Foreign keys explained
Check out our Manage Schema page for a definition of foreign keys.
Foreign keys are a key component to our Visual SQL. Without them, you won’t be able to pull data from multiple tables from the same data source in a single query. We use foreign keys to automatically determine how tables should be joined, enabling seamless blending of data across tables.
There are two ways to add foreign keys in Chartio:
To highlight the two methods, we’ll use an example of joining the Activity and User tables in the SaaS Company Demo Data data source.
Foreign keys in the Schema tab
Without setting up foreign keys, we’d need to create separate queries—one for the Activity table and another for the Users table—then join those queries together. In Chartio, setting up foreign keys enables you to use both these tables in a single query when using Visual Mode, auto-generating the join in the backend so you don’t have to do it manually. To accomplish this, we need to add a foreign key between the two tables to tell Chartio how to join them together. We’ll join the User ID column in the Users table to the User ID column in the Activity table.
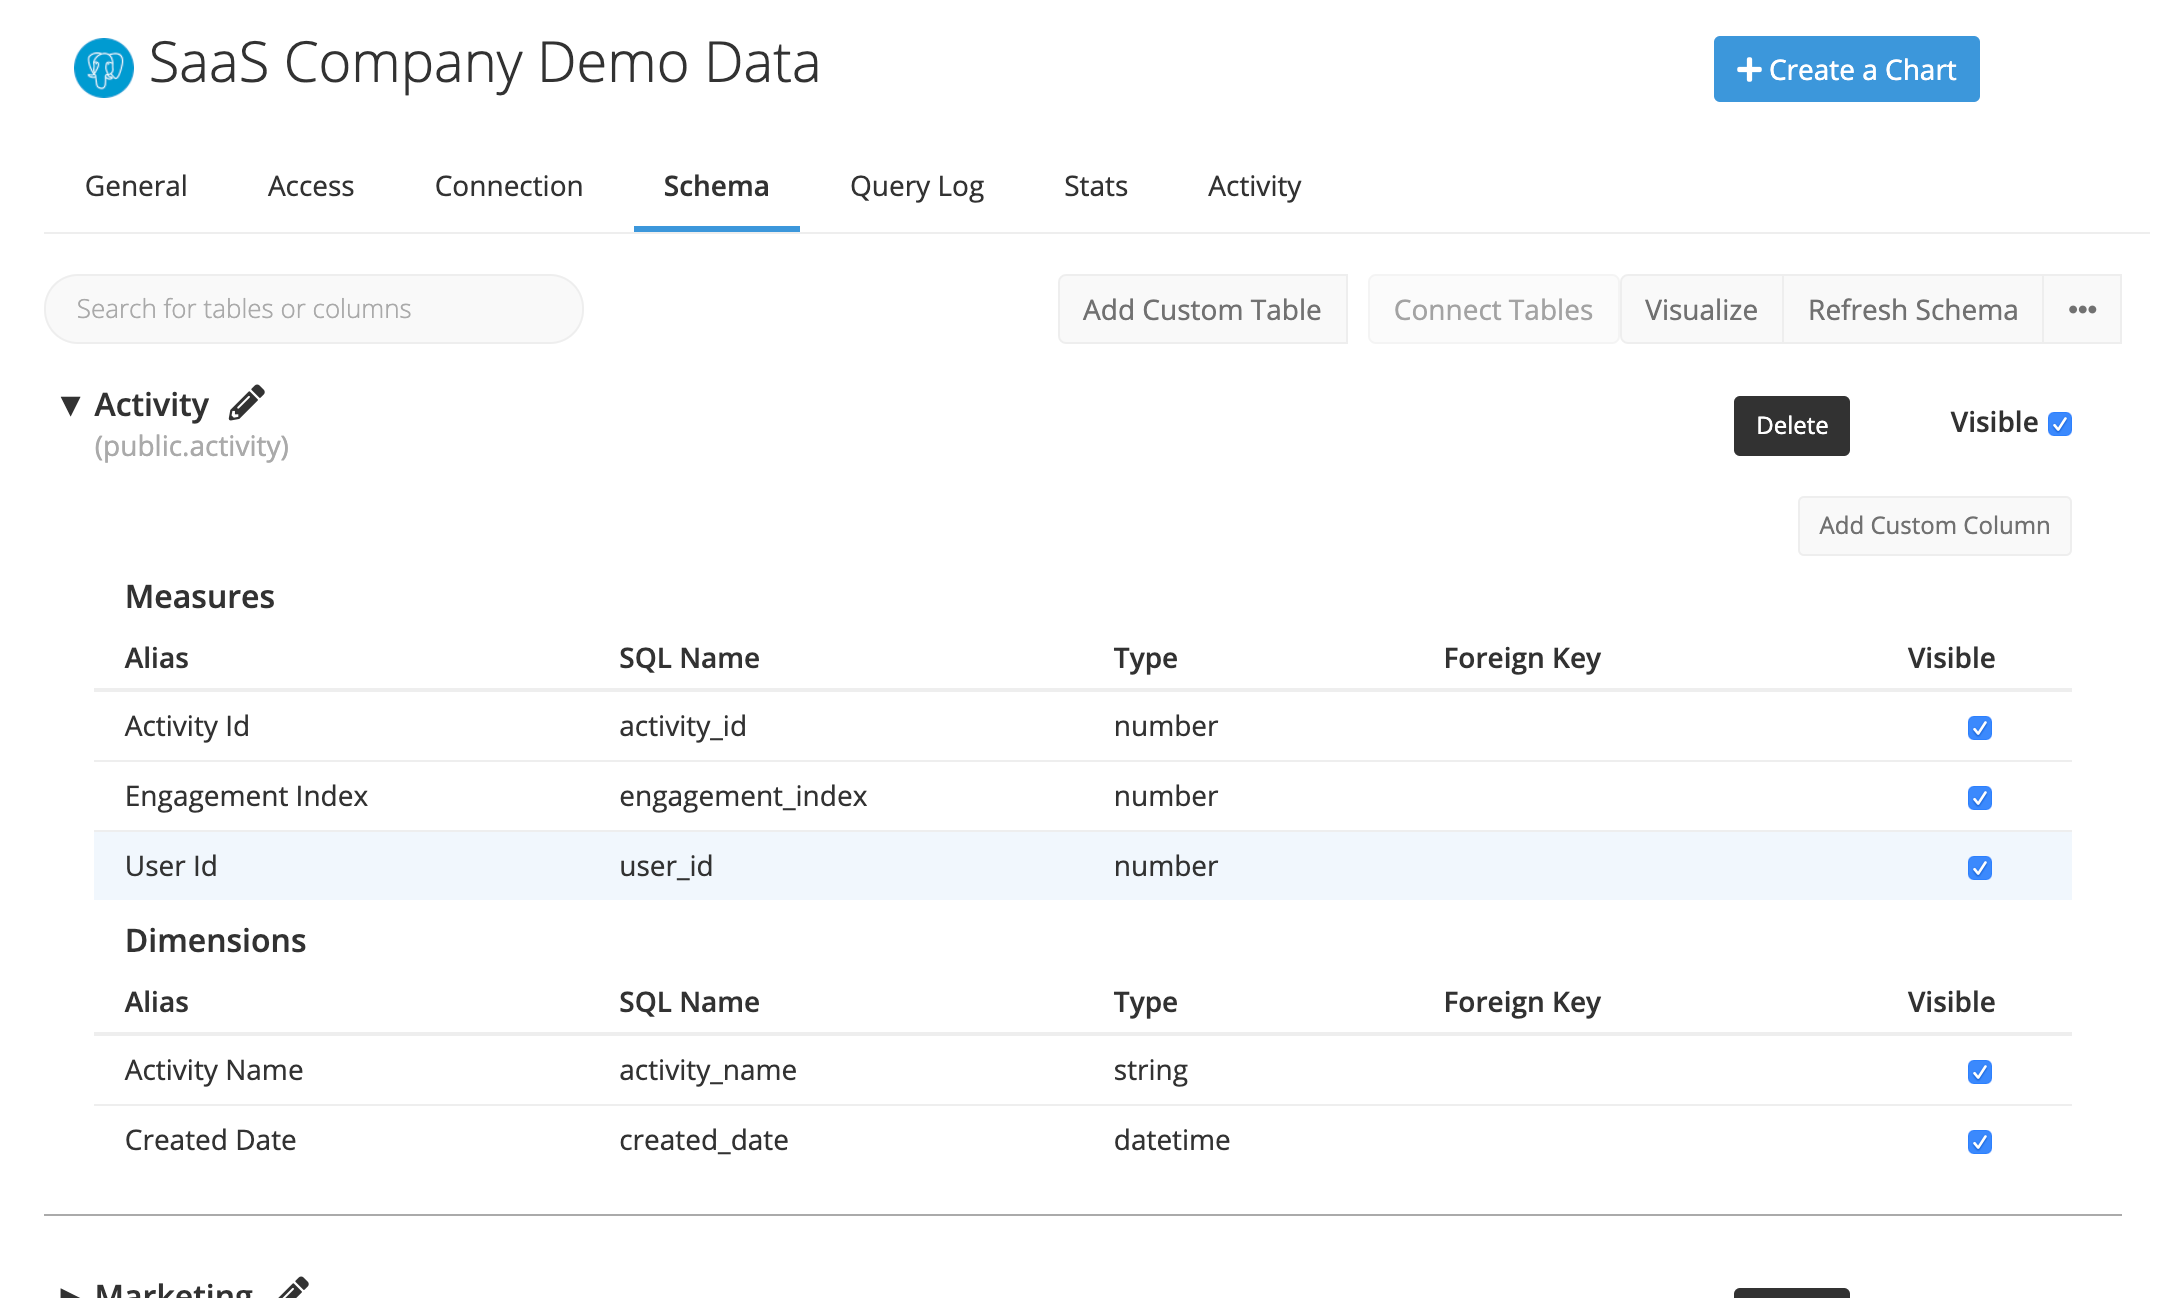
We’ll navigate to our data source’s Schema page by clicking Data from the top navigation bar, selecting our data source, then going to the Schema tab.
First, expand the Activity table to view all its columns then click the User ID column to edit it.

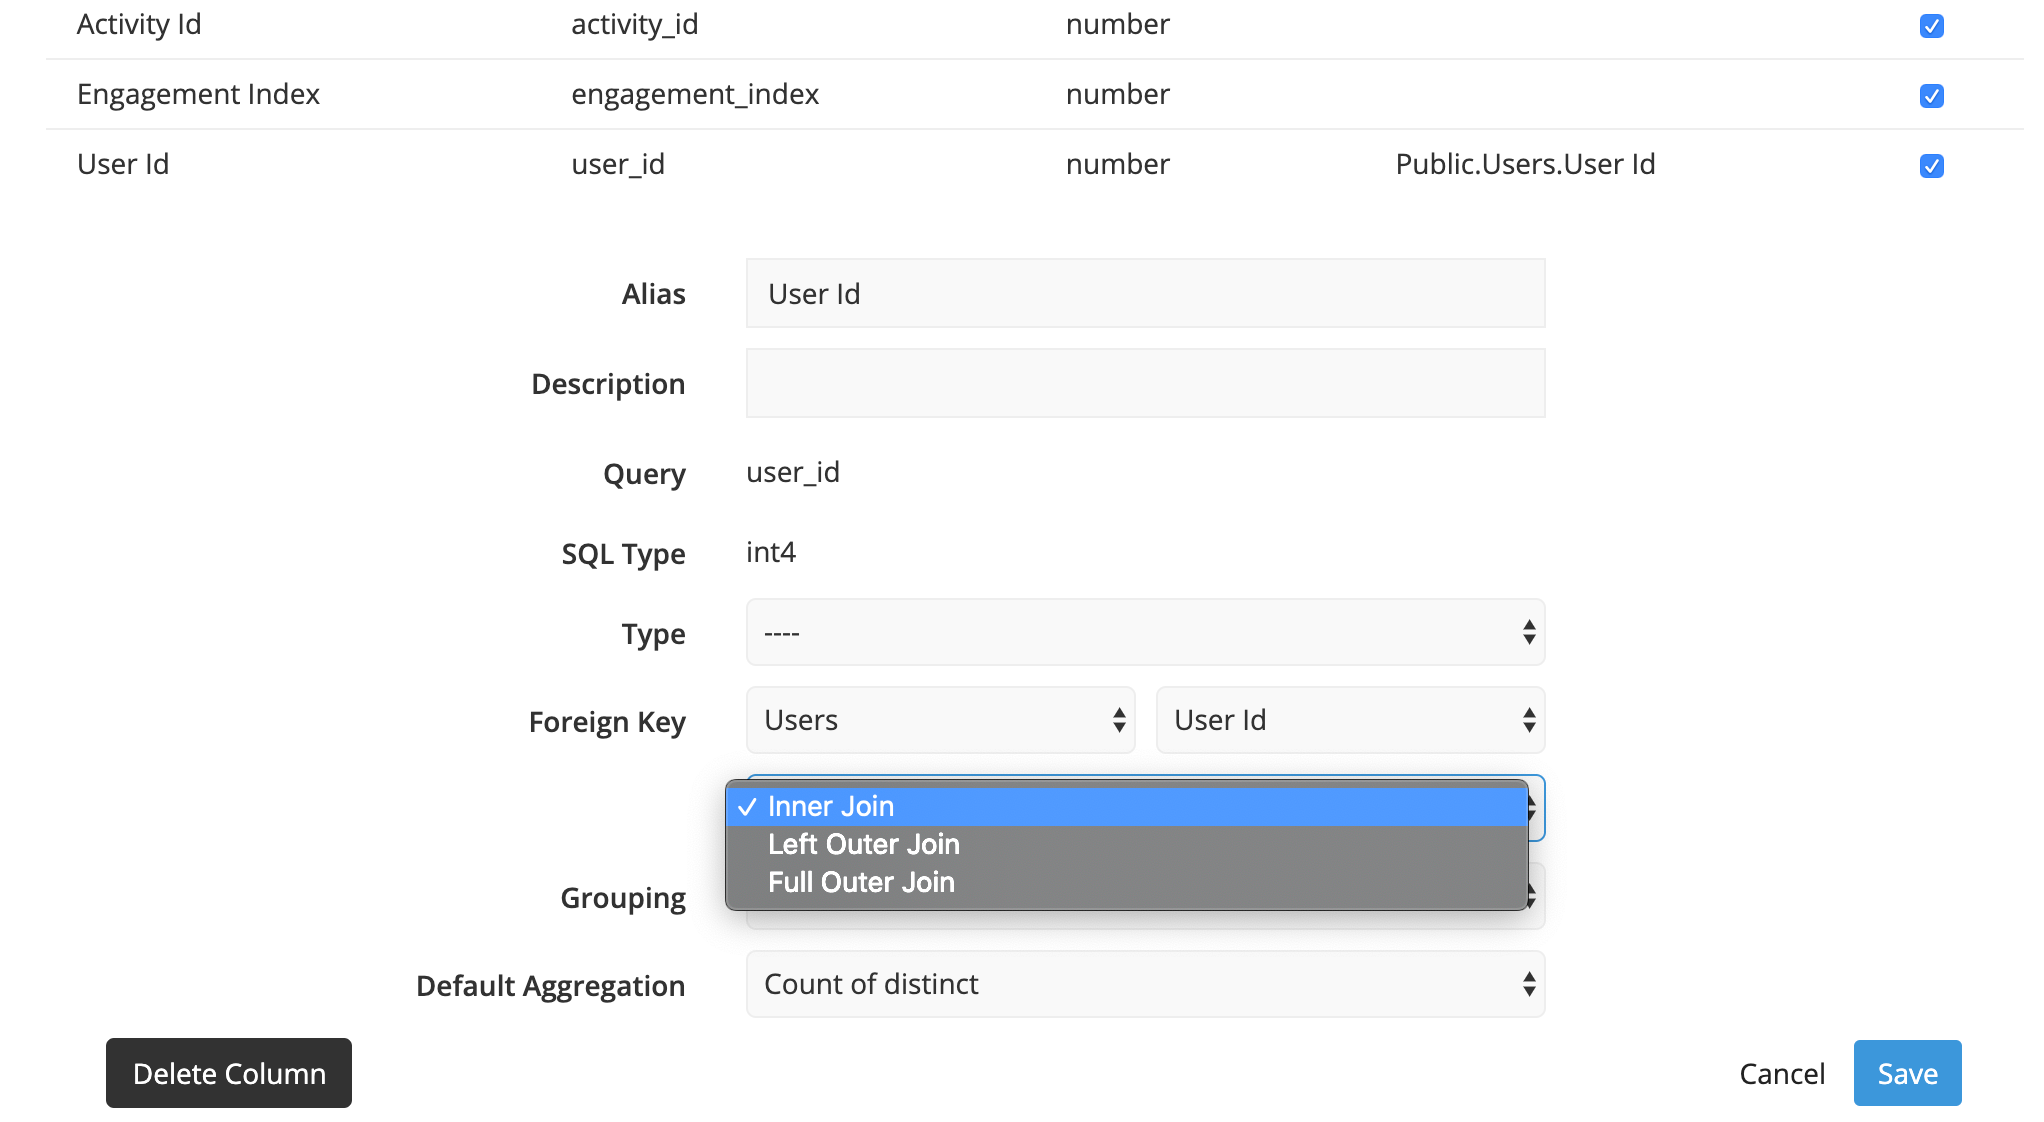
You’ll see a section labeled Foreign Key. From the first dropdown, we select the Users table then select User Id from the second dropdown. When finished, click Save to save your changes.
By default, the join relationship when creating foreign keys is set to Inner Join; however, you can change this at any time by selecting a different join type from the dropdown below the Table/Column dropdowns.

Chartio can now auto-generate join paths between these two tables from Visual Mode, using the User ID column to link them together.
Foreign keys in the chart editor
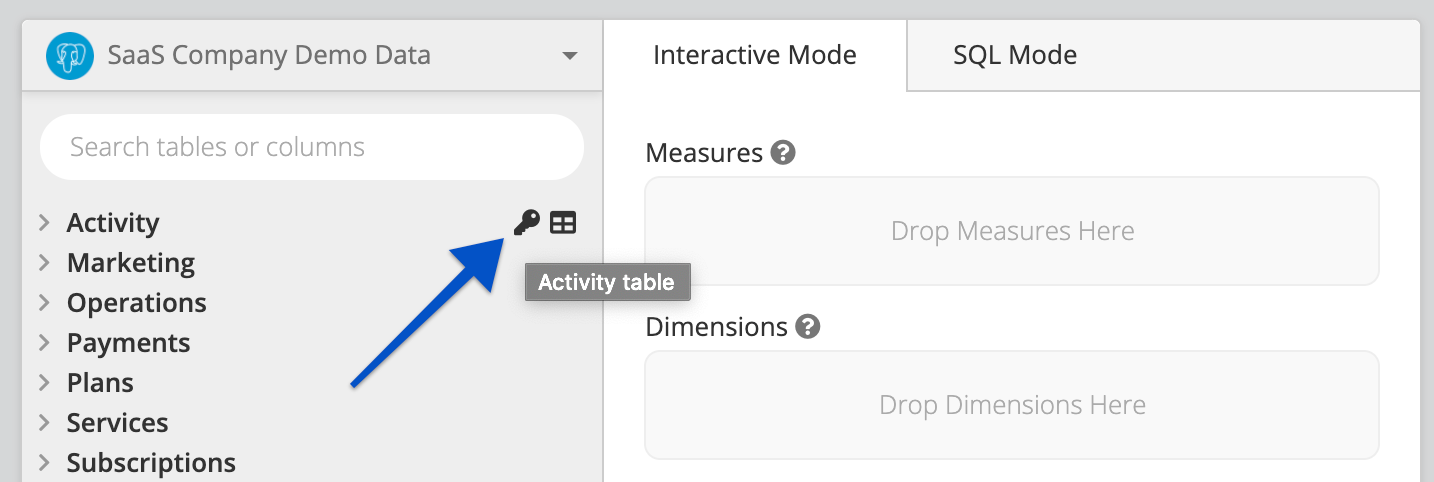
You can also add foreign keys directly in the chart editor by clicking the Key icon next to the Table name.

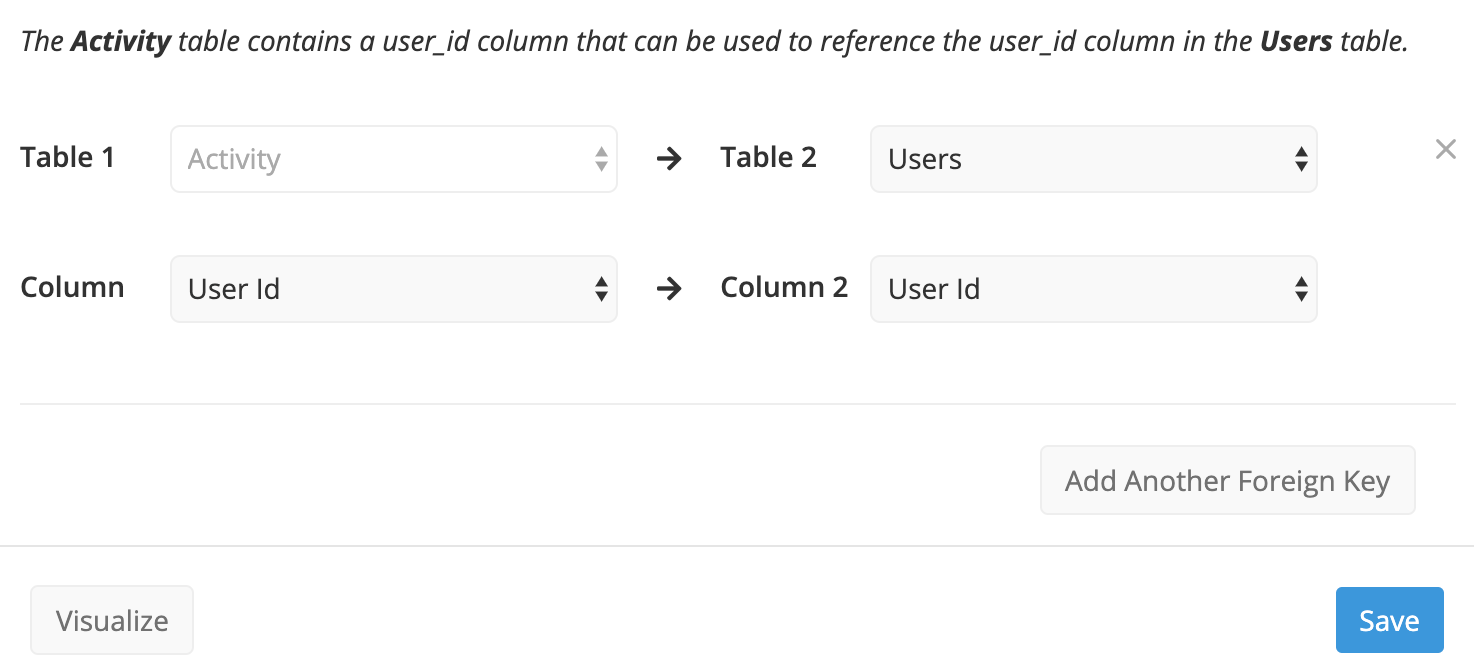
This brings up our foreign key wizard, which allows you to select the columns to connect.
For additional examples, view our Best Practices.