Chartio Best Practice: User and Team Management
Posted by on May 31, 2019 Best Practice, Chartio
User management in Chartio is one of those pesky housekeeping tasks that is often overlooked but could lead to headaches down the road. Put another way, user management when done right, is rarely noticed; when not properly managed, tends to lead to confusion, extra work and frustration all around. User management in Chartio becomes increasingly important as the number of users grows in your Chartio account.
Our Recommendations
1. Define permissions at a Team Level rather than at an Individual User level.
Teams are the basis of the permissions structure within Chartio. All users in your organization must belong to at least one team. You can define your teams however you like, but general practice is to create teams that reflect the way they will use Chartio. Generally, it’s easiest to group teams by department or permission level or both.
Permissions - Permissions in Chartio control the options that allow you to specify the access level to data sources and dashboards. The options are Administrator, Editor, or Viewer.
Permissions are customizable on a per-Team basis for each Data Source and Dashboard. Dashboard and Data Source permissions can also be granted on a per-user basis, but per-Team permissions are generally easier to manage for larger organizations.
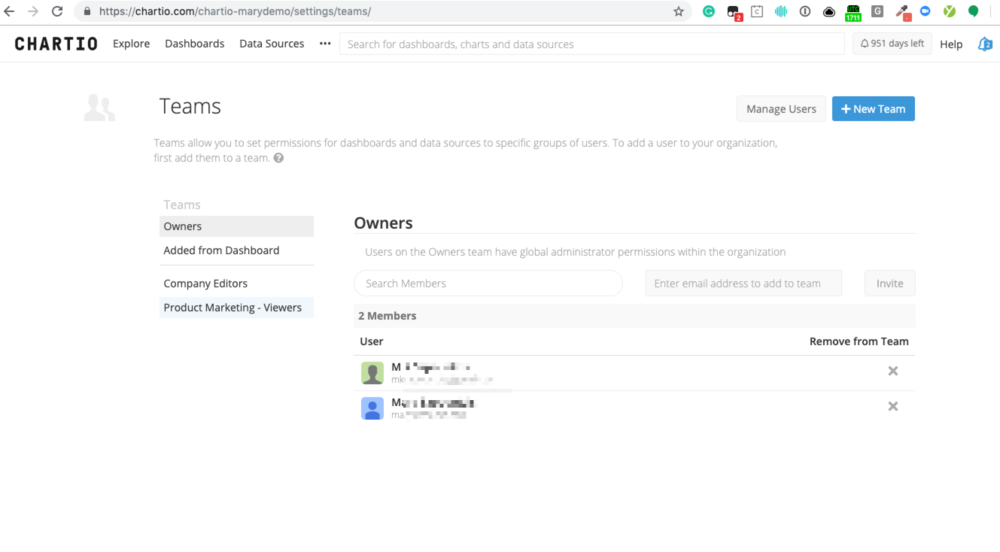
2. Restrict access to the Owners team to 2-5 users.
Each organization comes with one default team that cannot be removed: the Owners team. Anyone on the Owners team can grant themselves access to any dashboard or data source within the organization. There is no limit to the number of users that can belong to the Owners team, however, Chartio recommends only including users who should be responsible for the maintenance of the Chartio account. The Owners Team is included by default, and has global Administrator permissions for all account settings. Owners can grant themselves access to any data sources or dashboard within the organization.
Owners can view the full list of dashboards on the organization home page, by selecting Owner view in the sidebar. The full list of Data Sources is available by selecting Data Sources from the top navigation. As an Owner, you are auto-granted access to any dashboard when you visit it. You are also auto-granted access to a data source when you visit its settings page, or open a chart in the editor that uses a data source you don’t already have access to.
3. Define Primary Admins for every dashboard.
The Primary Admin is a designated admin on a dashboard or data source. The Primary Admin is considered the owner of the dashboard; access requests will be sent to the Primary Admin, and they should be the go-to contact with any questions about the dashboard or data source. The Primary Admin can be an individual user or a Team.
4. Frequently monitor the Added from Dashboard and Added from SAML teams and move users from these teams to their appropriate Teams.
Remove users from these temporary teams after reassignment.
The Added from Dashboard Team is a temporary access team for users who have been invited to join Chartio directly by a Dashboard Editor to view their dashboard. This team should be regularly monitored and any new users added to this team should be assigned to their proper Chartio teams and removed from the Added from Dashboard team.
The Added from SAML team is another team that is meant for temporary access. This team should be regularly monitored and any new users added to this team should be assigned to their proper Chartio teams and removed from the Added from SAML team.
User Management: Adding a new User
To see a complete listing of your users and their actions, including user behavior about last login, navigate to the Setting Tab on the Main Menu (…), and select Users.
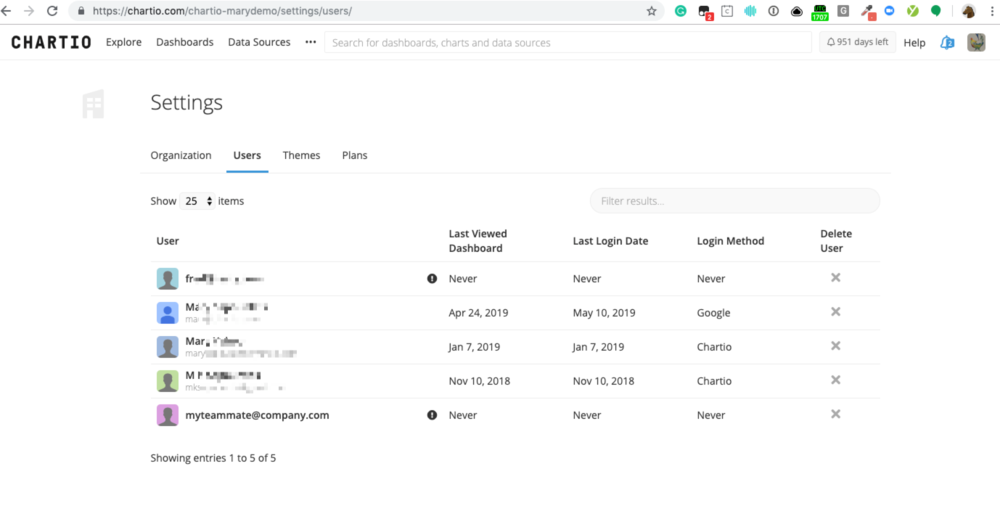
This user tab gives you a complete listing of users in your instance regardless of team membership. This portal is best used for searching for specific users, deleting users or quickly referencing access permission settings for a specific user.
In addition to the user tab, you can click into any team to view, invite or remove members from the team.
Creating new Teams, updating team membership
-
Select the Ellipsis (…) Tab from the main menu and then select ‘Teams’ from the drop down.
-
Navigate to a specific team by selecting in the Left side panel to open the team in the main window.
-
Click on the Team Name in the main window to expand the settings for this team or select [+ New Team] to create additional teams.
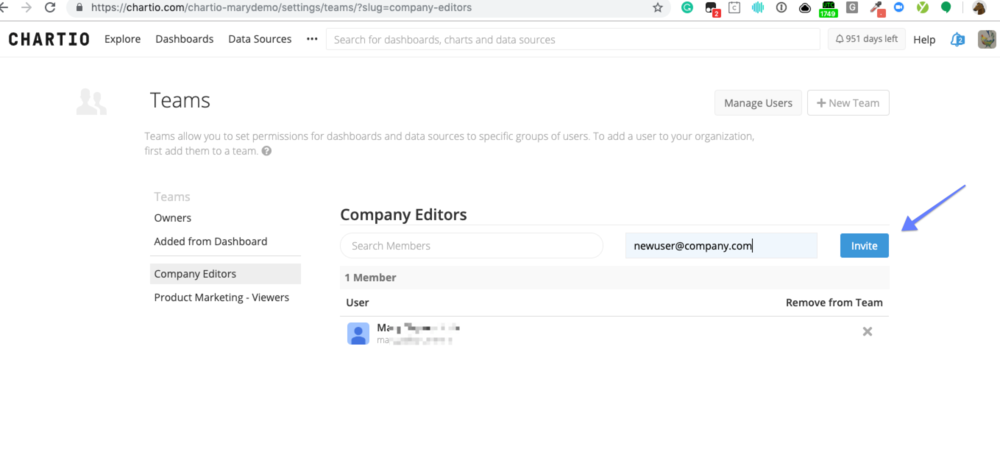
To add a user to a team in Chartio:
-
Navigate to a Team that you would like to invite the new user to join and enter their email address.
-
An invite will be sent to the user, asking them to log in and set up their account.
You will probably want to navigate to other teams you would like to add the user to and add them to these teams as well. Also, a new user can be added to Chartio by invitation to view a dashboard from a specific dashboard settings tab. These users are added to a temporary team titled ‘Added from Dashboard’.
What Chartio can do to help?
Chartio can help with bulk changes to teams. If you find yourself wanting to make a lot of changes to your users in Chartio, reach out to support@chartio.com for assistance. We are happy to work with you on these tasks.