Calendar
The Calendar Control allows you to filter your charts on a single date or date range.

Create a Calendar
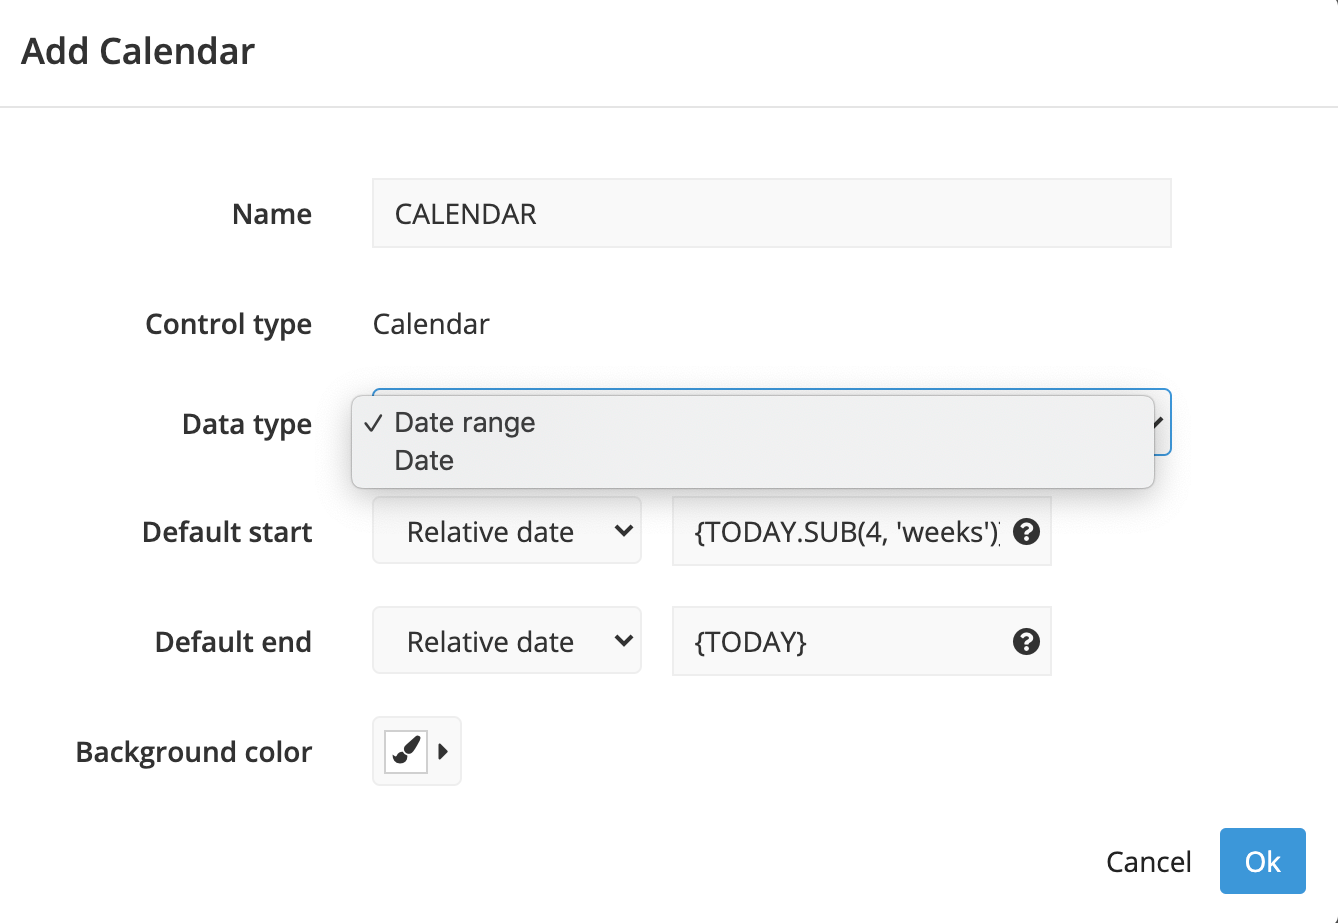
Click Add Control from the dashboard sidebar and select Calendar. A modal will pop up for you to choose your Calendar Control settings.
For Data type, choose whether you want to filter your charts on a single Date or a Date Range.
Edit the Default value(s) using a custom date, or a Relative Date as needed.

Connect a Calendar to a chart
In the Visual SQL interface
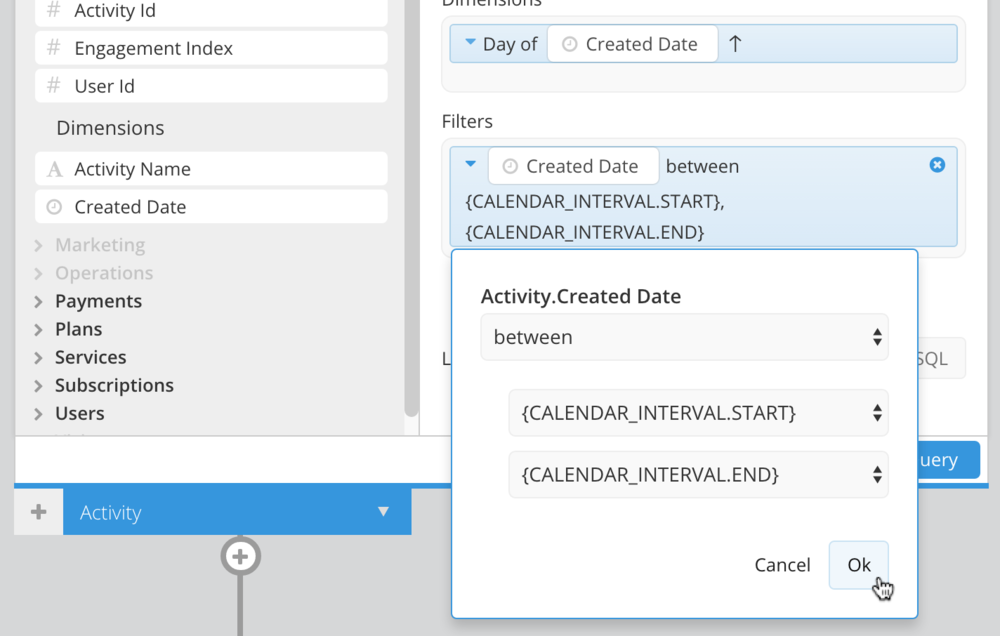
Find the chart you want to connect to your Calendar and open it in Visual SQL. Add the date column you want to filter by to the Filters section. Select your filter operator (you’ll probably want to use between or between and including), then type {CALENDAR_NAME.START} and {CALENDAR_NAME.END} for the start and end dates, respectively. Replace CALENDAR_NAME with your Control name.
Note: You’ll need to use the same .START and .END syntax when referencing Calendars in SQL Mode queries.
In the Data Explorer interface
Find the chart you want to connect to your Calendar and open it in the Data Explorer. Drag the date column you want to filter by to the Filters section. Choose your filter operator (you’ll probably want to use between or between and including) from the first dropdown, then select {CALENDAR_NAME.START} and {CALENDAR_NAME.END} from the second and third dropdowns.
Note: You’ll need to use the same .START and .END syntax when referencing Calendars in SQL Mode queries.
