Clone a Dataset
There are two ways of cloning a Dataset in your charts depending on the Mode you’re using, either Basic or Advanced Mode.
Basic Mode
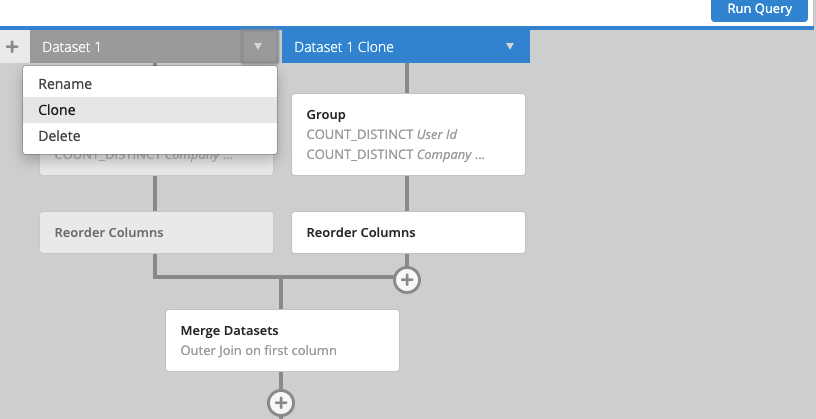
To clone a Dataset in Basic Mode, navigate to the bottom of the chart creator above the Data Pipeline. Click the down arrow button next to your dataset name and select Clone from the dropdown menu.
This is an example of what it looks like after a dataset has been cloned:

Note:
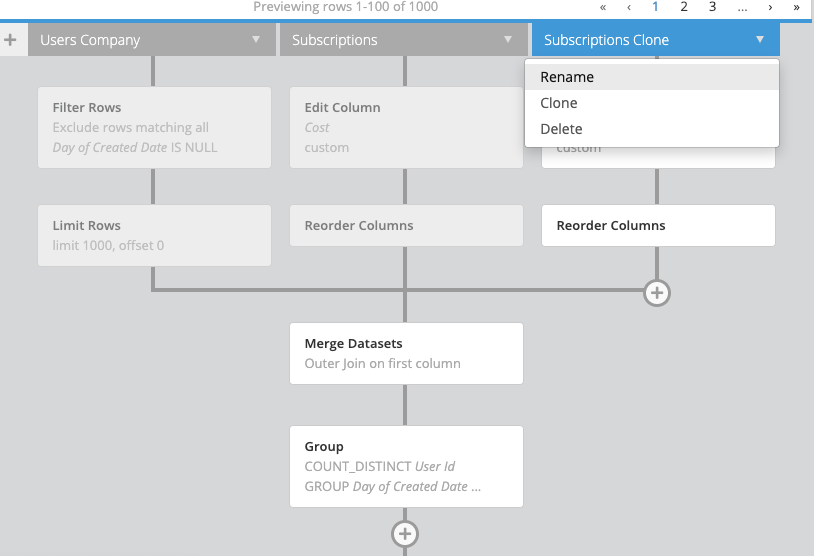
- The new, cloned dataset will be named {Previous Dataset Name} Clone. You can rename the dataset by also clicking the arrow next to the dataset name. From the menu, select Rename, type in the new Dataset name and click anywhere. Your changes will automatically be saved once you save the chart.
- Any pipeline steps associated with the original dataset will automatically be copied over to the clone. If you’d like to avoid copying over pipeline steps when cloning in Basic Mode, simply switch over to Advanced, clone your Dataset, connect it to a Merge step and switch back to Basic.
-
If you already have multiple datasets and pipeline steps applied after the merge step, the post-merge pipeline steps won’t be cloned, but will still apply to the joined datasets.

Advanced Mode
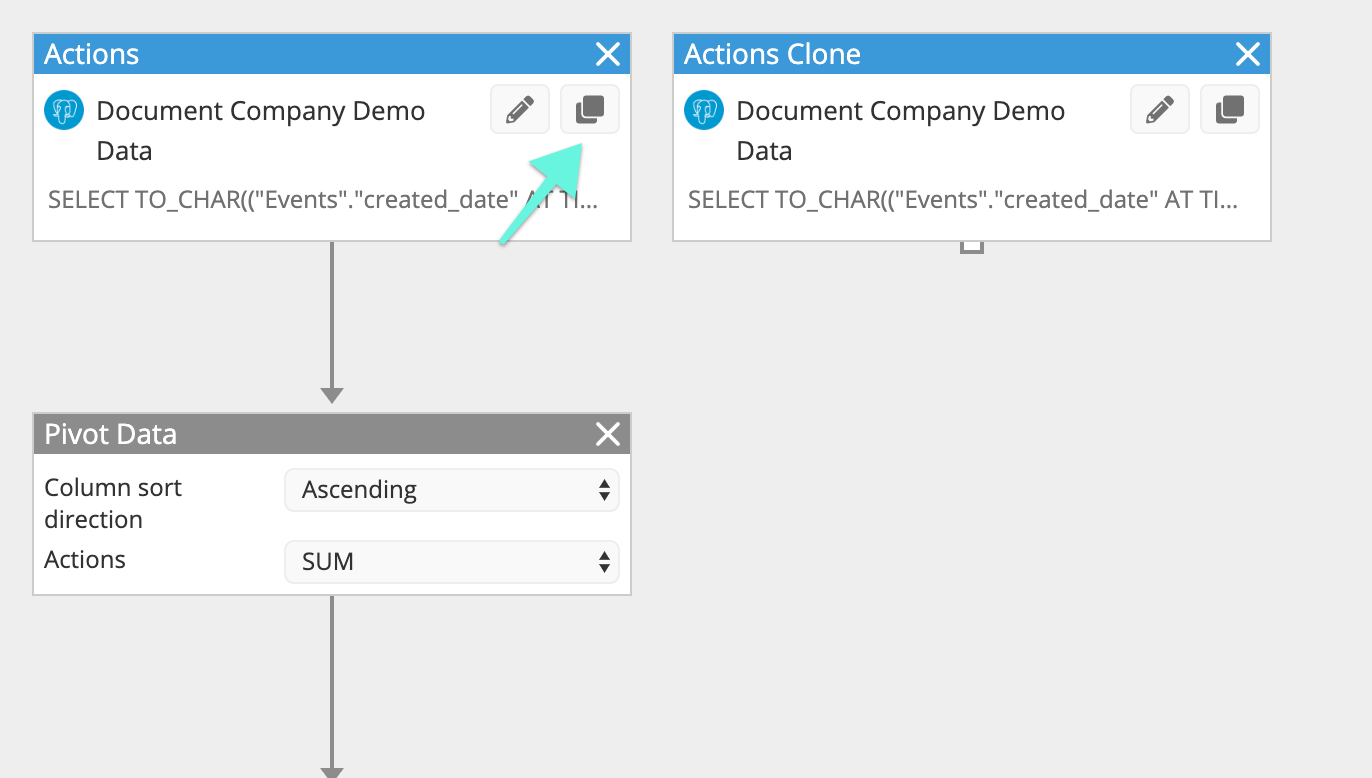
To clone a Dataset in Advanced, click on the square clone icon on the Database Query node. This will clone the Dataset and open the Dataset Interface where you can make any changes to the query and name.

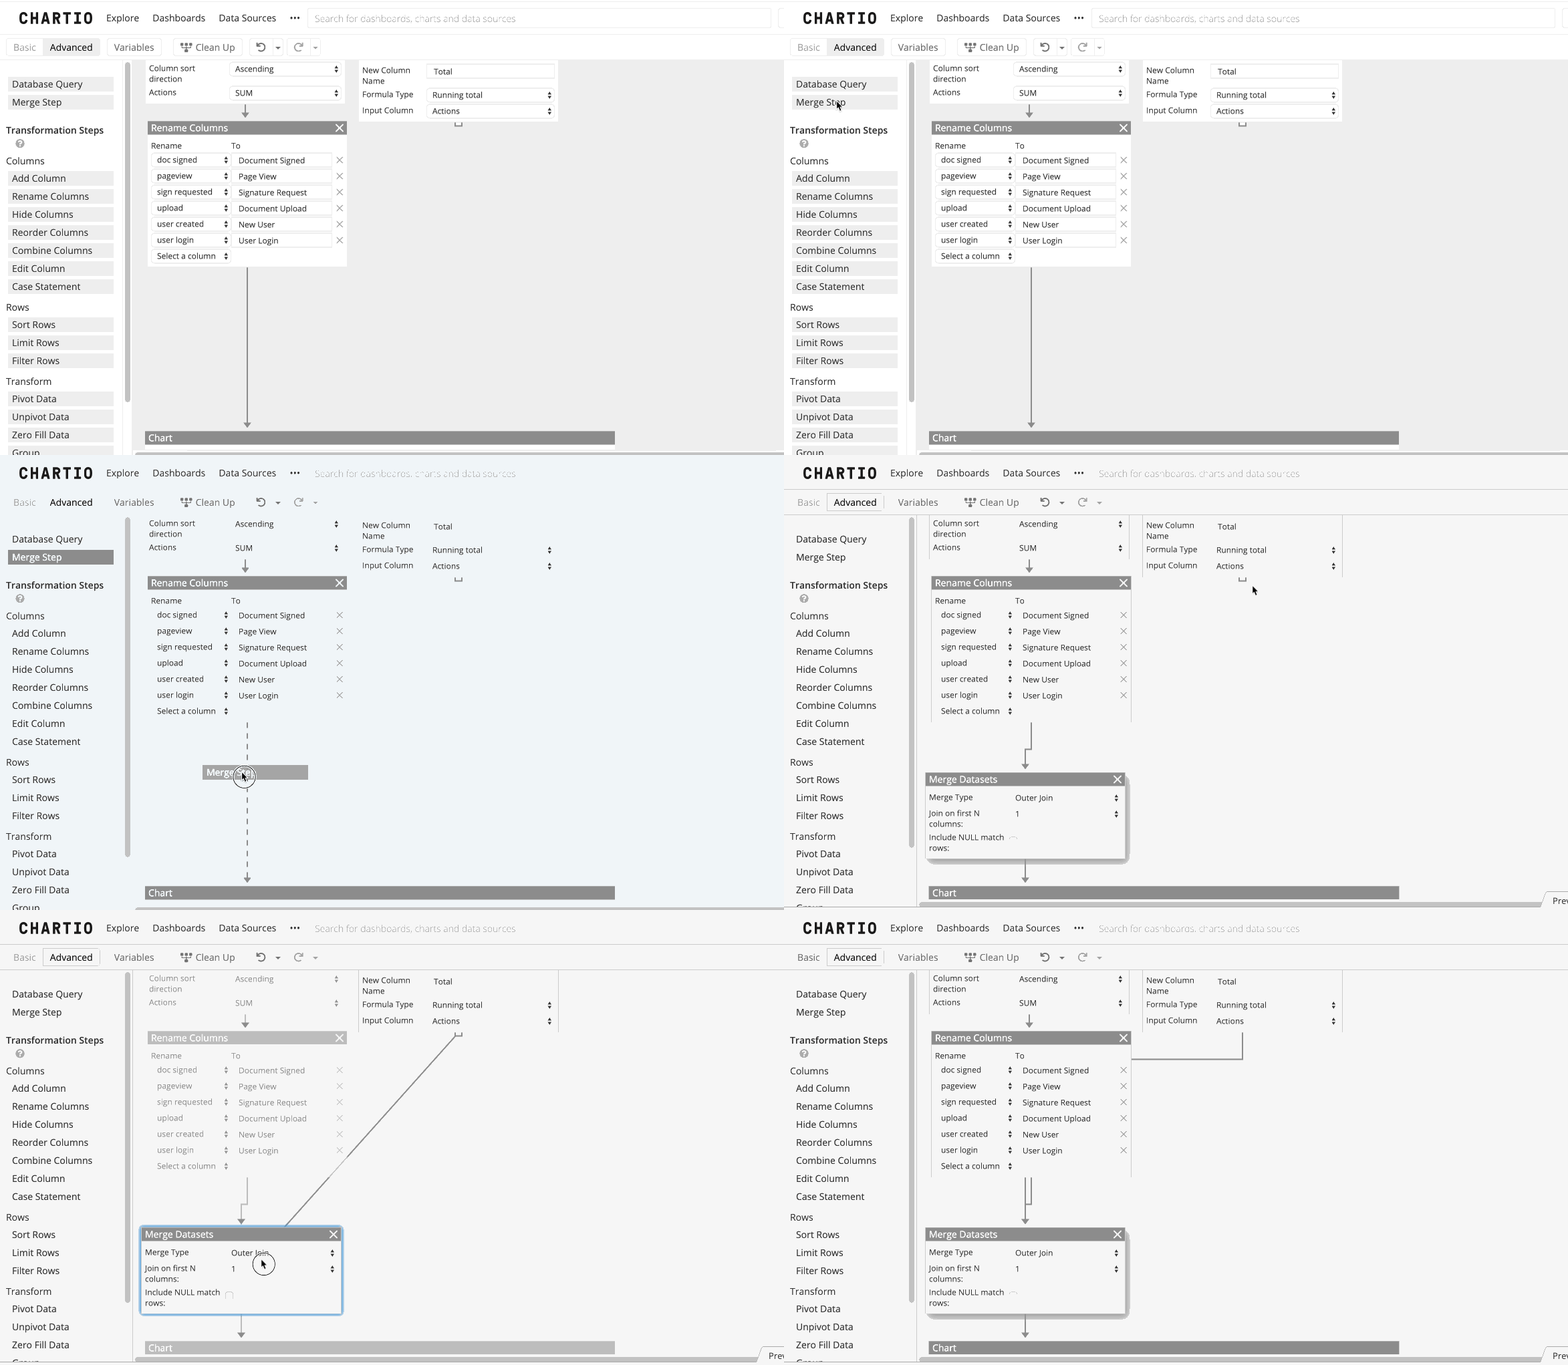
The clone will not yet be connected to the pipeline. To do this, add any additional Pipeline Steps needed. Then, add a Merge Step to your original Pipeline and join the new Dataset and Steps to the Merge Step.

Note:
- Your Pipeline Steps won’t automatically be copied over when cloning a Dataset in Advanced Mode.
- Remember to connect your new Dataset to your pipeline before saving.