Embedding in Salesforce
You can now embed your Chartio dashboards into Salesforce! Unlike the typical Embedding functionality, which doesn’t require viewers to have a Chartio license, embedding Chartio in Salesforce (SFDC) requires that each user viewing the dashboard in Salesforce has Chartio access. The Chartio dashboard is embedded as a parameterized iframe that you can add to your page layouts in Salesforce.
To get started, you’ll need:
- Chartio access
- Chartio Interactive Embedding enabled
- Salesforce Admin Account
Step 1 - Create your Chartio dashboard
In Chartio, create the dashboard you plan to embed. You’ll need to parameterize any Controls you intend to pass from Salesforce. For example, if you’d like to pass in Account.Id from Salesforce to filter your dashboard, you’ll need to create a Control that will accept that value.
In the example below, we used a Text Input Control named SFDC_ACCOUNT_ID that will accept a numeric value (Account.Id) from Salesforce. This value will be used to filter your charts and present only data specific to this account within Salesforce.

For an added level of interactivity, try including other Dashboard Controls to your embedded dashboard. Users will then be able to further filter the charts from Salesforce directly. You can also use the Current User Variable to customize the viewing experience of each user.
Note: Viewers must be logged into Chartio to any embedded dashboards; otherwise, they’ll receive the “Not Logged In” error message.
Step 2 - Create a new Visualforce Page in Salesforce
In Salesforce Classic
-
In Salesforce, click Setup near the top-right of the page.

-
For convenience, use the Quick Find to search for
Visualforce Pagesthen click Visualforce Pages from the filtered sidebar results. Alternatively, you could click Build > Develop > Visualforce Pages from the sidebar.
-
Click New above the table.

-
Give your new Visualforce Page a Label, Name, and Description.
Note: The Name can contain only underscores and alphanumeric characters. It must begin with a letter and must be unique. It cannot include spaces, end with an underscore, or contain two consecutive underscores.
- To make this page available in both Classic and Lightning, click the checkbox for Available for Lightning Experience, Lightning Communities, and the mobile app.
-
Replace all the contents of the Visual Markup section with the example text, keeping the formatting below and replacing
Account(the page/object you’re editing),your-org-slug,your-dashboard-slugwith the appropriate values:a. Format if you’re including Dashboard Controls (Note the required
/d/in thesrcURL):<apex:page standardController="Account"> <apex:iframe src= "https://chartio.com/d/<your-org-slug>/<your-dashboard-slug>/?embed=1&SFDC_ACCOUNT_ID={!Account.Id}" width="100%" height="2000px" id="account_app_usage" scrolling="true"/> </apex:page>Include any Salesforce variables or Dashboard Controls after
?embed=1in thesrcURL to filter the query, where each variable or Control is separated by an&. In this example,SFDC_ACCOUNT_ID = {!Account.Id}maps the Account.Id value from Salesforce to our Chartio Dashboard Control SFDC_ACCOUNT_ID.b. Format if you’re not including Dashboard Controls (Note the required
/d/in thesrcURL):<apex:page standardController="Account"> <apex:iframe src= "https://chartio.com/d/<your-org-slug>/<your-dashboard-slug>/?embed=1" width="100%" height="2000px" id="account_app_usage" scrolling="true"/> </apex:page>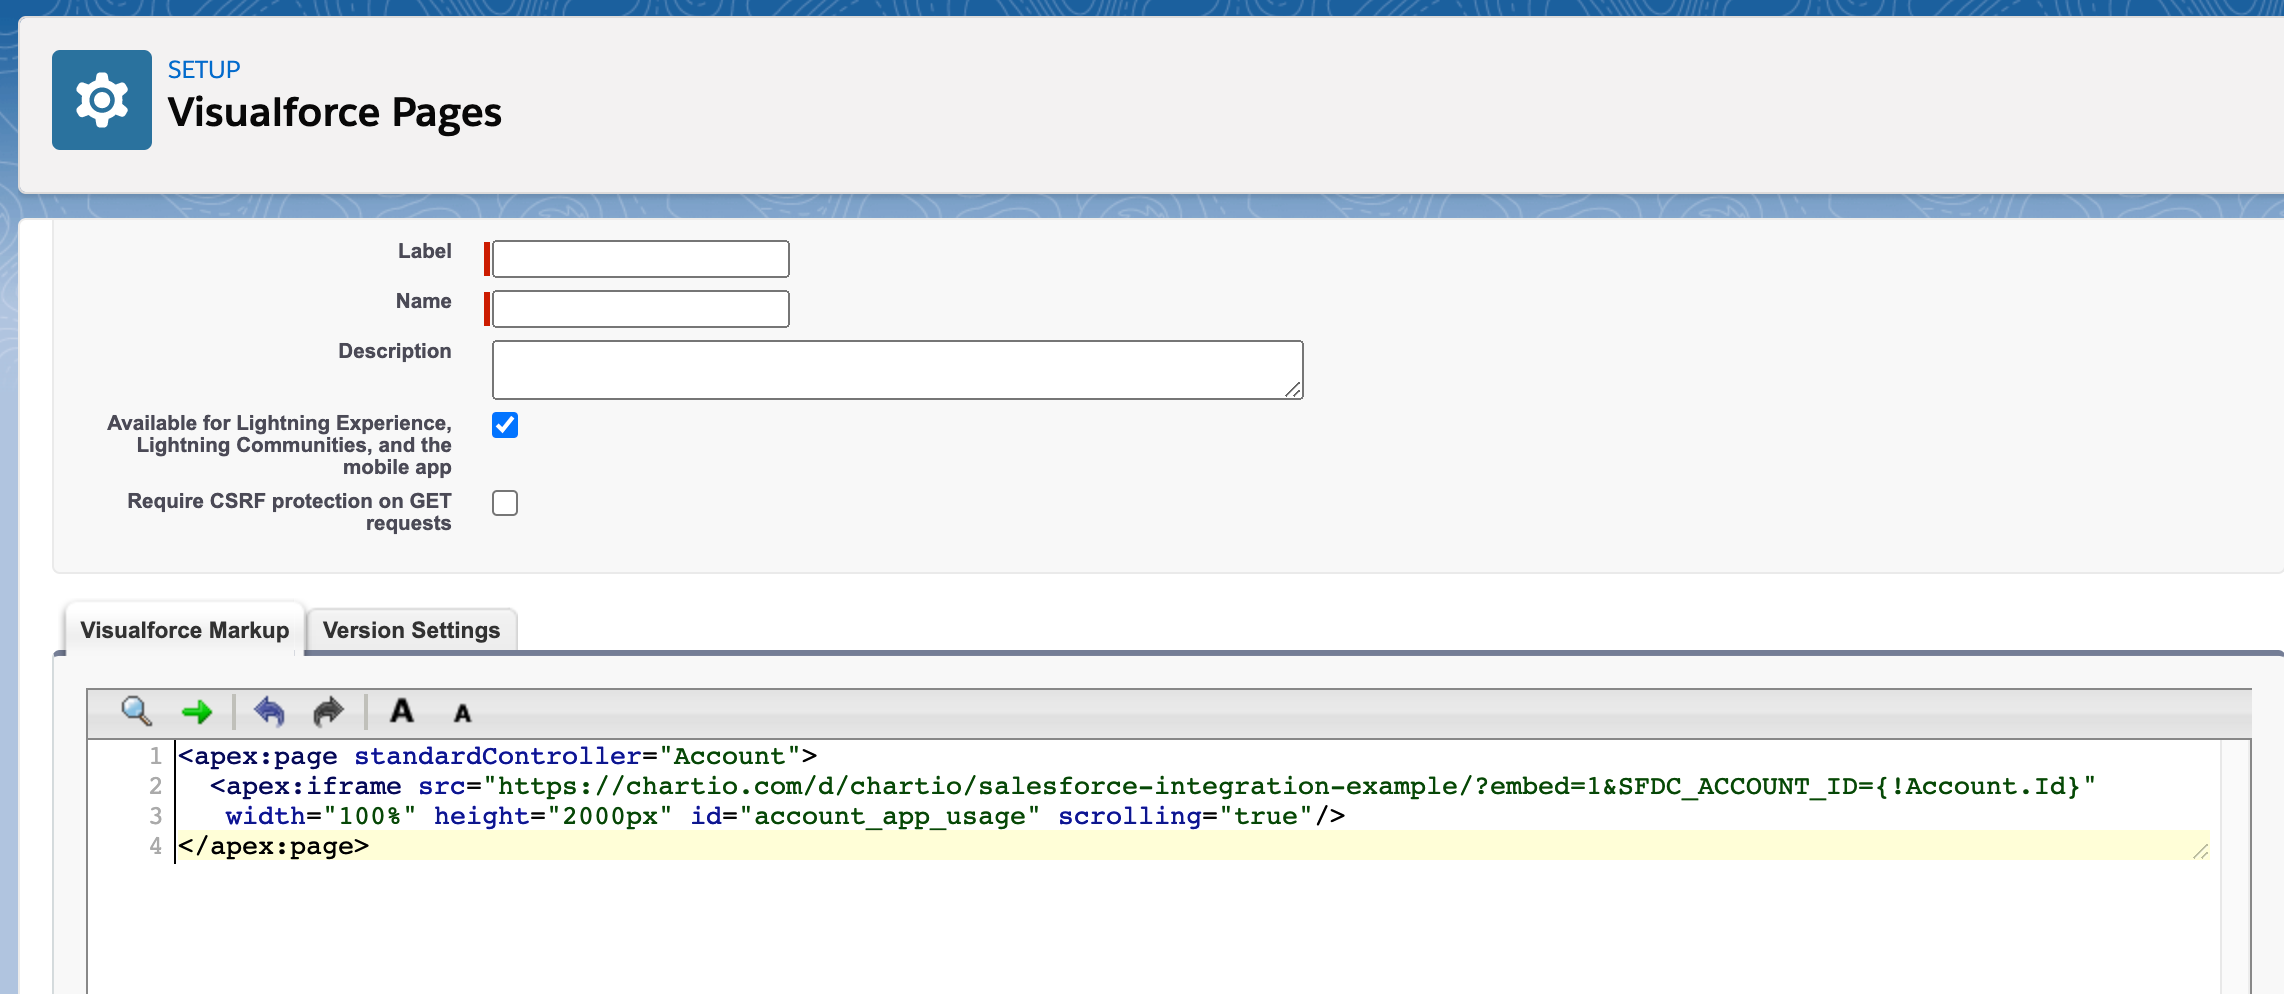
- Click Save at the top of the page to save your new Visualforce Page.
-
Use the Preview button to see what your Visualforce Page will look like within another page in Salesforce and adjust width and other attributes as needed.

- Continue to the next section: Add your new Visualforce Page to a Salesforce Page
In Salesforce Lightning
-
In Salesforce, click the Gear icon > Setup near the top-right of the page.

-
For convenience, use the Quick Find to search for
Visualforce Pagesthen click Visualforce Pages from the filtered sidebar results. Alternatively, you could click Platform Tools > Custom Code > Visualforce Pages from the sidebar.
-
Click New above the table.
-
Give your new Visualforce Page a Label, Name, and Description.
Note: The Name can contain only underscores and alphanumeric characters. It must begin with a letter and must be unique. It cannot include spaces, end with an underscore, or contain two consecutive underscores.
- To make this page available in both Classic and Lightning, click the checkbox for Available for Lightning Experience, Lightning Communities, and the mobile app.
-
Replace all the contents of the Visual Markup section with the example text, keeping the formatting below and replacing
Account(the page/object you’re editing),your-org-slug,your-dashboard-slugwith the appropriate values:a. Format if you’re including Dashboard Controls (Note the required
/d/in thesrcURL):<apex:page standardController="Account"> <apex:iframe src= "https://chartio.com/d/<your-org-slug>/<your-dashboard-slug>/?embed=1&SFDC_ACCOUNT_ID={!Account.Id}" width="100%" height="2000px" id="account_app_usage" scrolling="true"/> </apex:page>Include any Salesforce variables or Dashboard Controls after
?embed=1in thesrcURL to filter the query, where each variable or Control is separated by an&. In this example,SFDC_ACCOUNT_ID = {!Account.Id}maps the Account.Id value from Salesforce to our Chartio Dashboard Control SFDC_ACCOUNT_ID.b. Format if you’re not including Dashboard Controls (Note the required
/d/in thesrcURL):<apex:page standardController="Account"> <apex:iframe src= "https://chartio.com/d/<your-org-slug>/<your-dashboard-slug>/?embed=1" width="100%" height="2000px" id="account_app_usage" scrolling="true"/> </apex:page> - Click Save at the top of the page to save your new Visualforce Page.
-
Use the Preview button to see what your Visualforce Page will look like within another page in Salesforce and adjust width and other attributes as needed.
Step 3 - Add your new Visualforce Page to a Salesforce page
In Salesforce Classic
-
Go back to the Setup page then find the Salesforce object where you’d like to embed your Visualforce Page and edit its Page Layout.
a. Build > Customize > Pick Salesforce object you want to embed within > Page Layouts
b. Click Edit to the left of the object you want to edit.
-
In the Layout page, you’ll see the different elements you can add to your page in the top section. Scroll down to Visualforce Pages and click on it. You’ll then see your Visualforce Page in the available options.
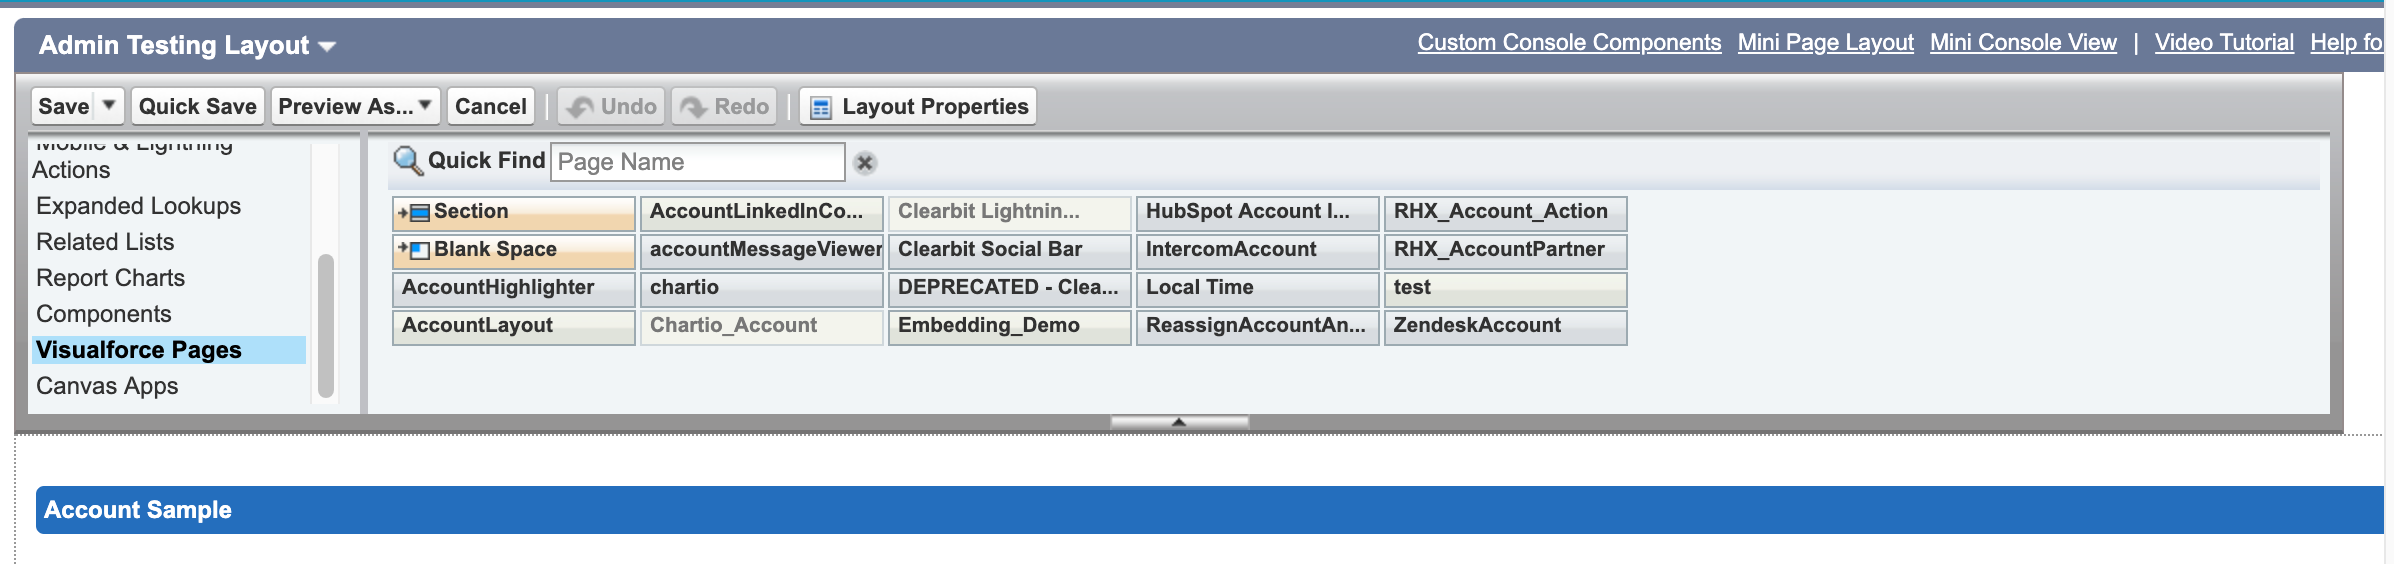
- You can then select the Visualforce Page you created in Step 2 then drag and drop it to where you want your Chartio dashboard embedded within your page.
- Before saving, you can preview what the page will look like for different users by clicking the Preview as… button at the top of the page.
- If everything looks good, click Save.
Now, your Chartio dashboard is embedded in Salesforce!
For additional help on adding a Visualforce Page to an object page in Lightning, see Salesforce’s documentation.
In Salesforce Lightning
-
Click on Object Manager towards the top of your Visualforce page.
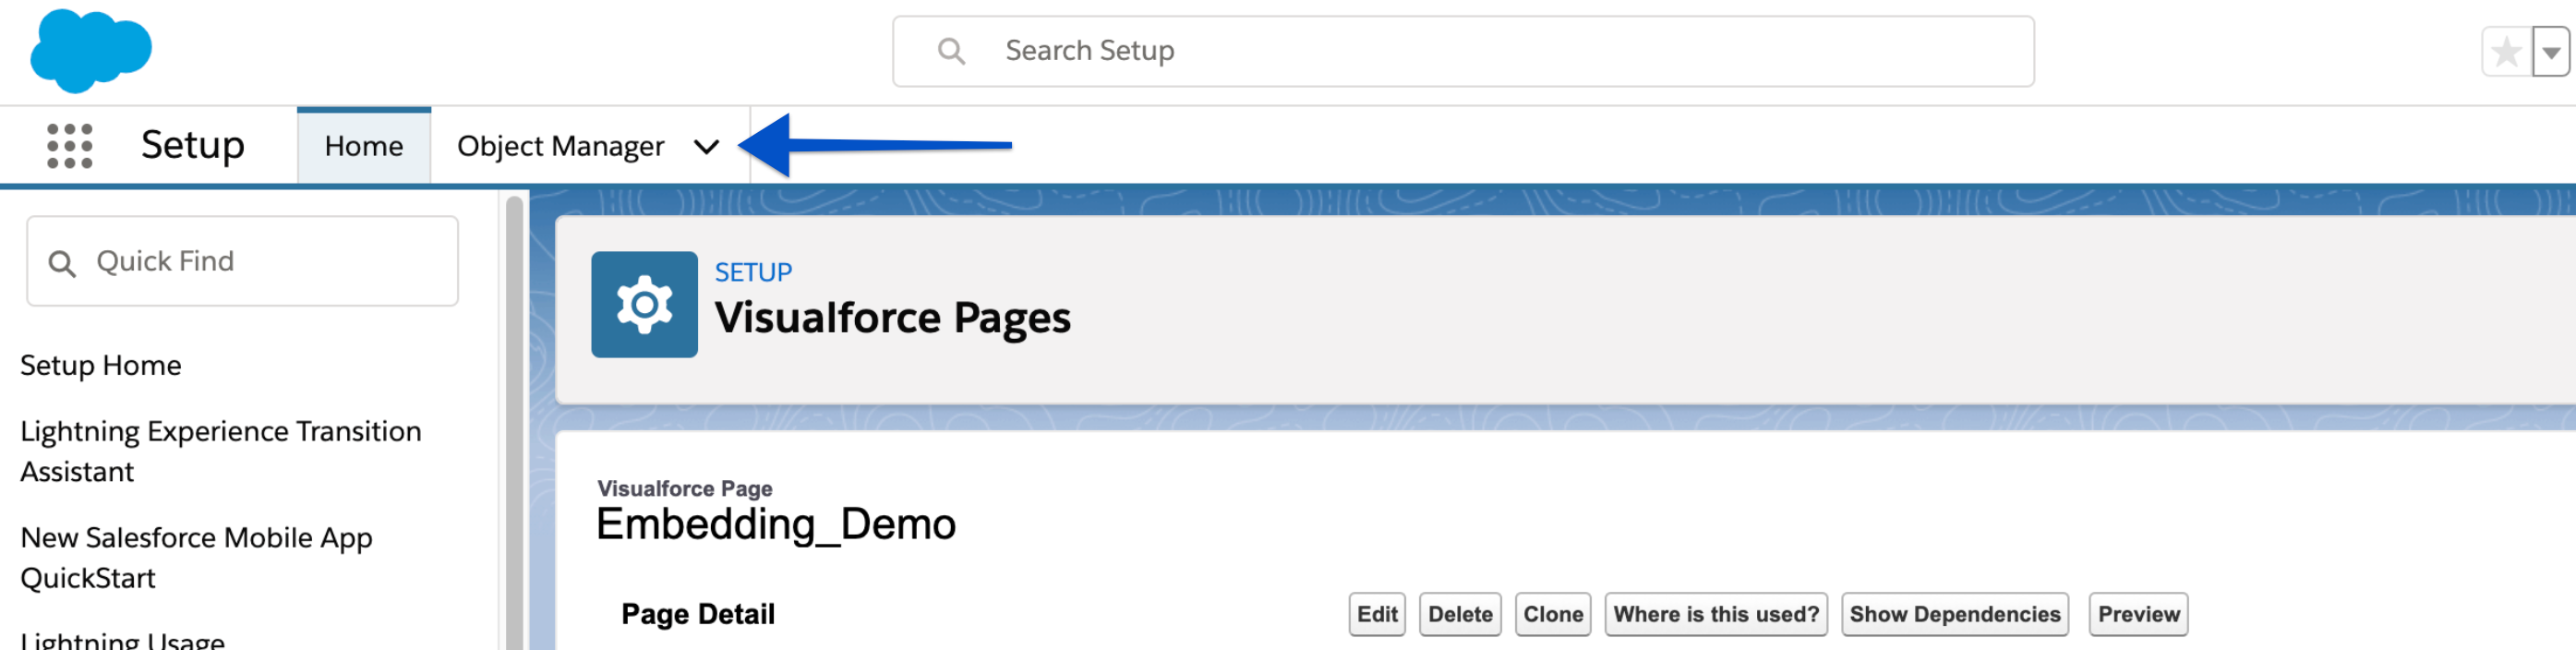
- Click on the name of the object where you want to embed your Visualforce page.
-
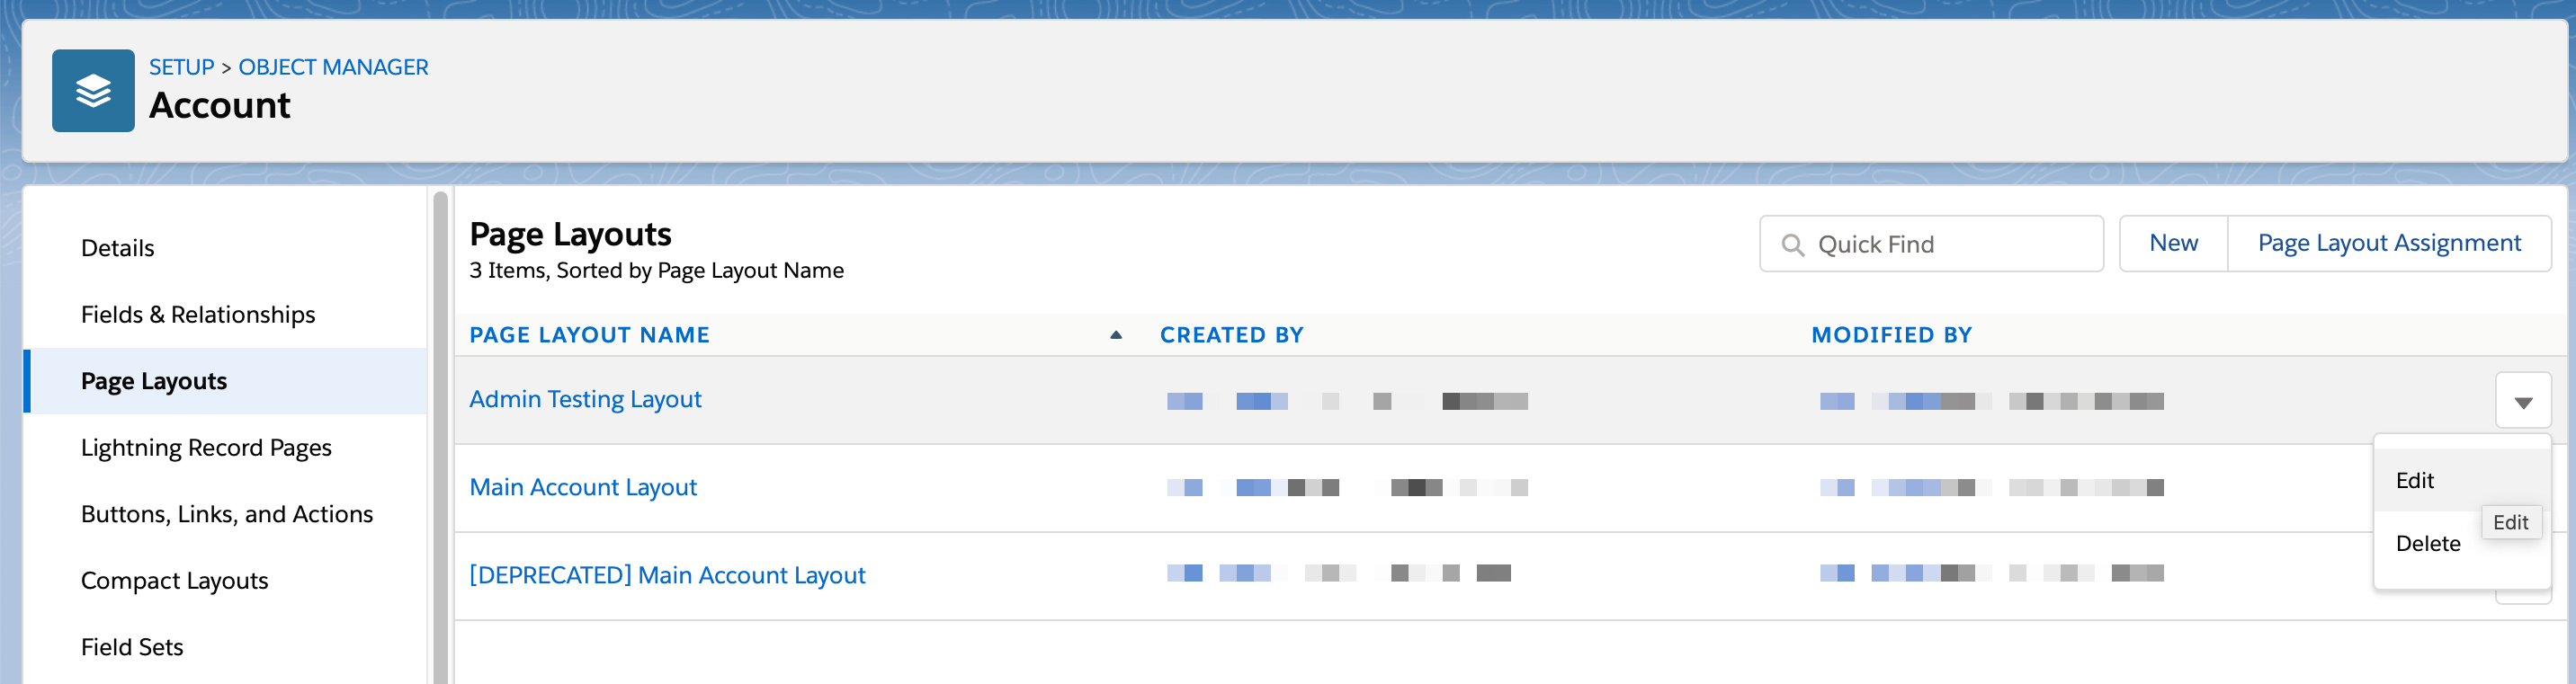
On the left-side menu, click Page Layouts, find the page to edit, then select Edit from the dropdown on the right-hand side.
-
In the Layout page, you’ll see the different elements you can add to your page in the top section. Scroll down to Visualforce Pages and click on it. You’ll then see your Visualforce Page in the available options.
- You can then select the Visualforce Page you created in Step 2 then drag and drop it to where you want your Chartio dashboard embedded within your page.
- Before saving, you can preview what the page will look like for different users by clicking the Preview as… button at the top of the page.
- If everything looks good, click Save.
Now, your Chartio dashboard is embedded in Salesforce!
For additional help on adding a Visualforce Page to an object page in Lightning, see Salesforce’s documentation.
Troubleshooting
Not Logged In message
SFDC users will need to be logged into Chartio for the embedded dashboard to appear. If they are not logged in, they will get a message directing them to the Chartio login page as seen below:

Upon seeing this message, the user can click on Open Login Page to open Chartio in a separate tab and enter their username and password. Once they’re logged into Chartio, they can simply reload this page and the embedded dashboard will appear on the selected page.
Chartio refused to connect
If you encounter the “chartio.com refused to connect” error message, you may need to double-check the src URL in your Visual Markup (see Step 6) and ensure you’ve included the required /d/ in the URL.