Join data across tables
Chartio automatically detects Foreign Key relations between your tables when it imports your schema for MySQL and PostgreSQL data sources. This will enable you to join columns from different tables in a data source within the same dataset.
If there are no Foreign Keys in your Chartio schema—either because Chartio is unable to access them or they don’t exist—you can specify the joins in the schema editor for your data source.
Set up Foreign Keys
Connect tables
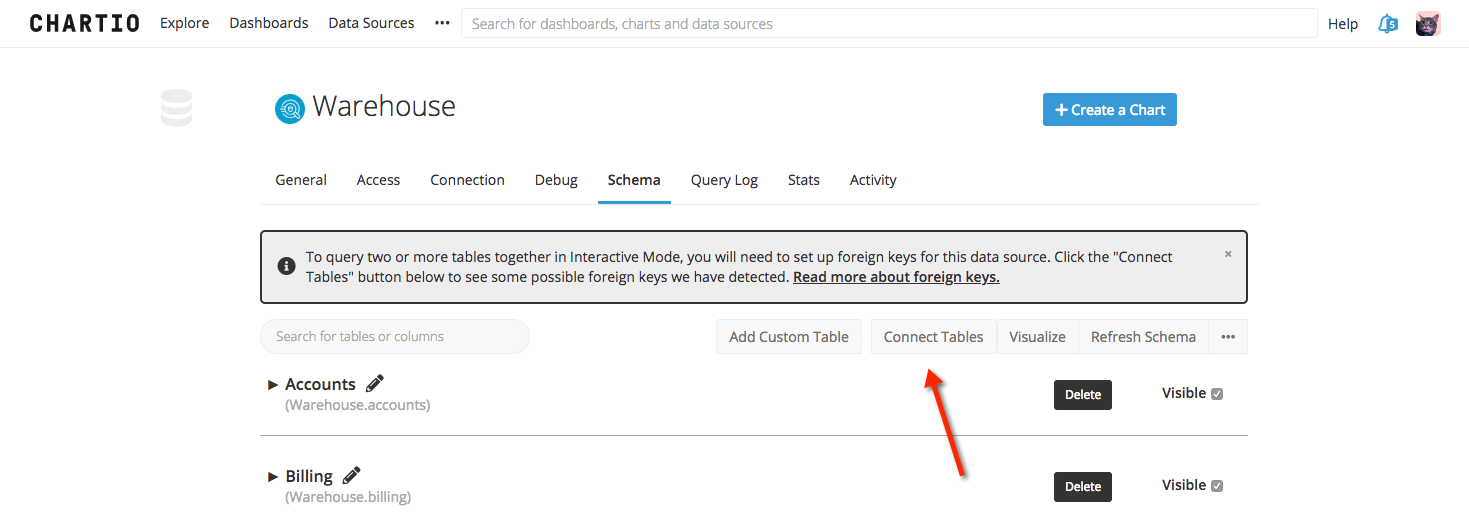
If no Foreign Keys are set up in your Schema, Chartio will suggest possible foreign keys for you using the Connect Tables feature. You can review and approve the Foreign key selections before they’re added to your Chartio schema. Note: Foreign Keys are only added to Chartio’s metadata, we don’t make any changes to the database itself.

Manually add Foreign Keys
If no Foreign Keys are detected or if you want to change existing ones, you can edit them manually in the Schema.
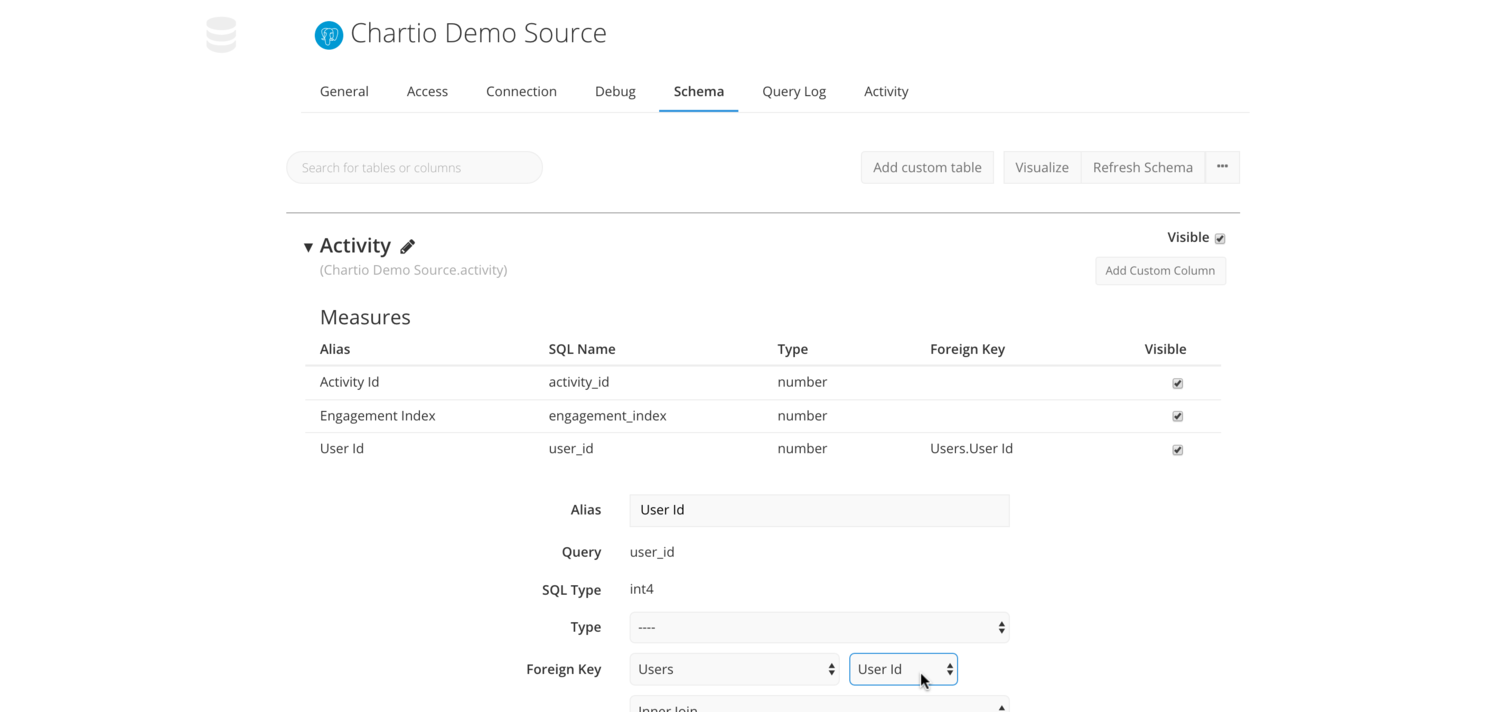
In the example below, we’ll click Activity to expand the Activity table. Then, we’ll click User Id to open the User Id column’s settings. In the Foreign Key dropdown, we’ll select the Users table, then select the Id column. This will create a join between our Activity and Users tables.
If you’re modifying Foreign Keys, make sure to remove the old Foreign Key using the same steps as above.

Note: Changing Foreign Keys in your schema will affect charts using this data source. We suggest setting up your Foreign Keys as soon as you add a new data source.
Read more about manually setting up Foreign Keys.
Adjusting the join path
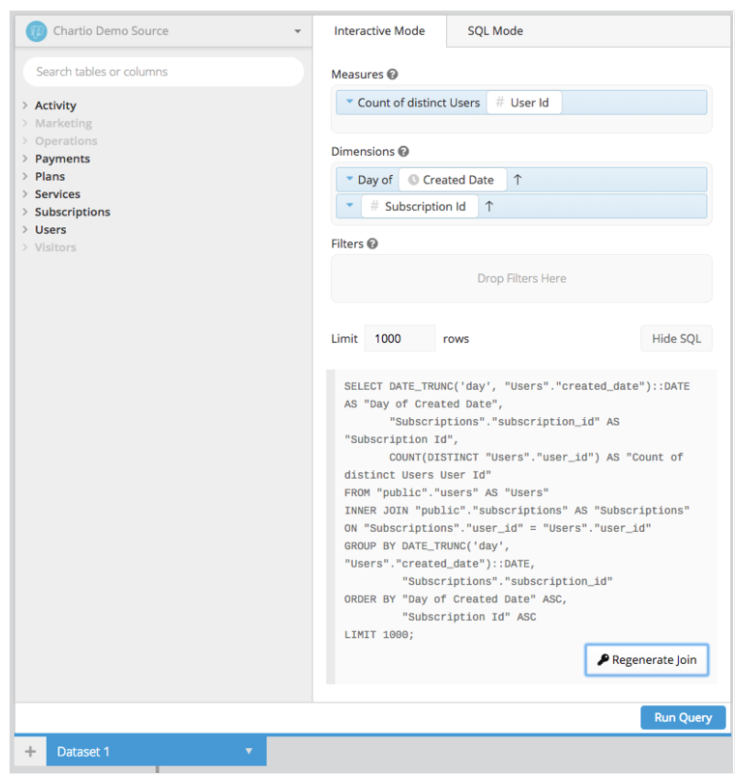
If you have Foreign Keys set up on your data source, Chartio is able to auto-generate join paths in Interactive Mode. Joins are then automatically built into your queries when dragging columns from related tables into your Datasets. Chartio will try to find the shortest path between tables, but this may not always be the join path you want to use.
Interactive Mode
In Interactive Mode, add a filter using a column from the table you want to route the join path through. Choose a non-nullable column (e.g. the primary key) and filter by is not null. This will force the join path to be generated through the desired table.
Alternatively, you can click on the “Regenerate Join” button that appears when previewing the SQL to switch to the desired join path.

SQL Mode
If you have a specific join path you’d like to use for your chart, you can always switch your chart to SQL Mode. From there, you’ll be able to type in the desired tables and columns which you’d like to use to join your data.
Note: Your chart will need to be saved in SQL Mode to maintain this custom join path. It will not be possible to evert the chart back to Interactive Mode after doing this.