Connect a Dashboard Control in the Pipeline
In most cases, you’ll probably connect your Dashboard Controls inside the Filters section of your queries. While this is the easiest way to do it, you can actually connect your Controls in the Pipeline as well.
One advantage for connecting a Control in the Pipeline is to improve performance on your data source. When the Control is connected in the query itself, new queries are sent to your data source whenever a dashboard viewer updates the Control’s values. By connecting the Control in the Pipeline, new queries are NOT sent to your data source whenever new values are selected because the calculations/transformations in the Pipeline are applied to cached query results.
Unlike filtering in the query, the column to which you want to connect your Control must exist in your result set. If you no longer need that column in your result set after connecting your Control, you can always hide it.
Date Bucket
-
The original datetime column in your query needs to use the most granular time bucket (i.e., second) for this to work.
-
Use an Apply Formula Action (Visual SQL) or Edit Column Step (Data Explorer) on your datetime column, select Custom as the formula type, and use the following CASE statement:
 case
     when {DATE_BUCKET_NAME}='minute' then strftime('%Y-%m-%d %H:%M', "Column_Name")
     when {DATE_BUCKET_NAME}='hour' then strftime('%Y-%m-%d %H:00', "Column_Name")
     when {DATE_BUCKET_NAME}='date' then strftime('%Y-%m-%d',"Column_Name")
     when {DATE_BUCKET_NAME}='week' then datepart("Column_Name", 'year')||'-W'||((strftime('%j', date("Column_Name", '-3 days', 'weekday 4')) - 1) / 7 + 1)
     when {DATE_BUCKET_NAME}='month' then strftime('%Y-%m',"Column_Name")
     when {DATE_BUCKET_NAME}='year' then strftime('%Y',"Column_Name")
     when {DATE_BUCKET_NAME}='quarter' then strftime('%Y', "Column_Name")||'-Q'||((datepart("Column_Name", 'month')+2)/3)
     else "Column_Name"
 end
Creating a custom Date Bucket using a Dropdown? You can use this CASE statement when setting that up too.
-
Add a Group & Aggregate Action (Visual SQL) or a Group Step (Data Explorer) and select Group for your datetime column. Select the appropriate aggregations for the rest of your columns.
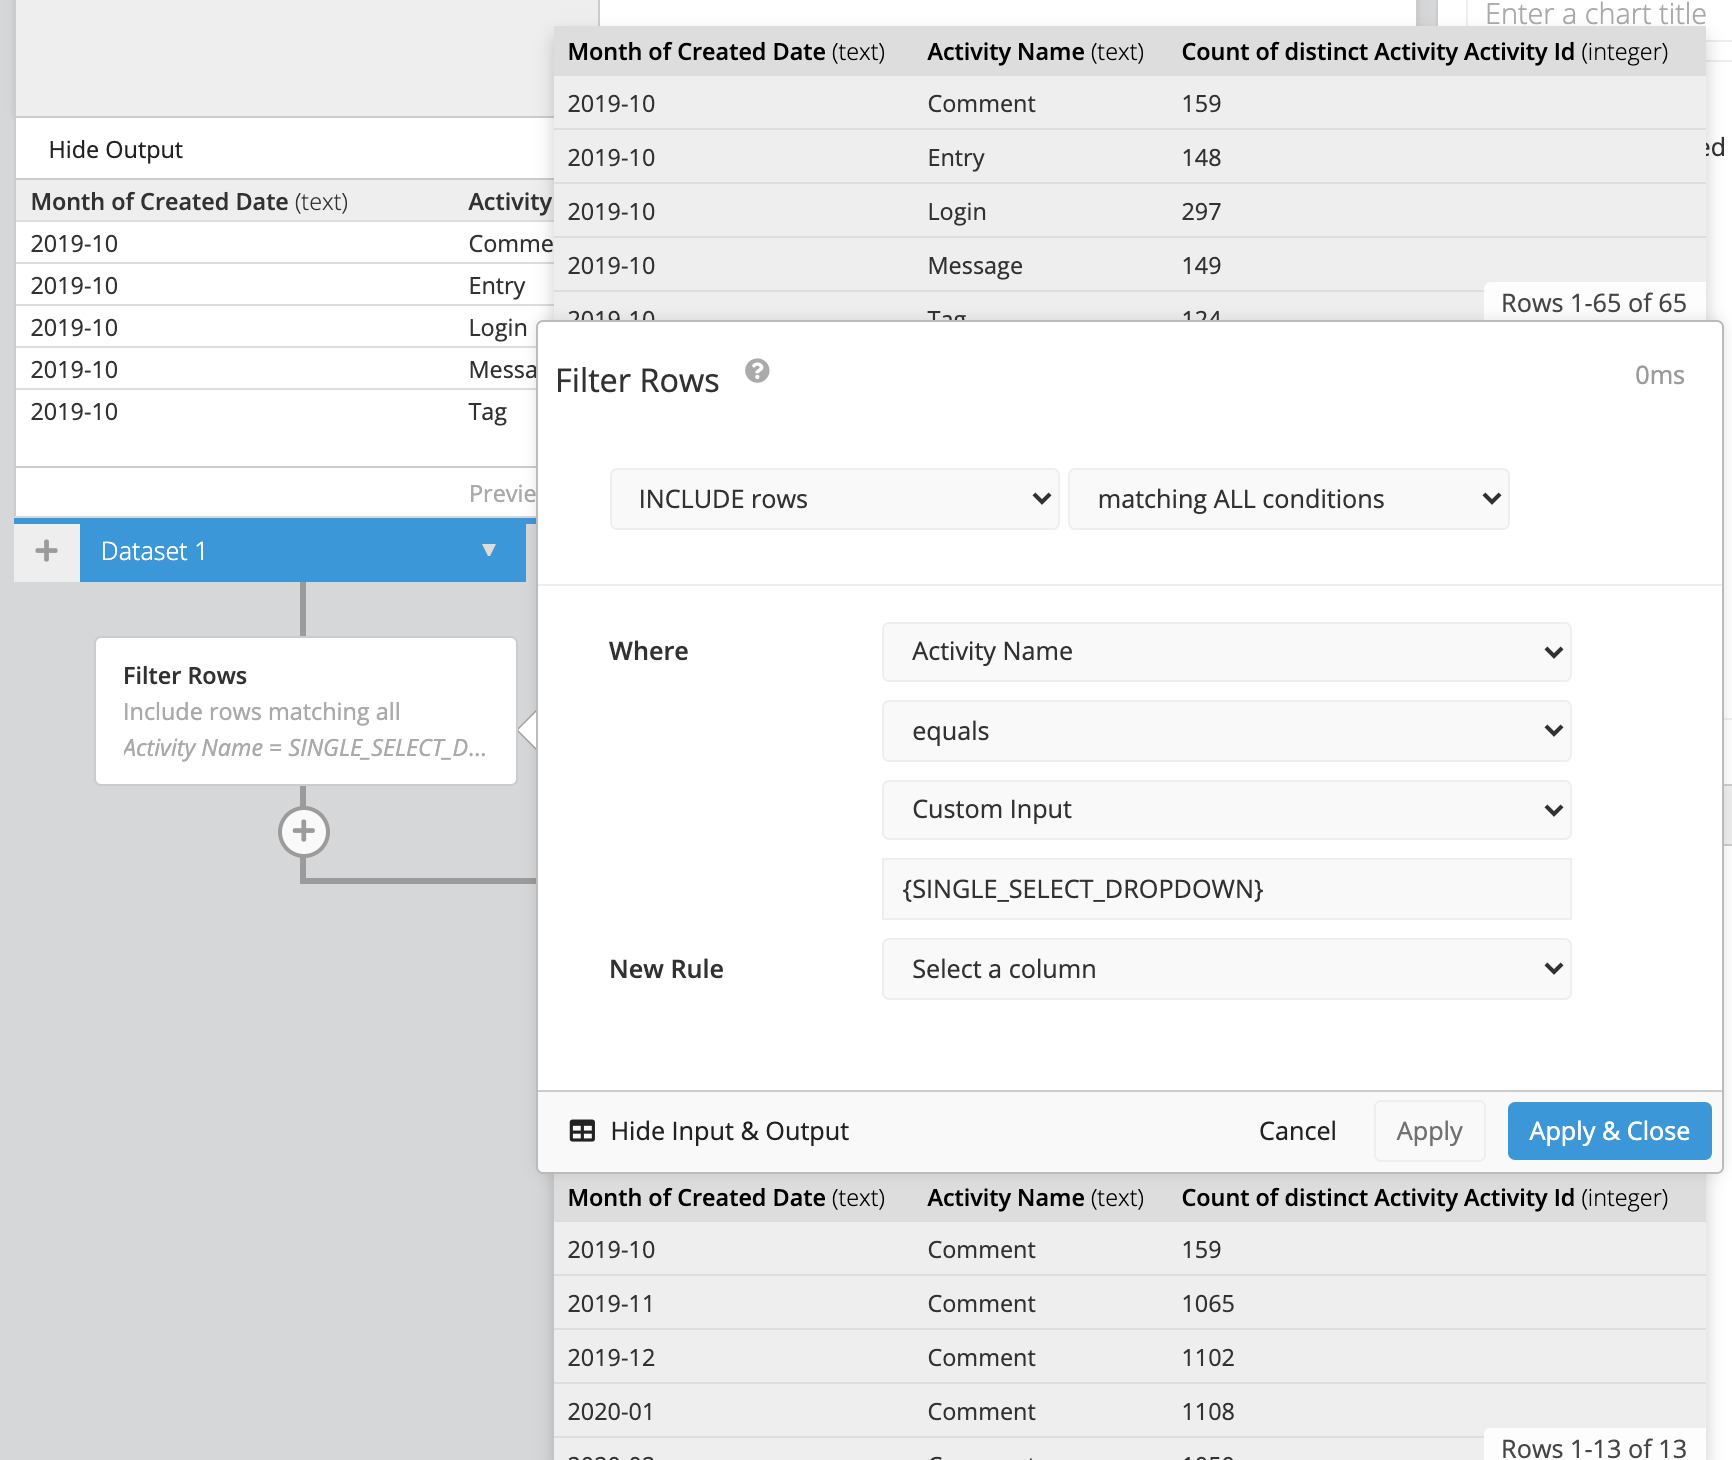
Dropdown
For a single-select Dropdown, connecting it in the Pipeline is pretty simple. Just add a Filter Action (Visual SQL) or Filter Rows Step (Data Explorer) and add the following filter condition for your column:
"Column_Name" = {DROPDOWN_NAME}
| In the Visual SQL interface |
|---|
 |
| In the Data Explorer interface |
|---|
 |
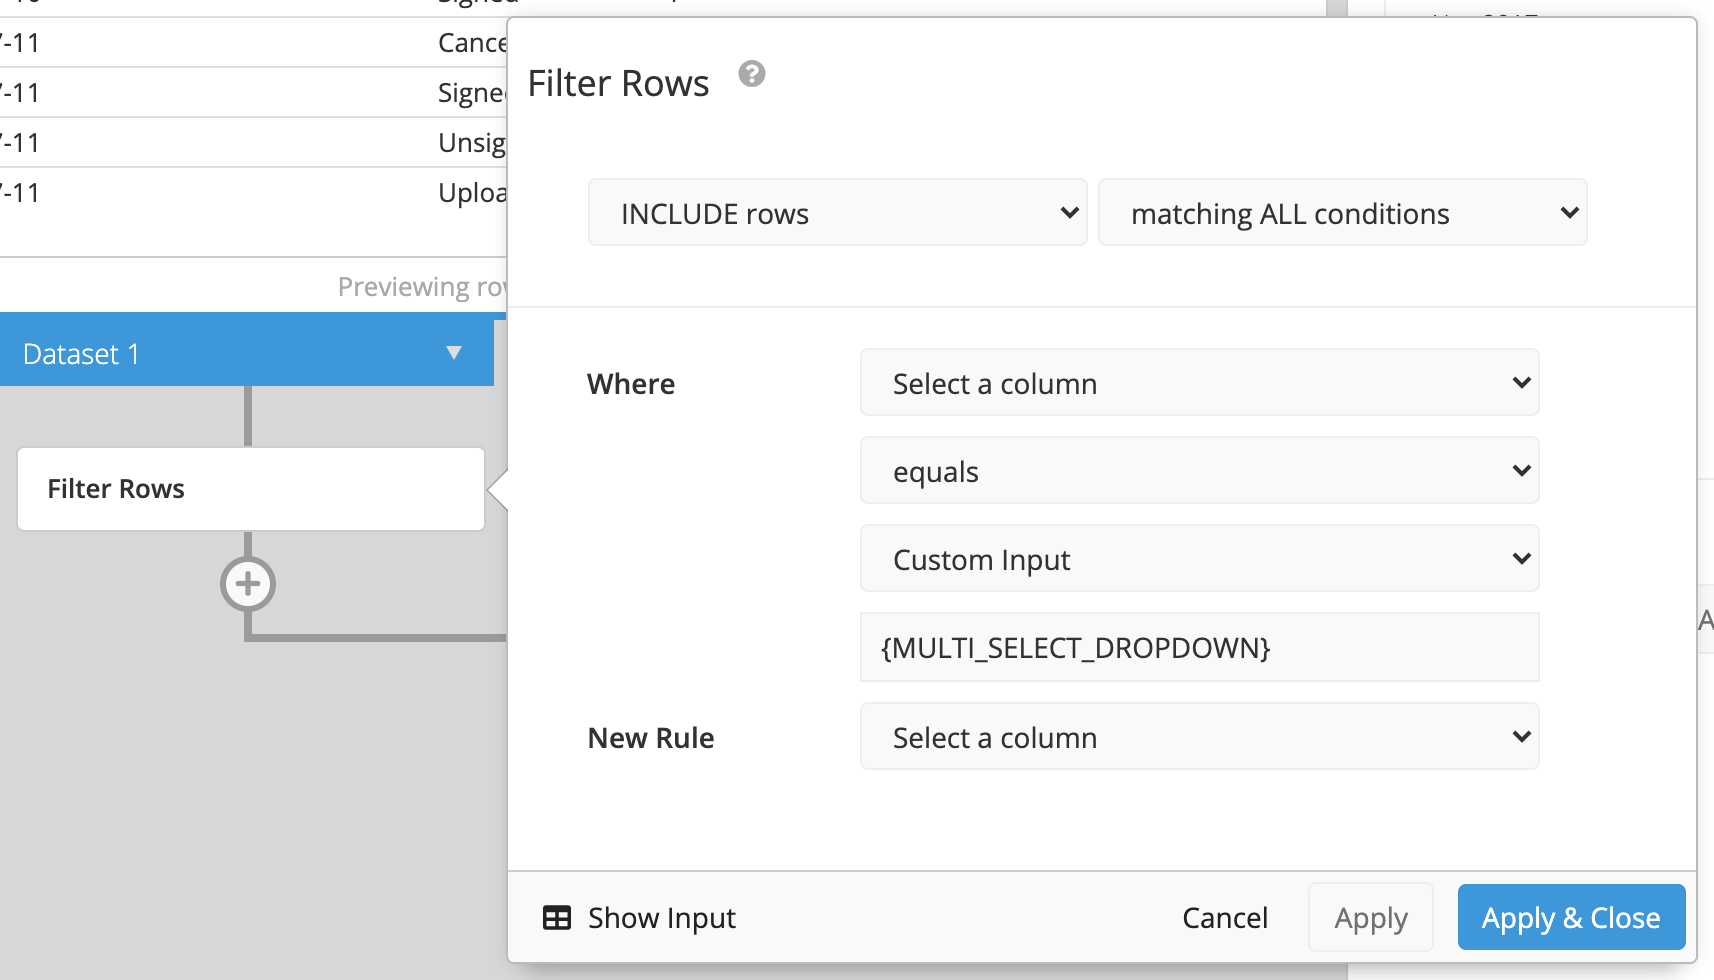
For a multi-select Dropdown, add a Filter Action (Visual SQL) or Filter Rows Step (Data Explorer) and add the following filter condition:
"Column_Name" is one of {DROPDOWN_NAME}
Keep in mind, connecting a multi-select Dropdown in the Pipeline using a Filter Action or Filter Rows Step does NOT handle the “Show All” setting. If you’d like to show all data when no Dropdown values are selected, check out our FAQ for an alternate way of connecting multi-select Dropdowns in the Pipeline.
| In the Visual SQL interface |
|---|
 |
| In the Data Explorer interface |
|---|
 |
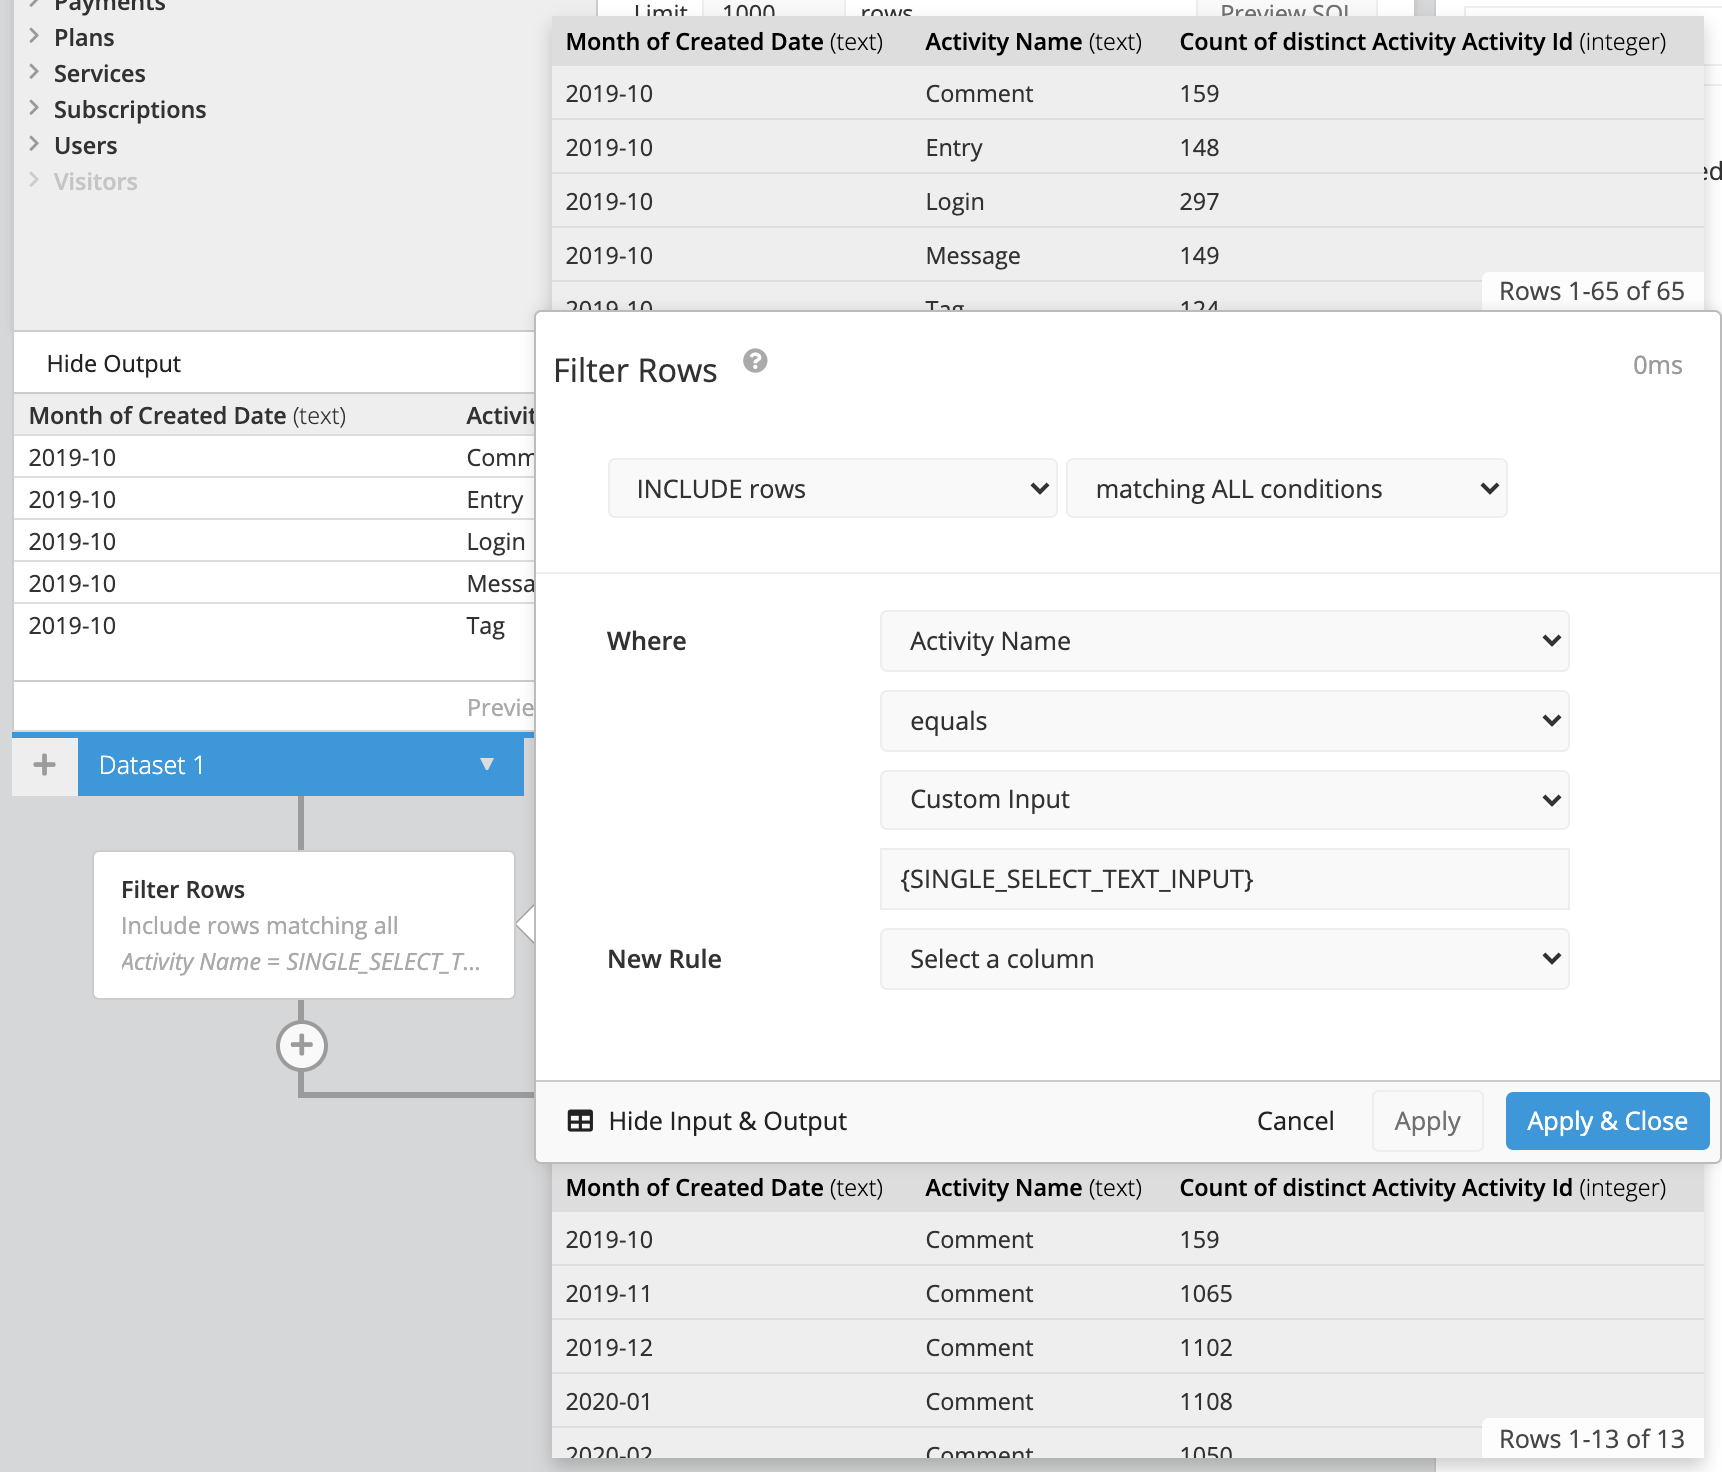
Text Input
For a single-select Text Input, just add a Filter Action (Visual SQL) or Filter Rows Step (Data Explorer) and add the following filter condition:
"Column_Name" = {TEXT_INPUT_NAME}
| In the Visual SQL interface |
|---|
 |
| In the Data Explorer interface |
|---|
 |
For a multi-select Text Input, it’s similar to how you’d handle multi-select Dropdowns. Again, if you’ve selected the “Show All” setting for your multi-select Text Input, you’ll need to refer to our FAQ for an alternate way of connecting multi-select Dropdowns in the Pipeline but use a Text Input instead!
For Text Inputs using wildcards, check out this FAQ for filtering using a Text Input with wildcards.
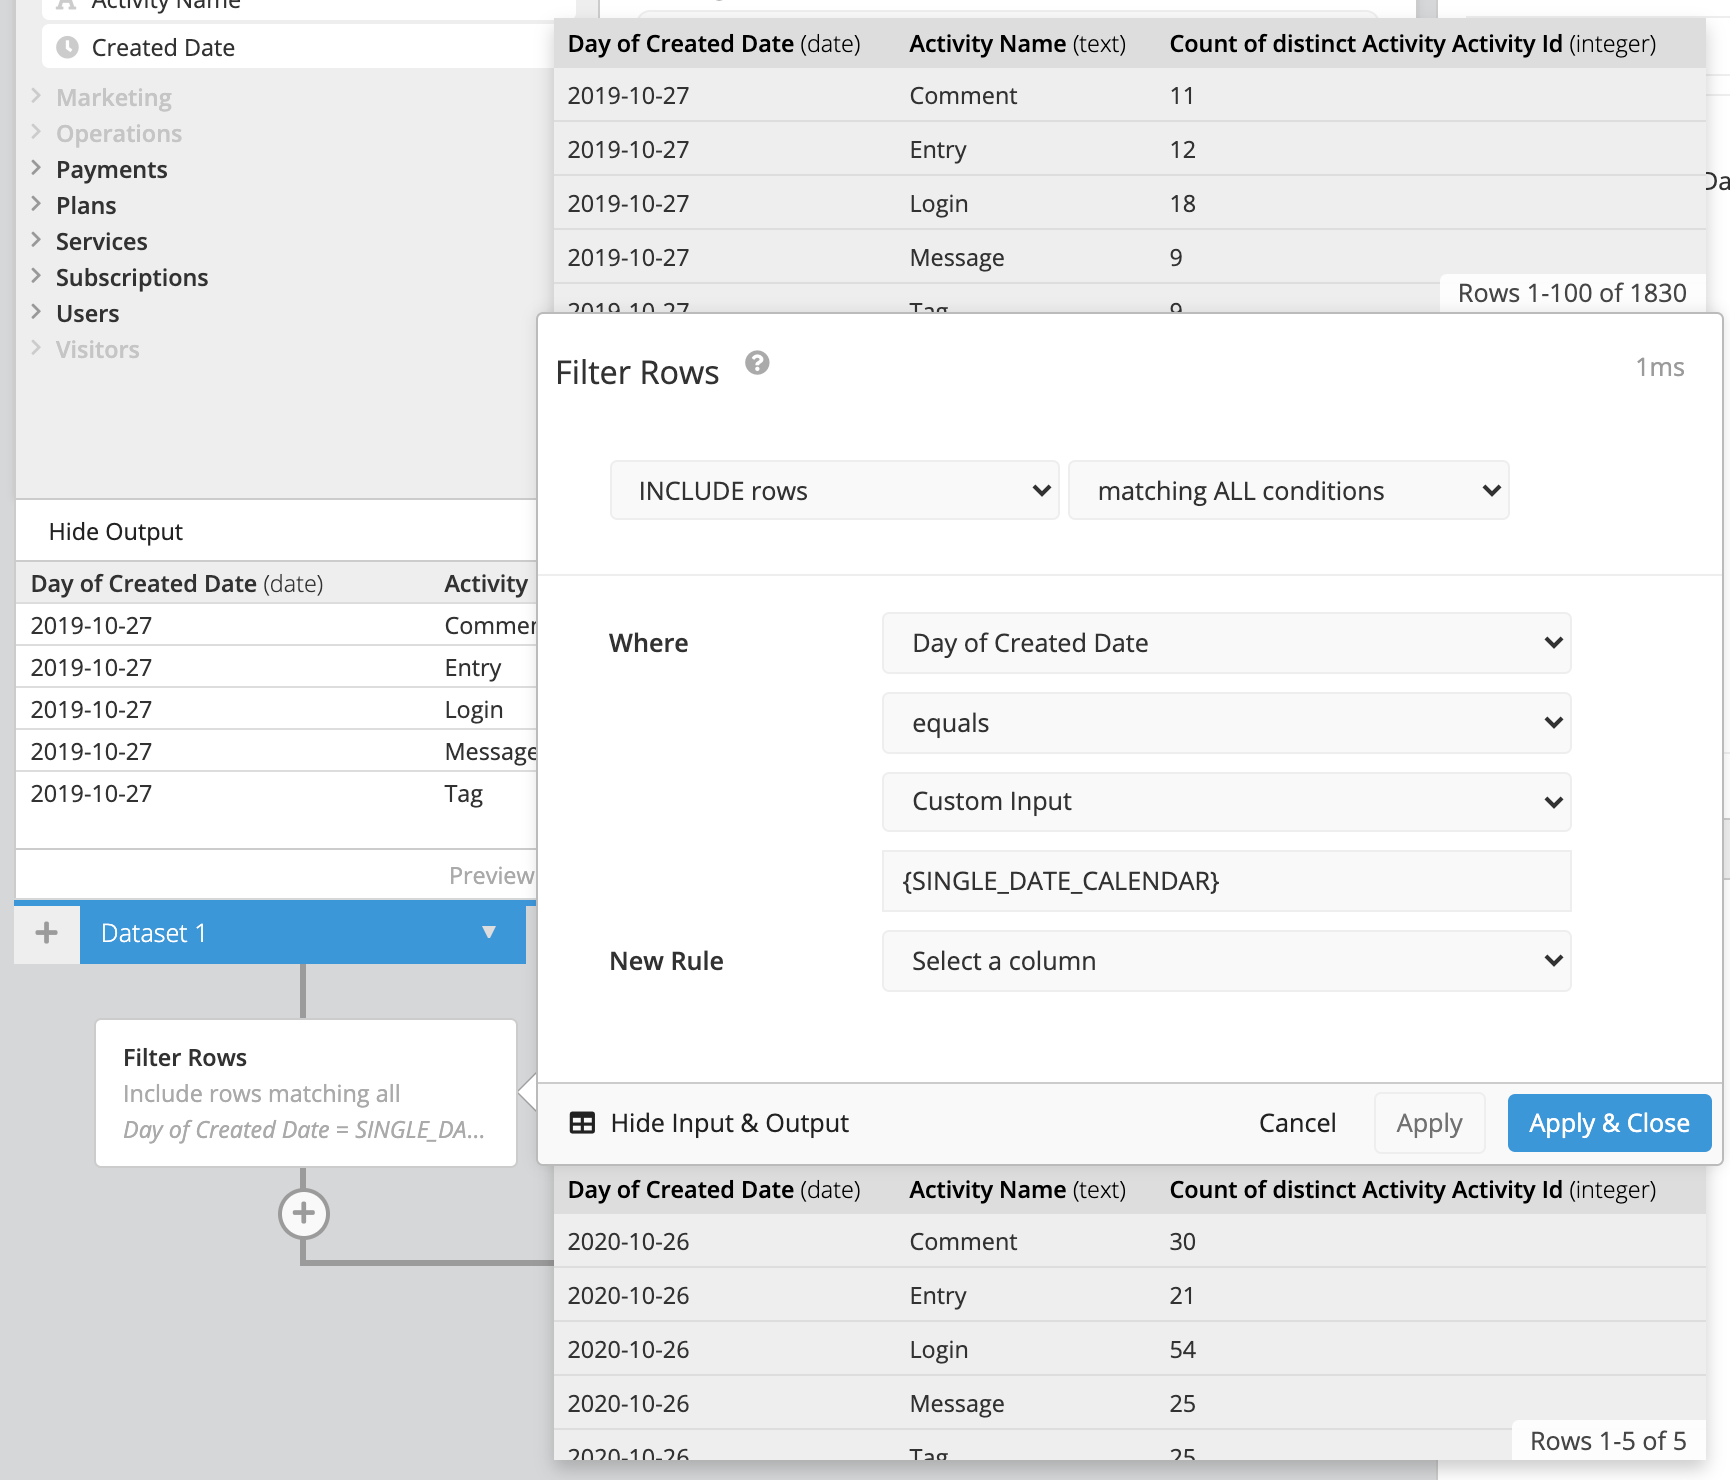
Calendar
For a single-date Calendar, add a Filter Action (Visual SQL) or Filter Rows Step (Data Explorer) and add the following filter condition:
"Column_Name" = {DATE_CALENDAR_NAME}
| In the Visual SQL interface |
|---|
 |
| In the Data Explorer interface |
|---|
 |
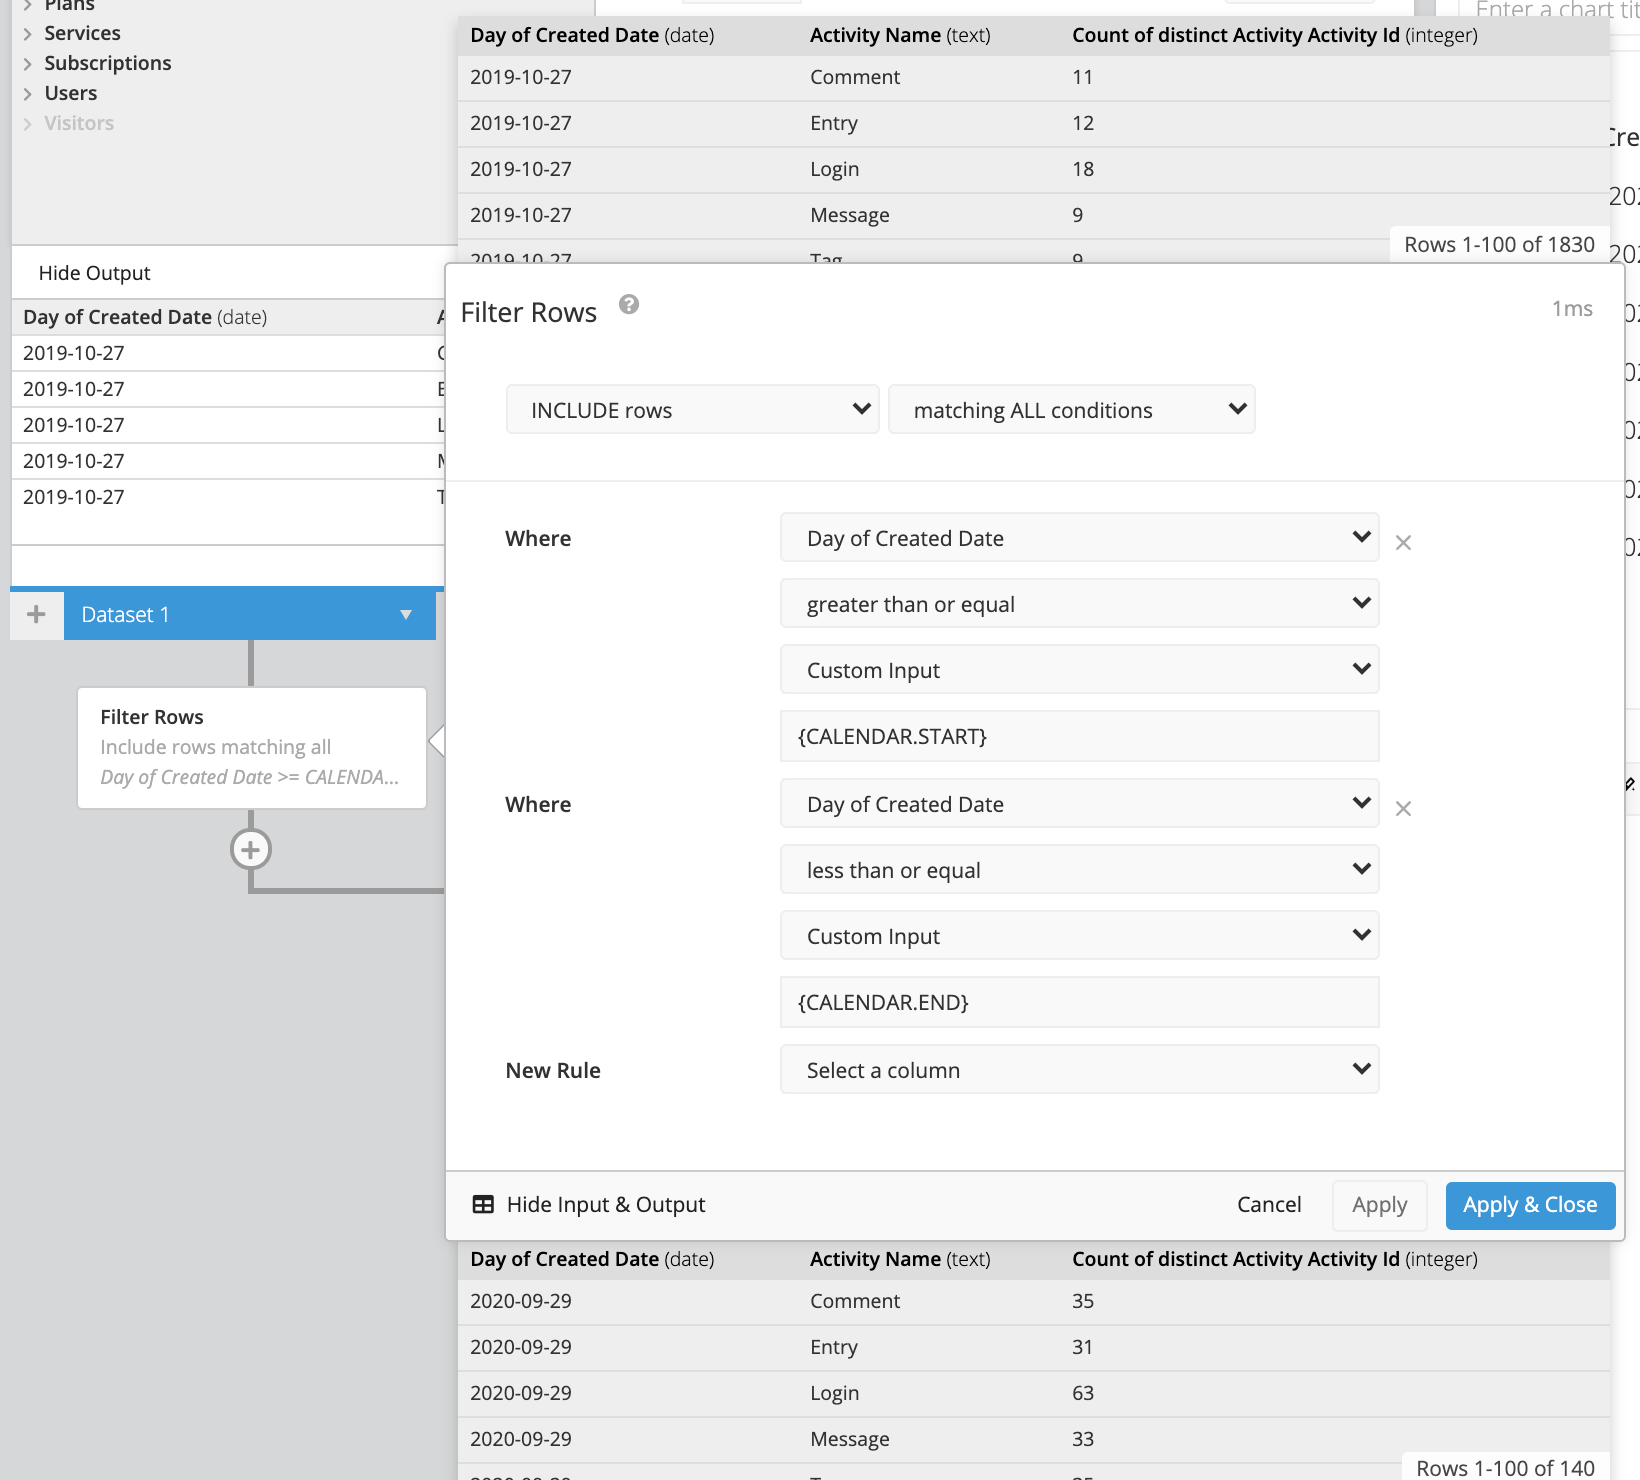
For a date-range Calendar, add a Filter Action (Visual SQL) or Filter Rows Step (Data Explorer) and add two filter conditions—one for your Calendar start date and one for your Calendar end date. For example, you can use the following conditions to return rows where the dates are between the Calendar start and end dates (inclusive):
"Column_Name" >= {CALENDAR_NAME.START}
"Column_Name" <= {CALENDAR_NAME.END}
| In the Visual SQL interface |
|---|
 |
| In the Data Explorer interface |
|---|
 |