Connect to Amazon Athena
Check out our step-by-step video showing how to connect your Amazon Athena database to Chartio:
Note: Chartio does not have a direct connection to Amazon S3, as Chartio supports primarily relational SQL databases. Amazon Athena has the capability of accessing your data stored in an S3 bucket. For more information about this process, please refer to the Amazon Athena documentation.
1. Create the necessary policies
Before you begin, write down the names or path locations for the S3 bucket with your data and the S3 bucket where the query results are stored. You’ll need both ARNs to set up the policies.
Read access to your S3 bucket
-
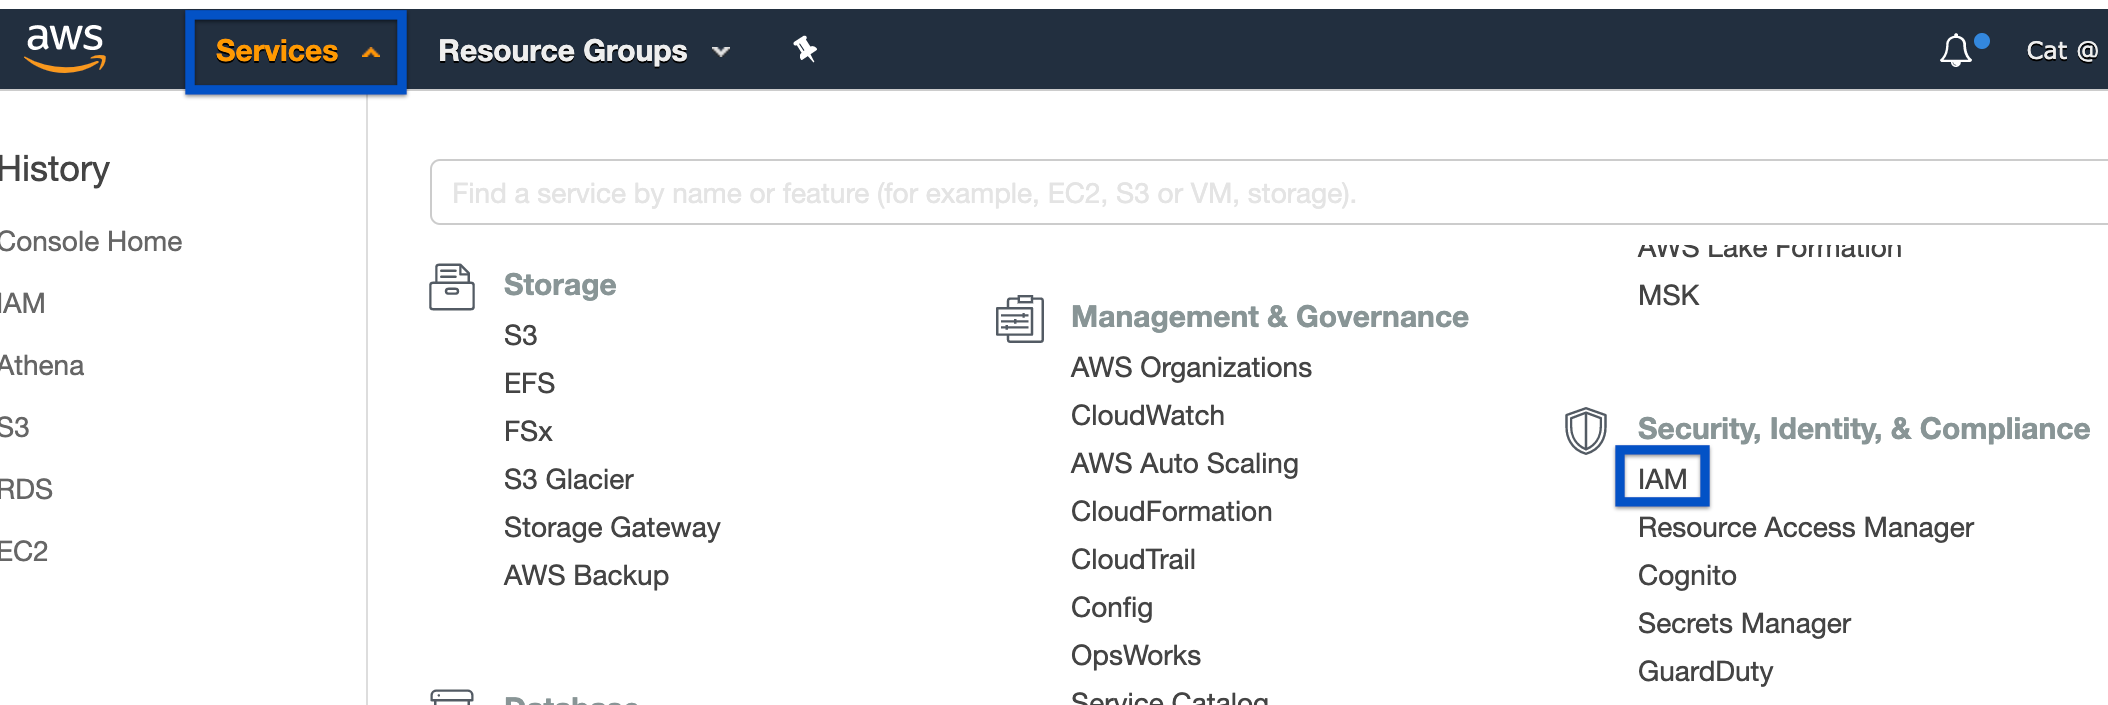
Open your AWS Management Console then click Services > IAM from the left of the top navigation bar.
-
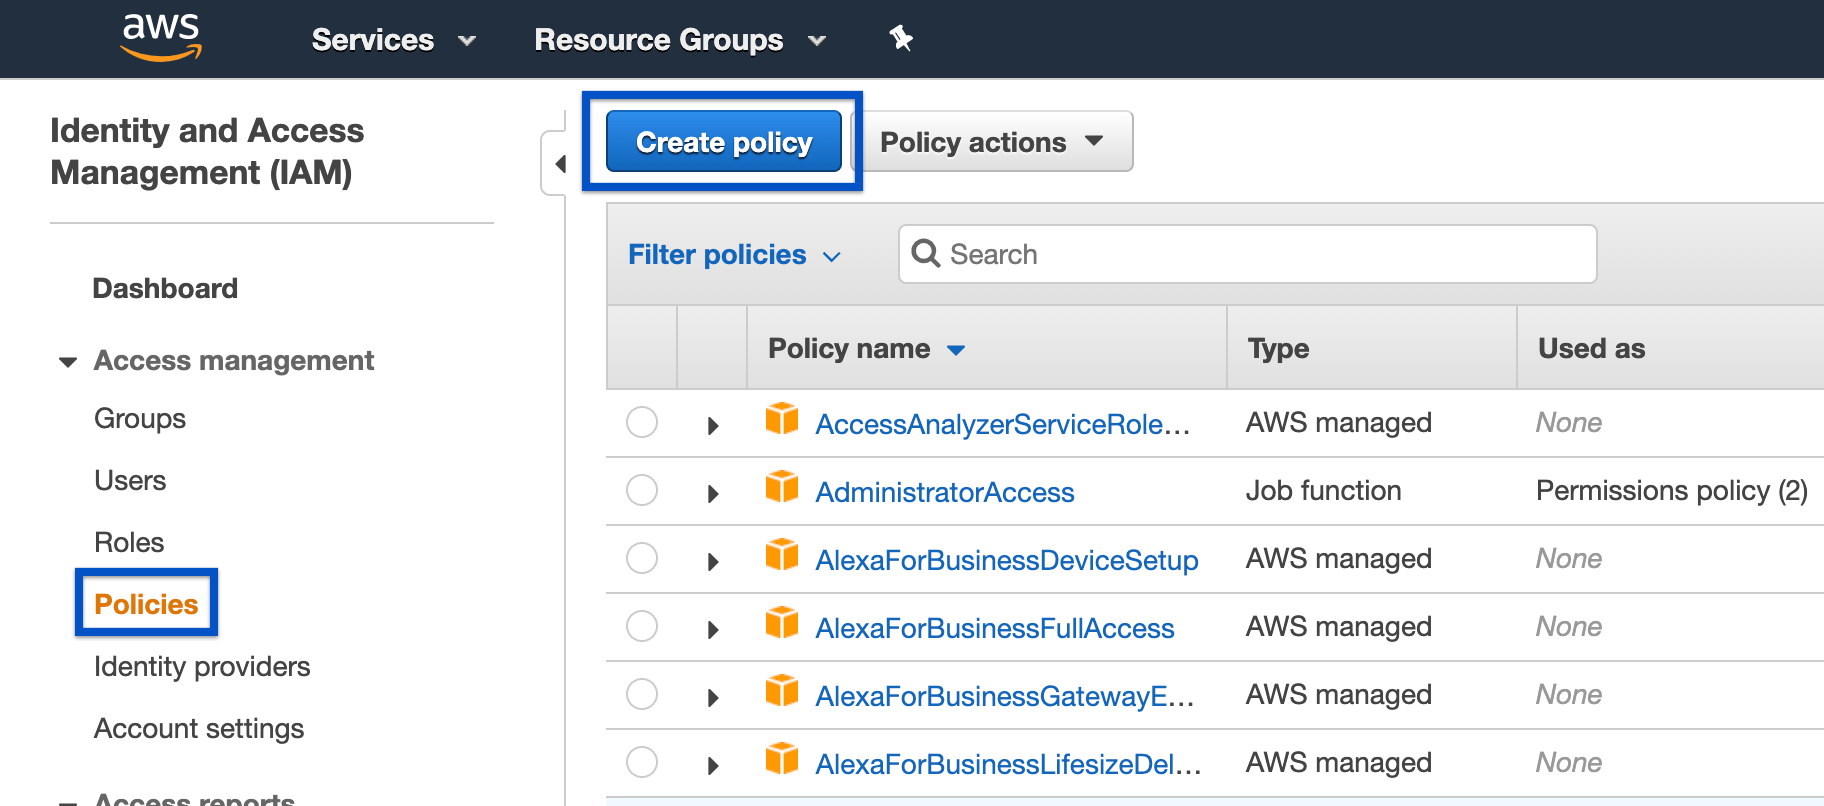
From the left sidebar, click Policies, then click Create Policy from the top of the page.
-
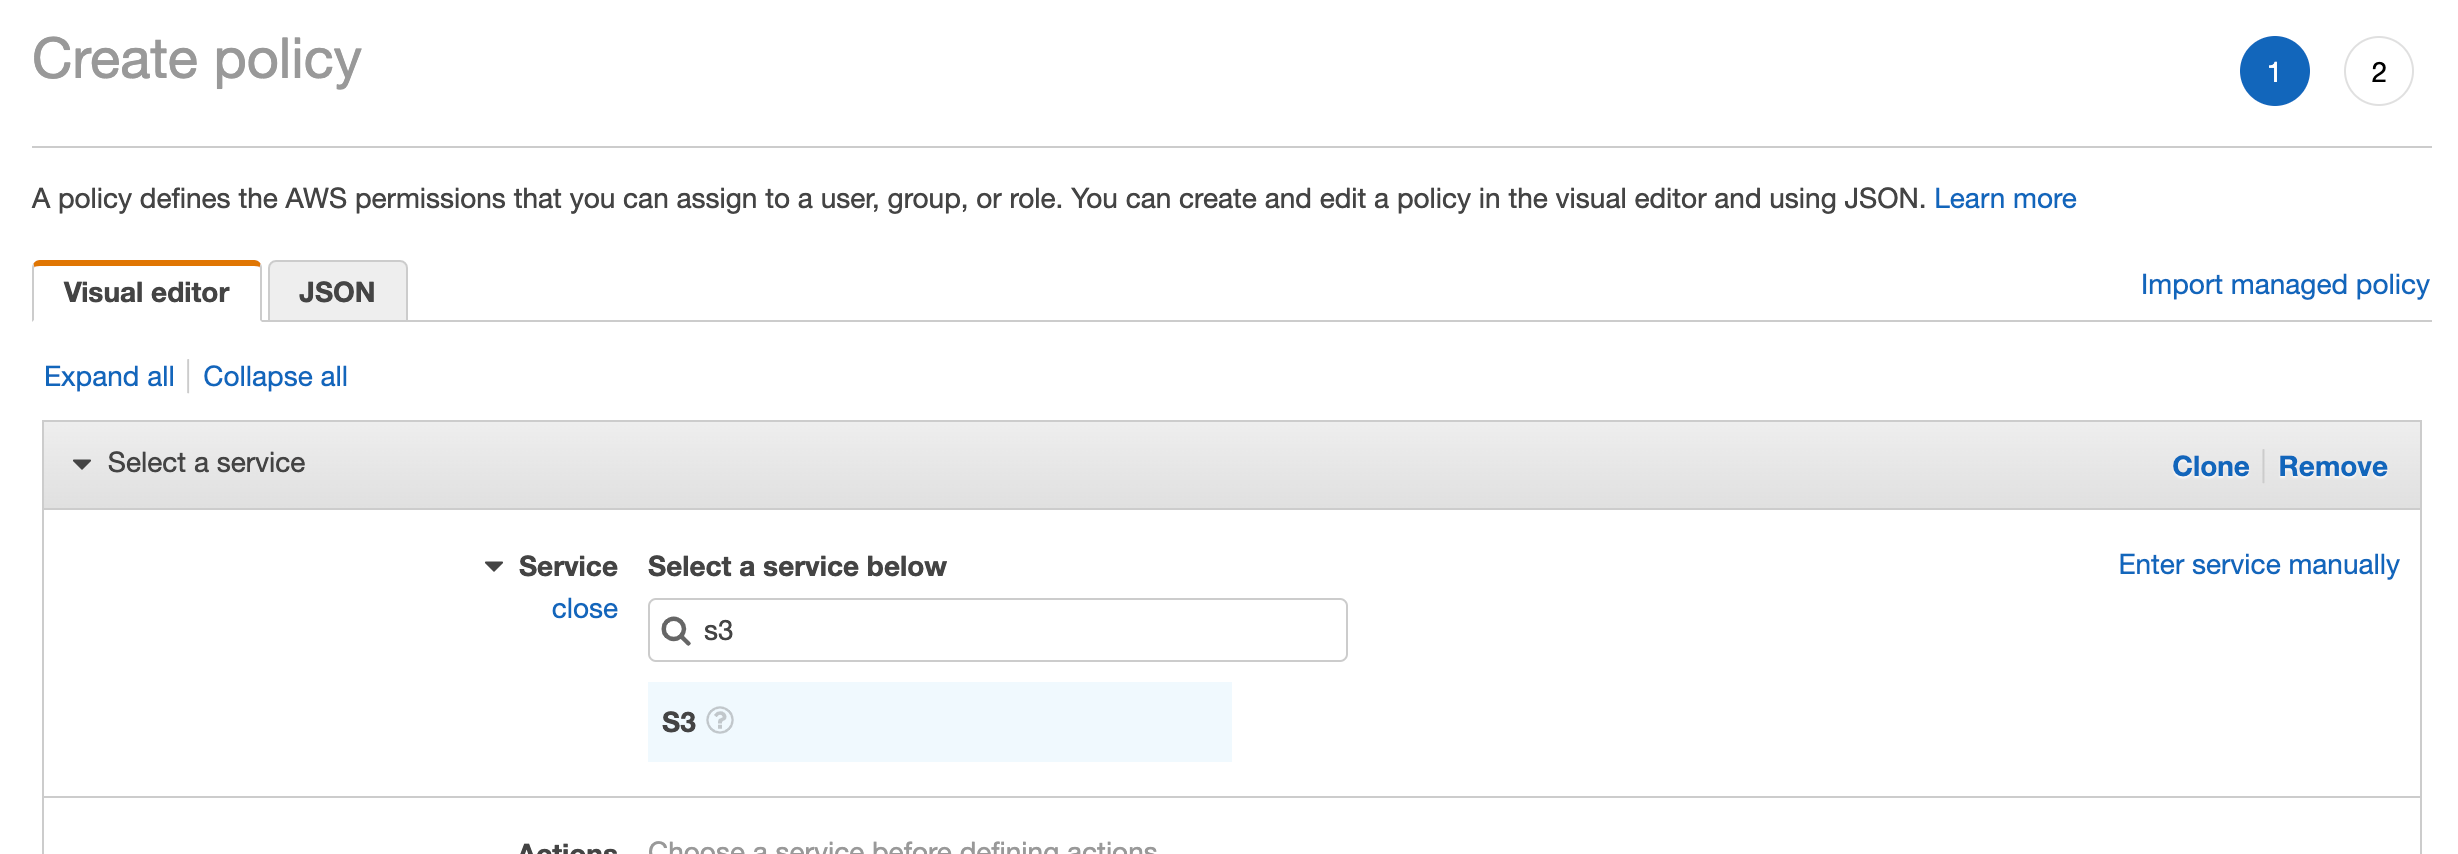
Stay on the Visual Editor tab. For the Service, search for S3 in the search bar and select it from the results.
- For Actions, select the following:
- List > ListBucket
- Read > GetObject
-
For Resources, provide the following:
a. Bucket: Click Add ARN then provide the path location of your S3 bucket. Click Add.
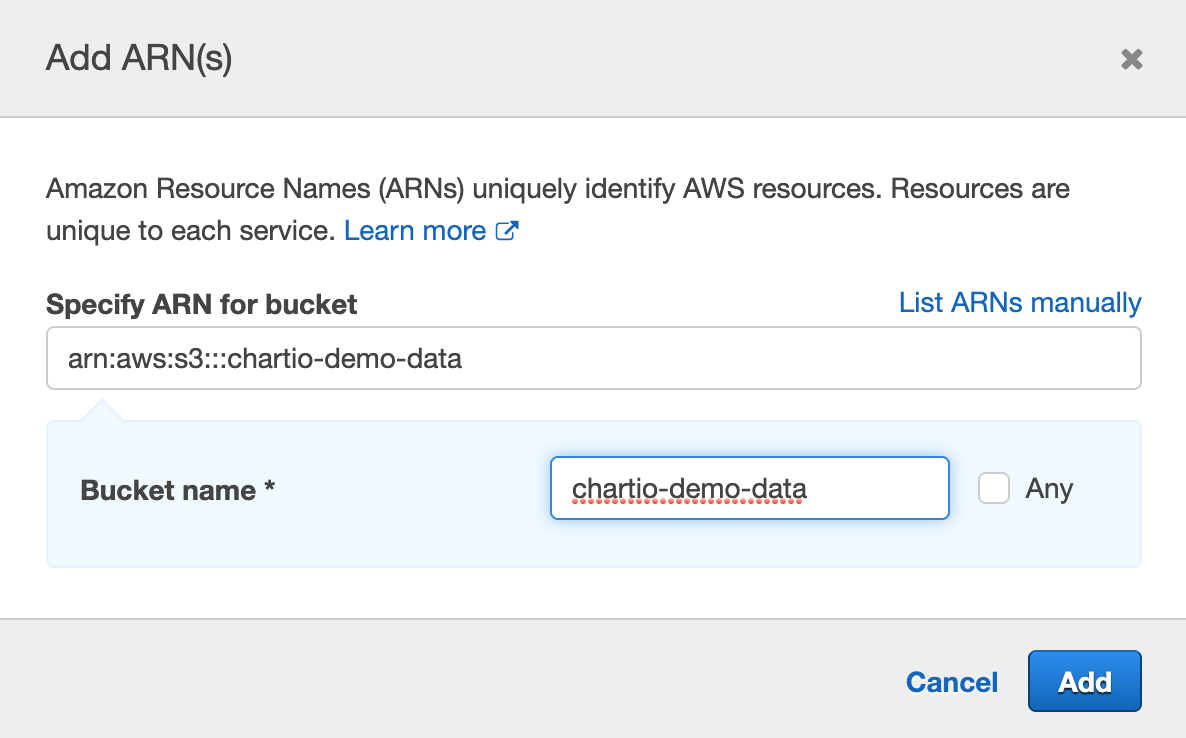
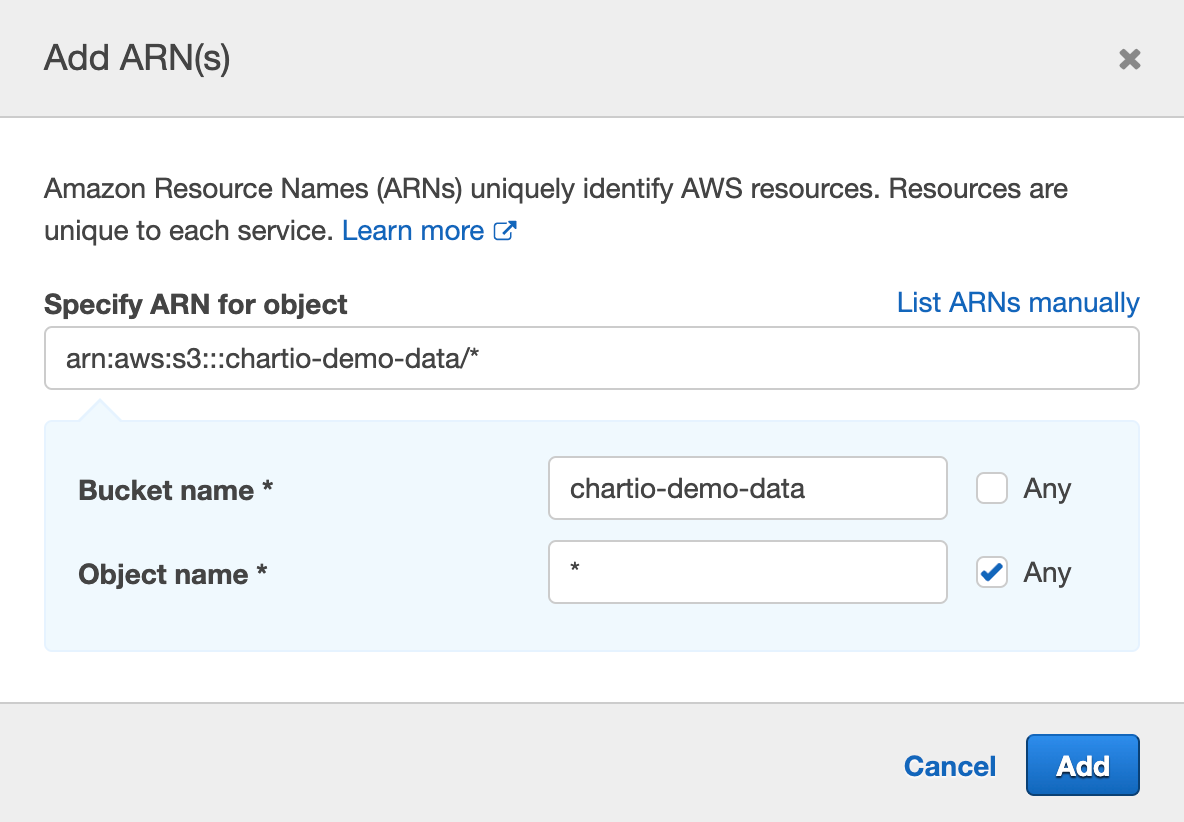
b. Object: Click Add ARN then provide the path location of your S3 bucket for the Bucket name and select Any for the Object name. Click Add.
-
Click Review policy.
- Provide a name (e.g., chartio_read_access) and description for your new policy. Click Create policy when you’re done.
Write access to your results bucket
You need to create a second policy that gives Chartio the necessary access to write query results to your results bucket and read those results for displaying to your charts.
Note: The results of any queries you execute in Chartio need to be written into the results bucket.
- From the Policies page, click Create Policy again.
- Stay in the Visual Editor tab. For the Service, select S3.
- For Actions, select the following:
- List > ListBucket
- Read > GetBucketLocation
- Read > GetObject
- Write > PutObject
-
For Resources, provide the following:
a. Bucket: Click Add ARN then provide the path location of your results bucket. Click Add.
b. Object: Click Add ARN then provide the path location of your results bucket for the Bucket name and select Any for the Object name. Click Add.
- Click Review policy.
- Provide a name (e.g., chartio_write_results) and description for this new policy. Click Create policy when you’re done.
2. Generate your secret key
-
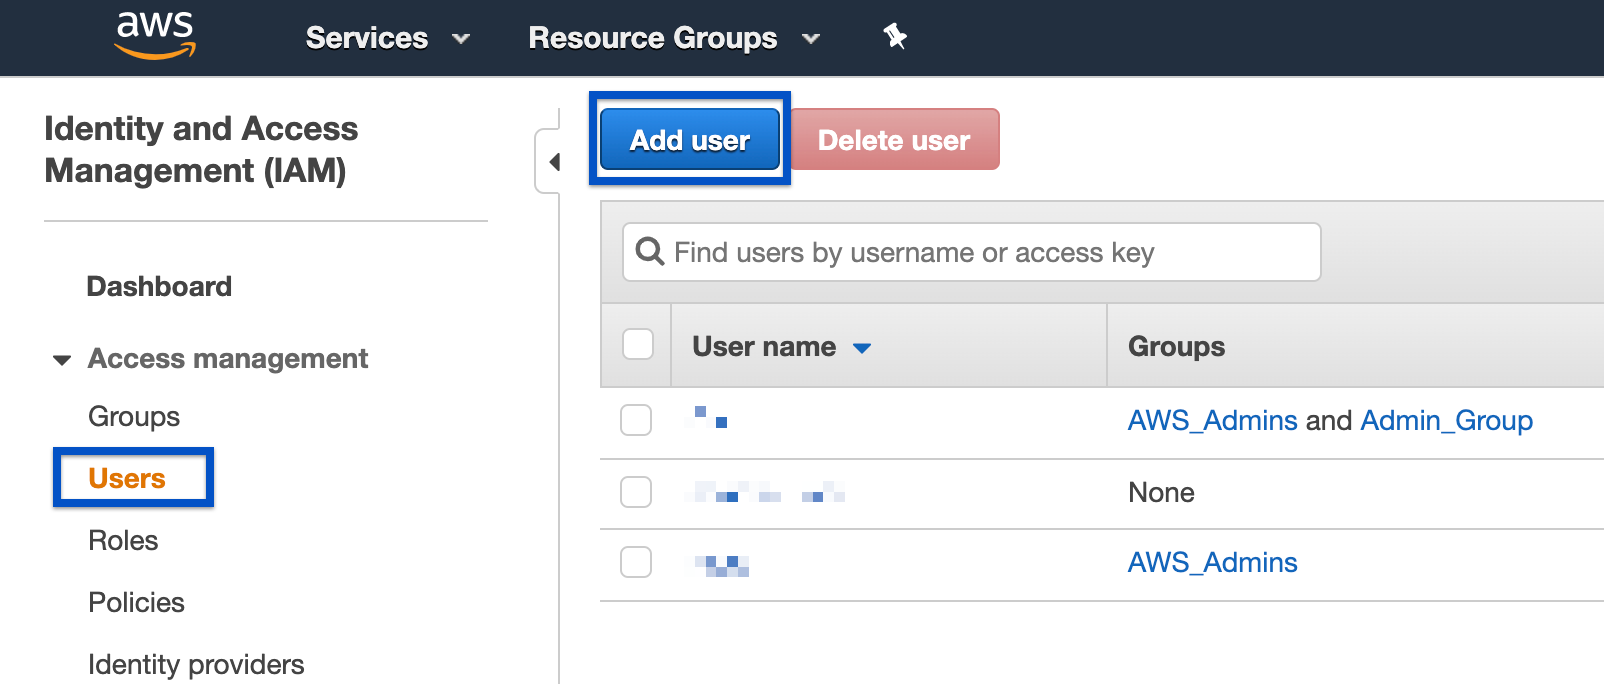
From the left sidebar of the IAM page, click Users, then click Add User from the top of the page. You’ll use this user to connect to Chartio.
-
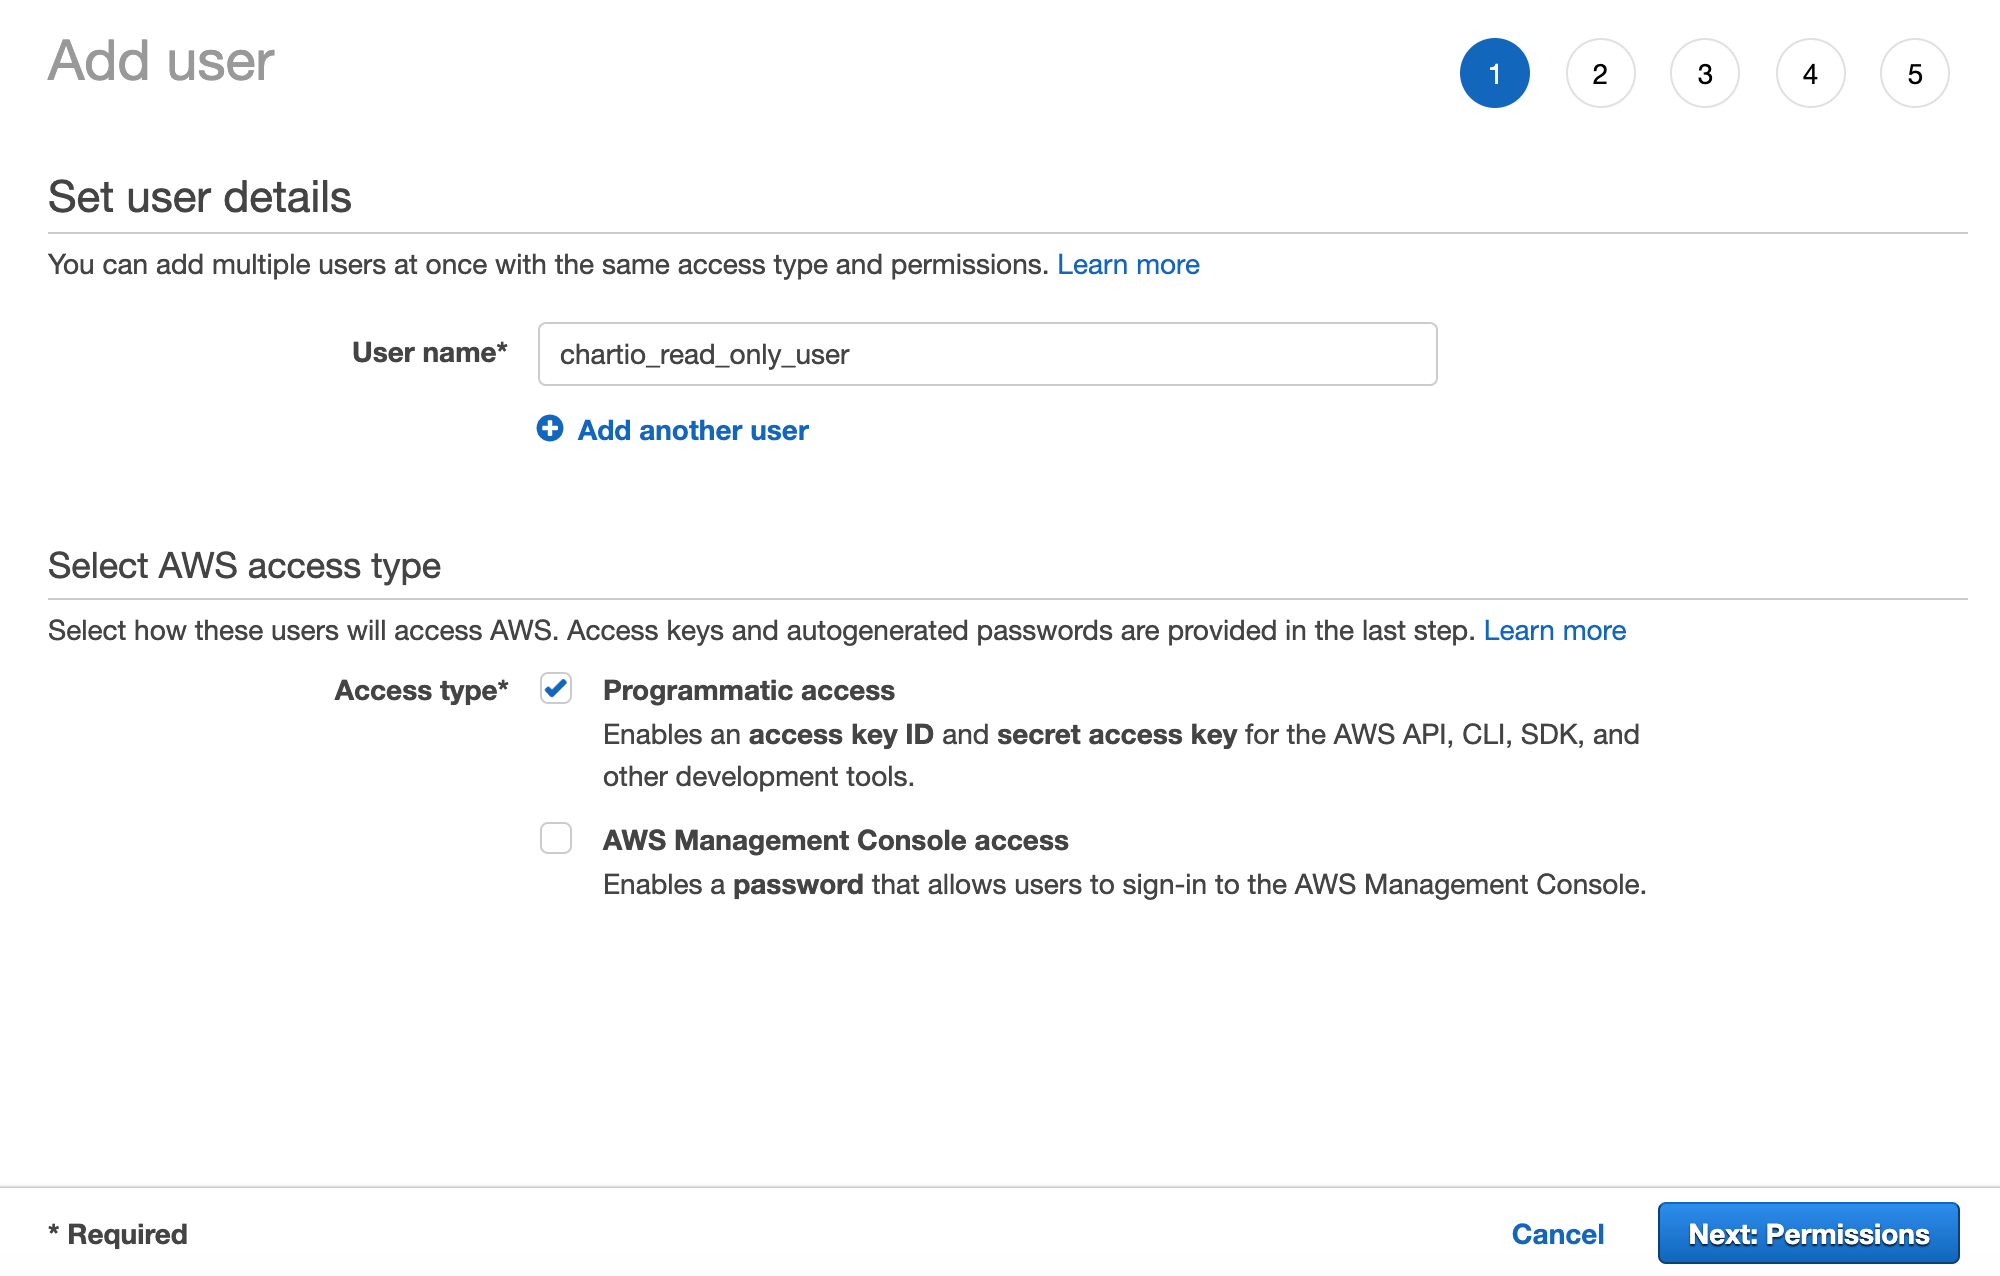
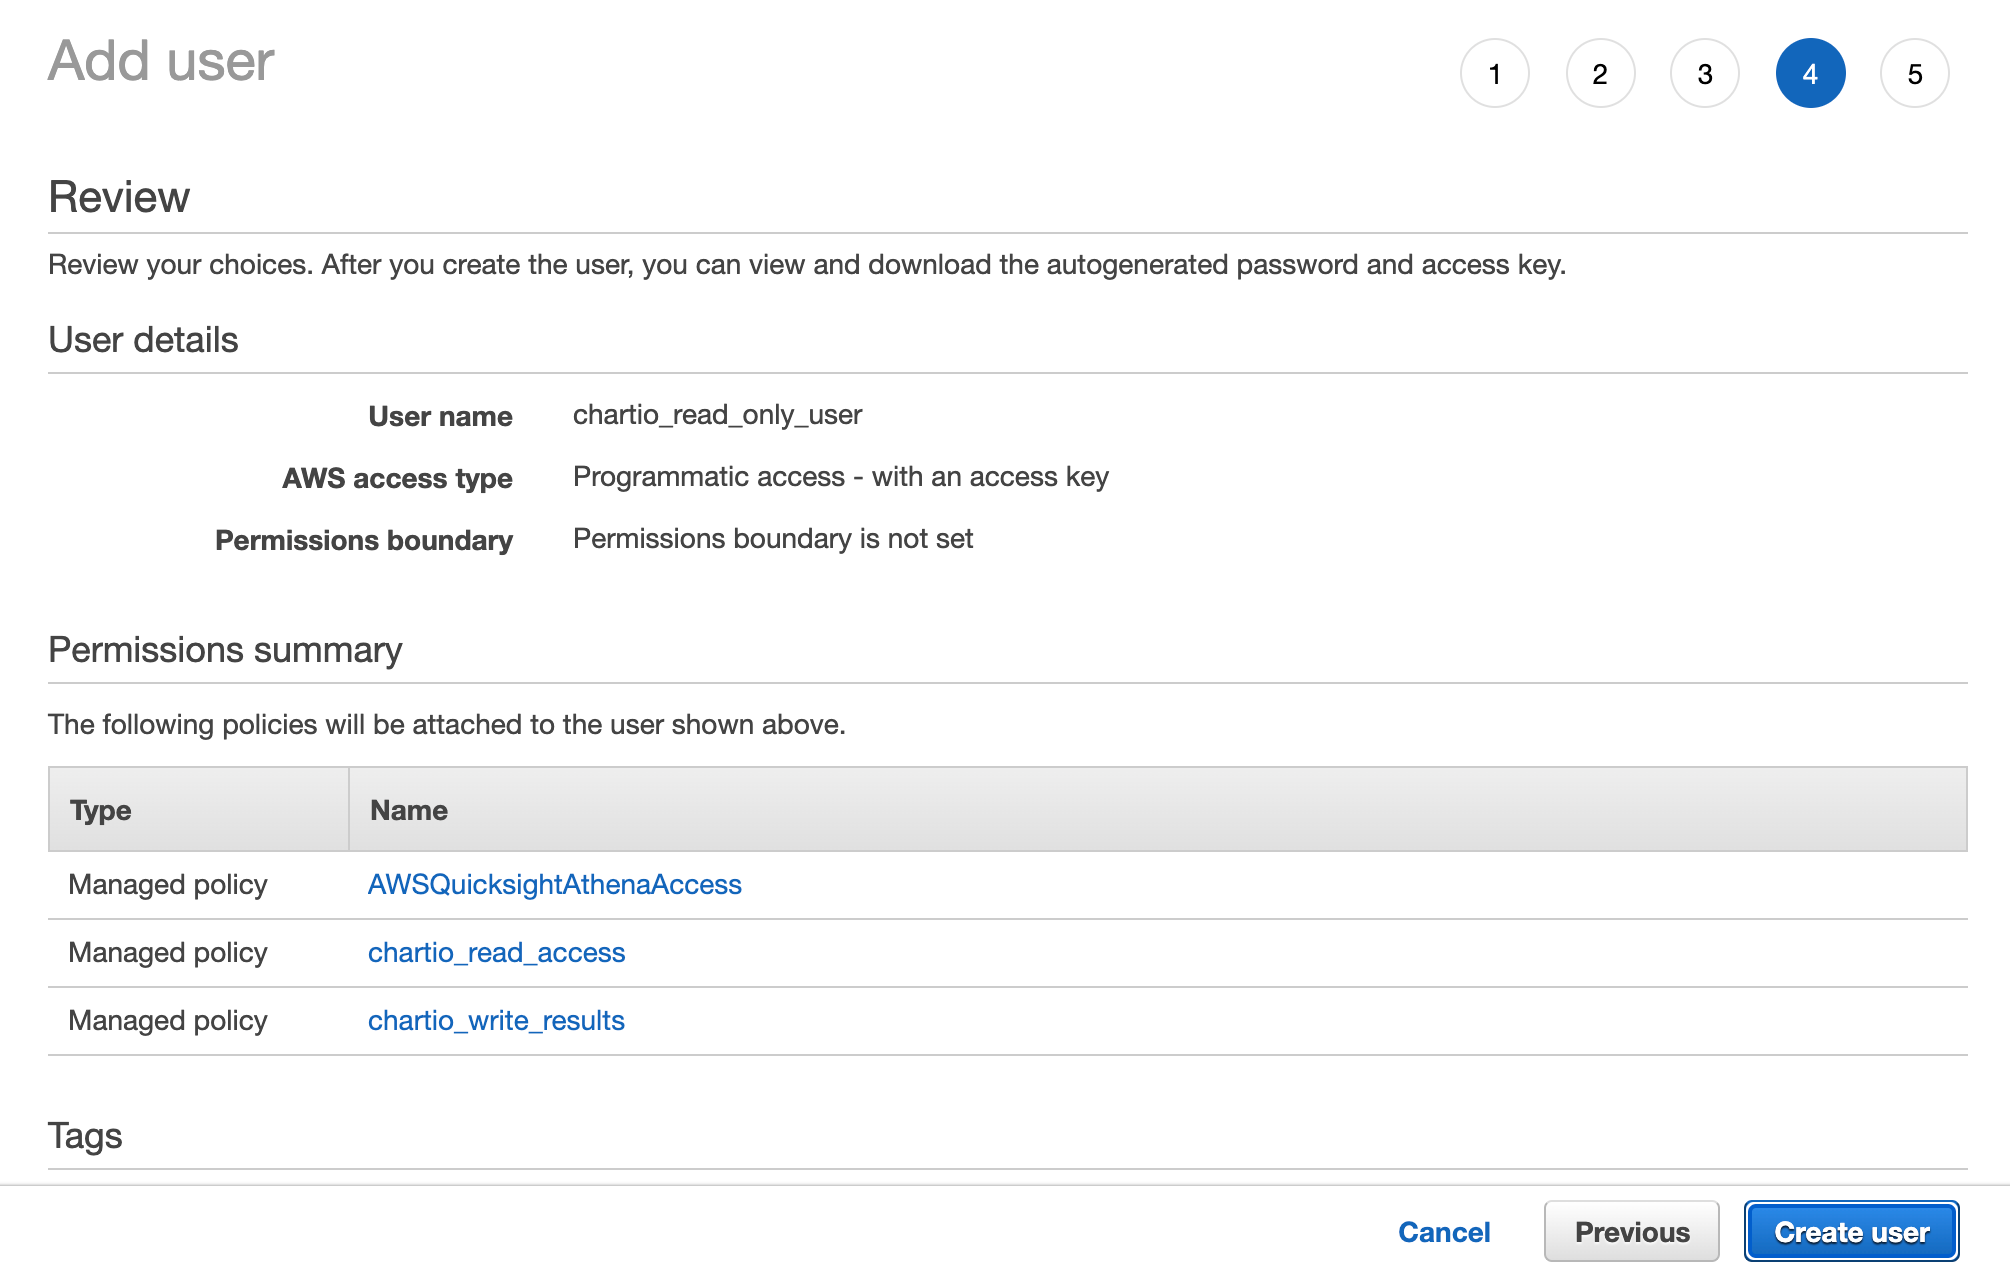
Provide a username for the new user (e.g., chartio_user) and select Programmatic access for the access type. Click Next:Permissions to continue.
- Click Attach existing policies directly then add select the following policies:
- AWSQuickInsightAthenaAccess
- The read access policy you created
- The write access policy you created
-
Click Next:Tags, add your tags (optional), then Next:Review. Review your user details then click Create user.
-
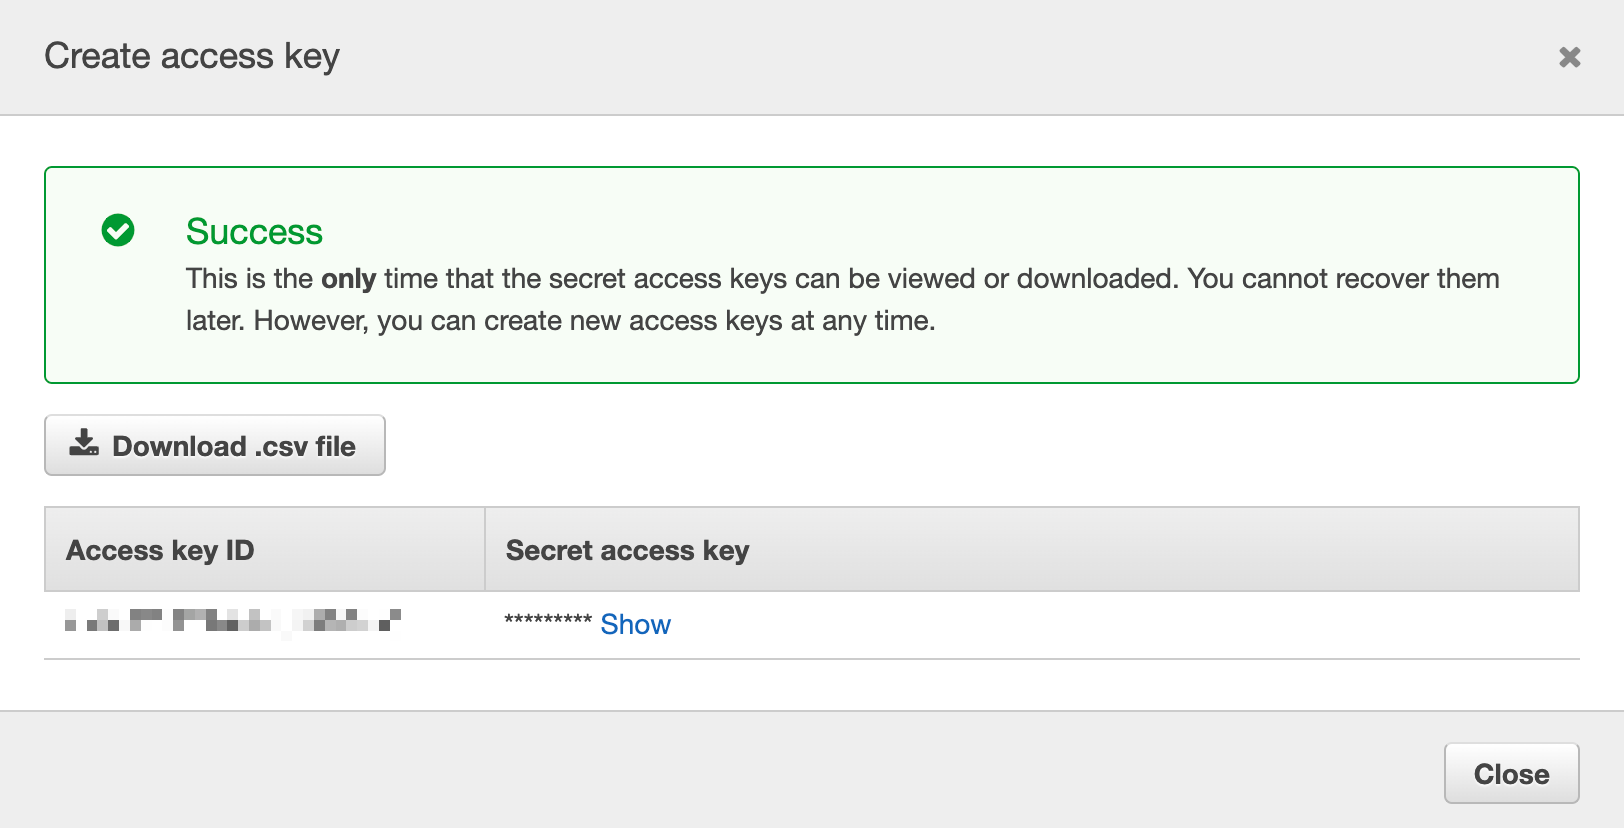
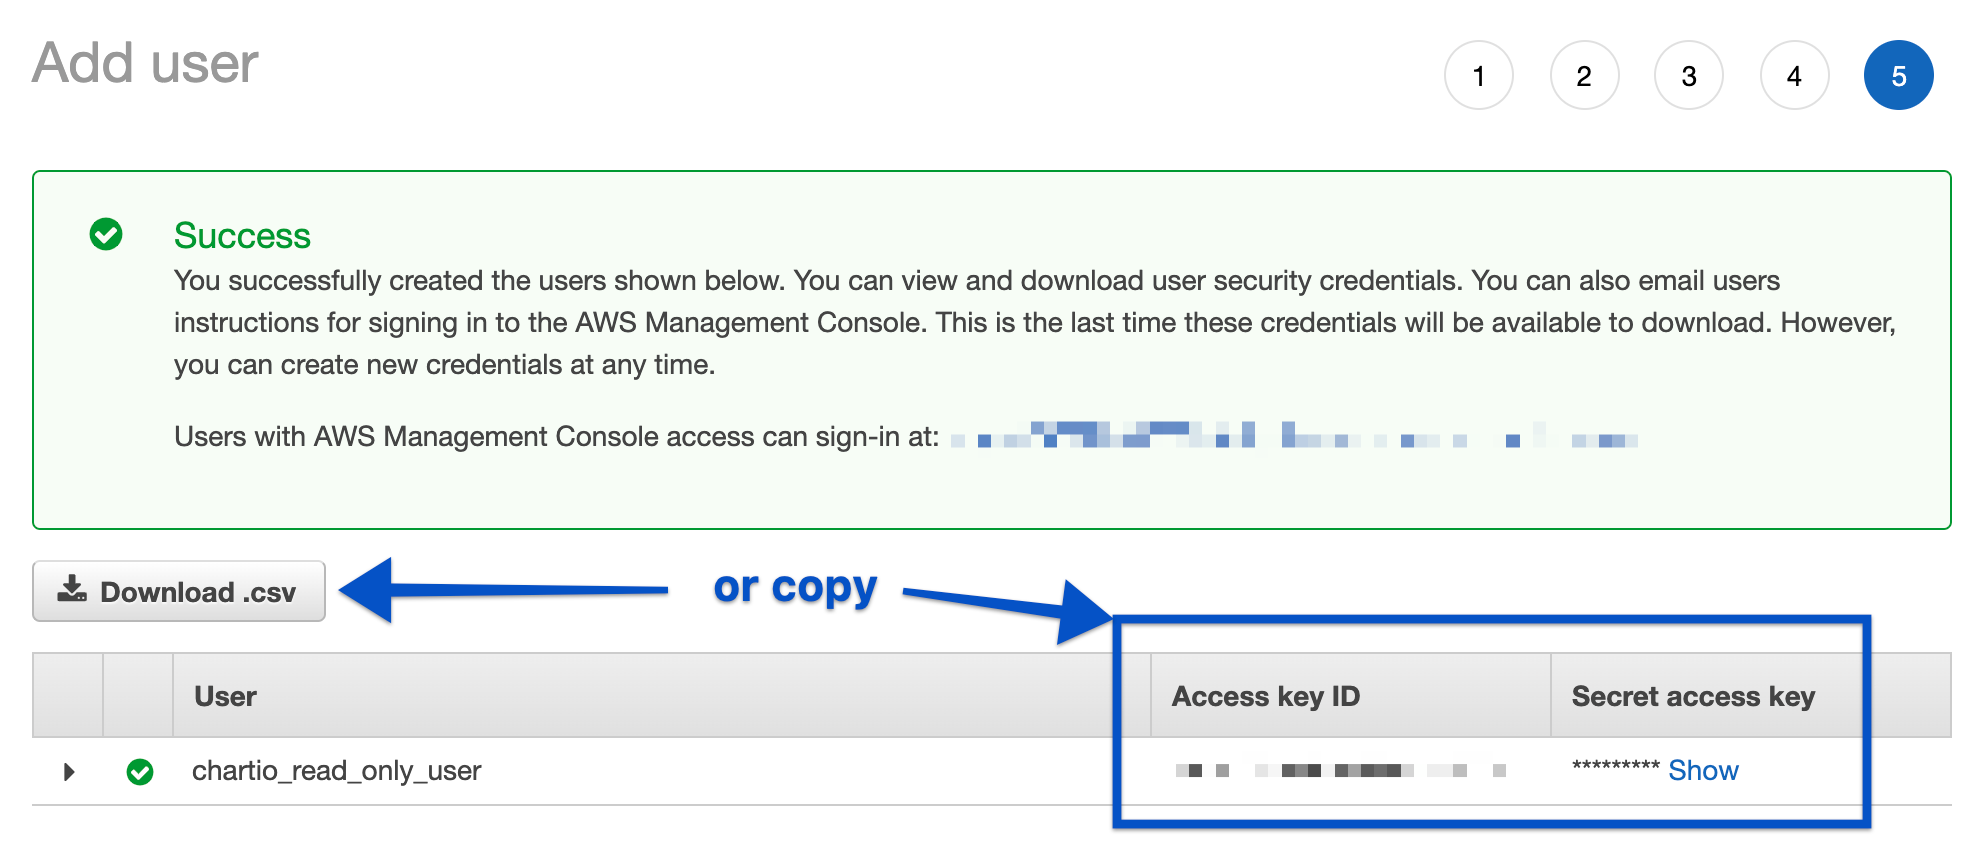
Upon creating the user, an access key will be generated. Copy the Access key ID and the generated Secret access key to a secure location (or download and securely store the info as a CSV file); you’ll need those to connect Athena to Chartio. The secret key can only be accessed from this user creation screen. If you leave the screen without copying the secret key, you’ll need to create a new one.
3. Connect Athena to Chartio
Find and provide the information for the required data source connection form fields.
- AWS Access Key: This is the Access key ID
- AWS Secret Key: The generated Secret access key
- Database name: Specify a specific database or leave blank to bring in all databases
-
Region: To find your AWS region, go to Services > Athena. The region is shown at the right of the top navigation bar. Select the same region in Chartio.

-
S3 Staging Directory: Provide the path to your results bucket in the required format.
If you don’t know the path, go to Services > S3, select the checkbox to the left of your results bucket’s name from the list, then click Copy Bucket ARN. It’ll look something like this:
arn:aws:s3:::my-query-results. Edit it so it follows the required format:s3//my-query-results/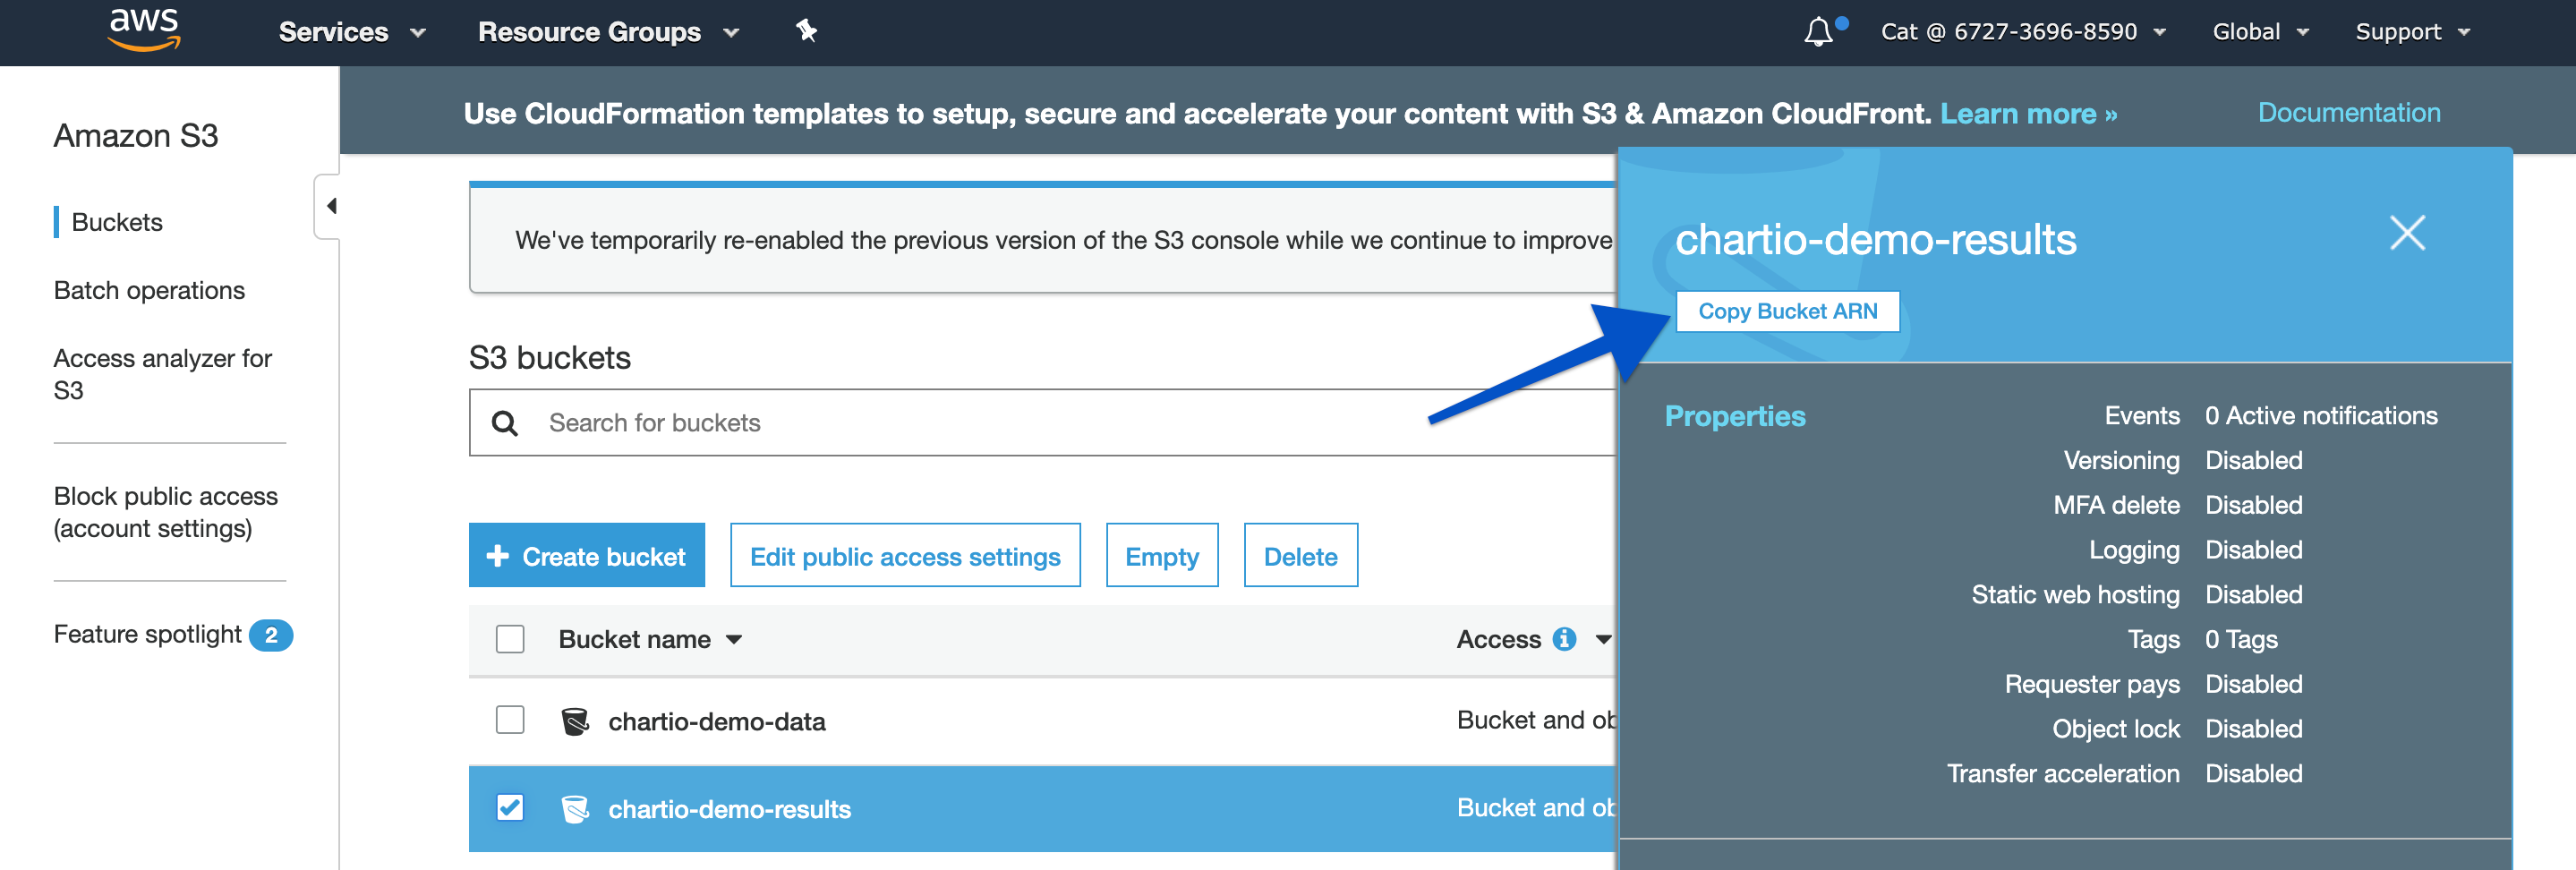
Generate a new access key
- Open your AWS Management Console then click Services > IAM from the left of the top navigation bar.
- Click Users from the left sidebar then click the Chartio user’s name from the list.
-
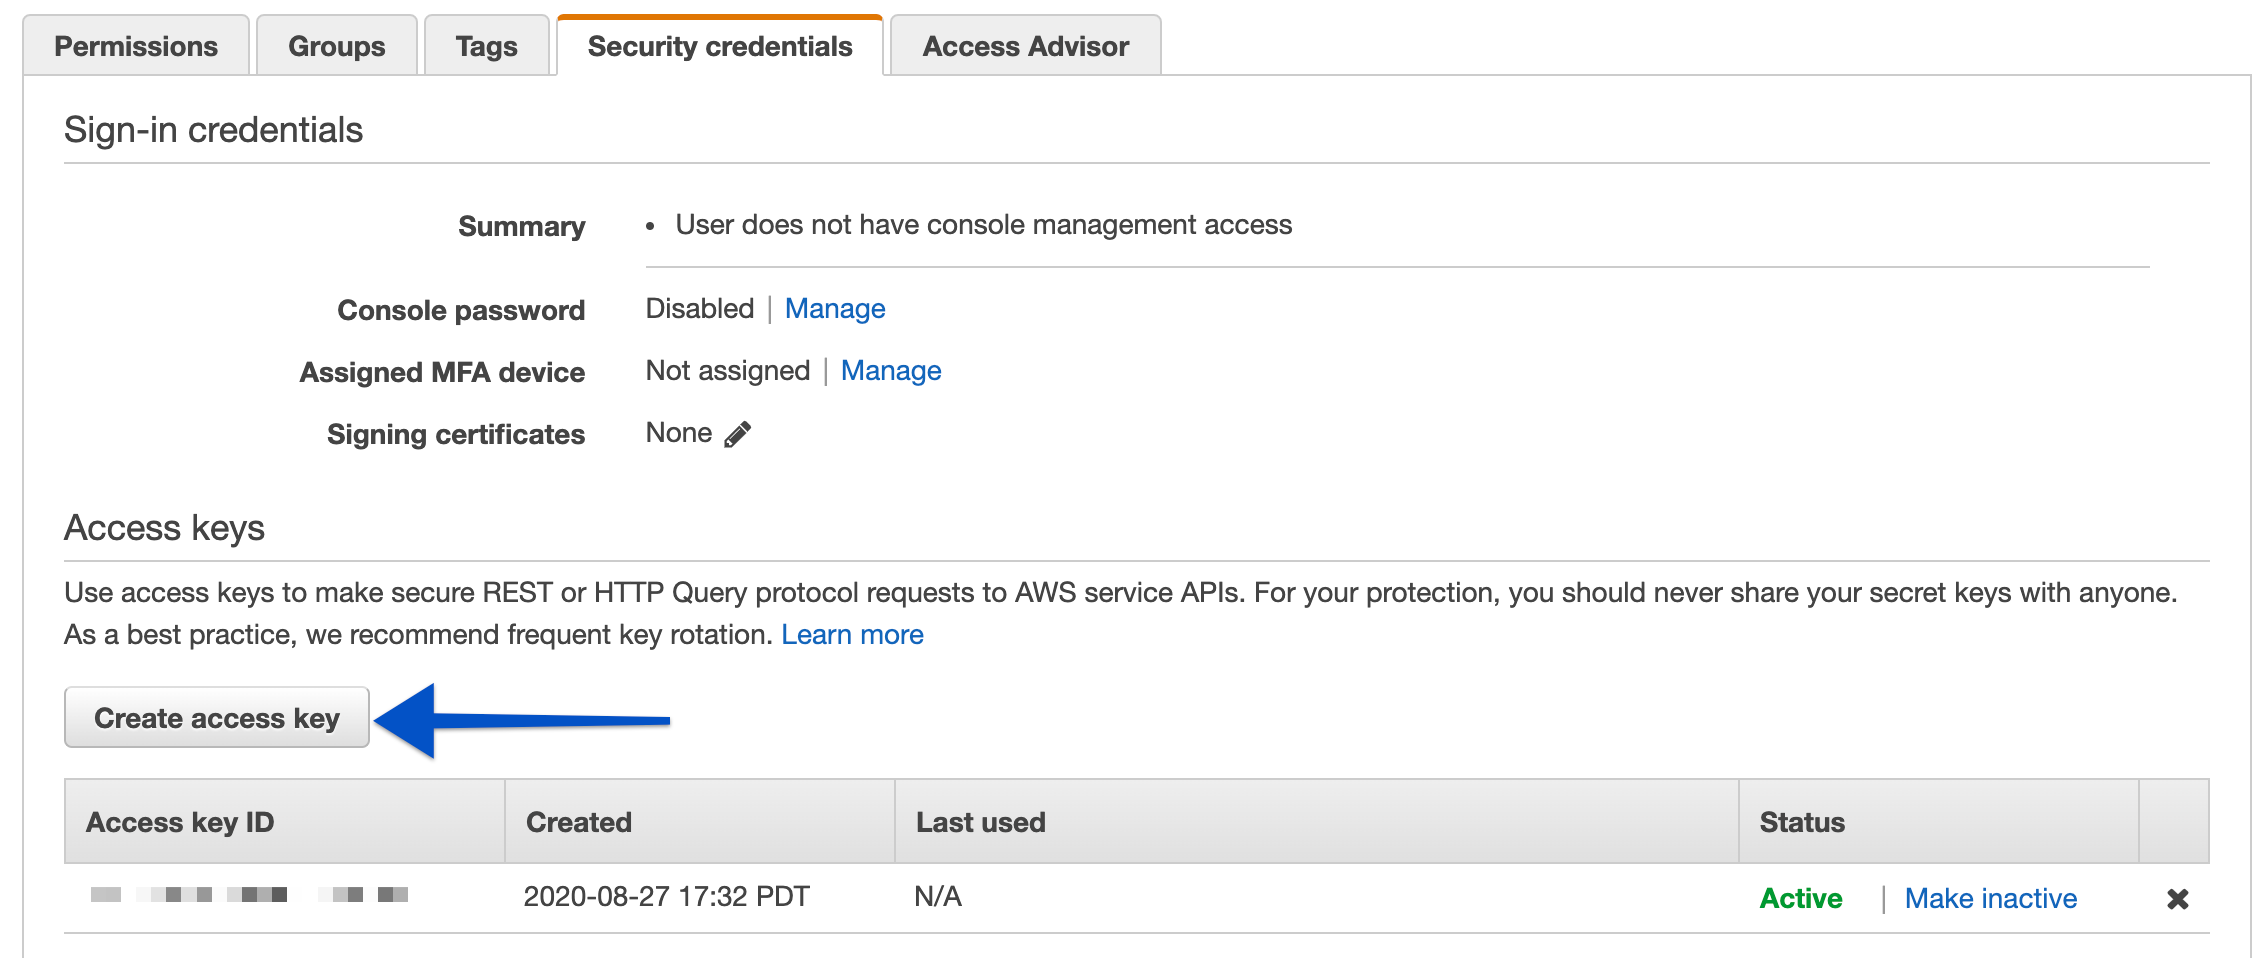
Navigate to the Security Credentials tab then click Create access key.
-
A new access key will be generated. Make sure to copy the Access key ID and the Secret access key; you’ll provide both of these in Chartio’s data source connection form.
