Connect to Amazon Redshift
Check out our step-by-step video showing how to connect your Amazon Redshift data source to Chartio:
Note: If your database server, RDS instance, or Redshift cluster is on a private subnet of an Amazon VPC, follow our VPC connection instructions instead.
1. Allow Chartio’s IP address
Follow the instructions in the Amazon Redshift section of our documentation for how to allow Chartio’s IP address.
2. Create a Redshift read-only user
You will need to create a new user and grant SELECT permissions to the tables the user (i.e., Chartio) will access.
-
To create a new user, go back to the Redshift console and connect the query editor to your data source and run the query below, replacing
<username>and<password>with your new username and password combination.Note: The password must contain at least one uppercase, one lowercase, and one numeric character.
CREATE USER <username> WITH PASSWORD '<password>'; -
To grant select permissions on all tables in a schema, run the query below, replacing
<schema>with the name of your schema and<username>with the user you created above.GRANT SELECT ON ALL TABLES IN SCHEMA <schema> TO <username>;If you’d like to grant SELECT permissions on a table-by-table basis, you can run the query below to generate the queries to
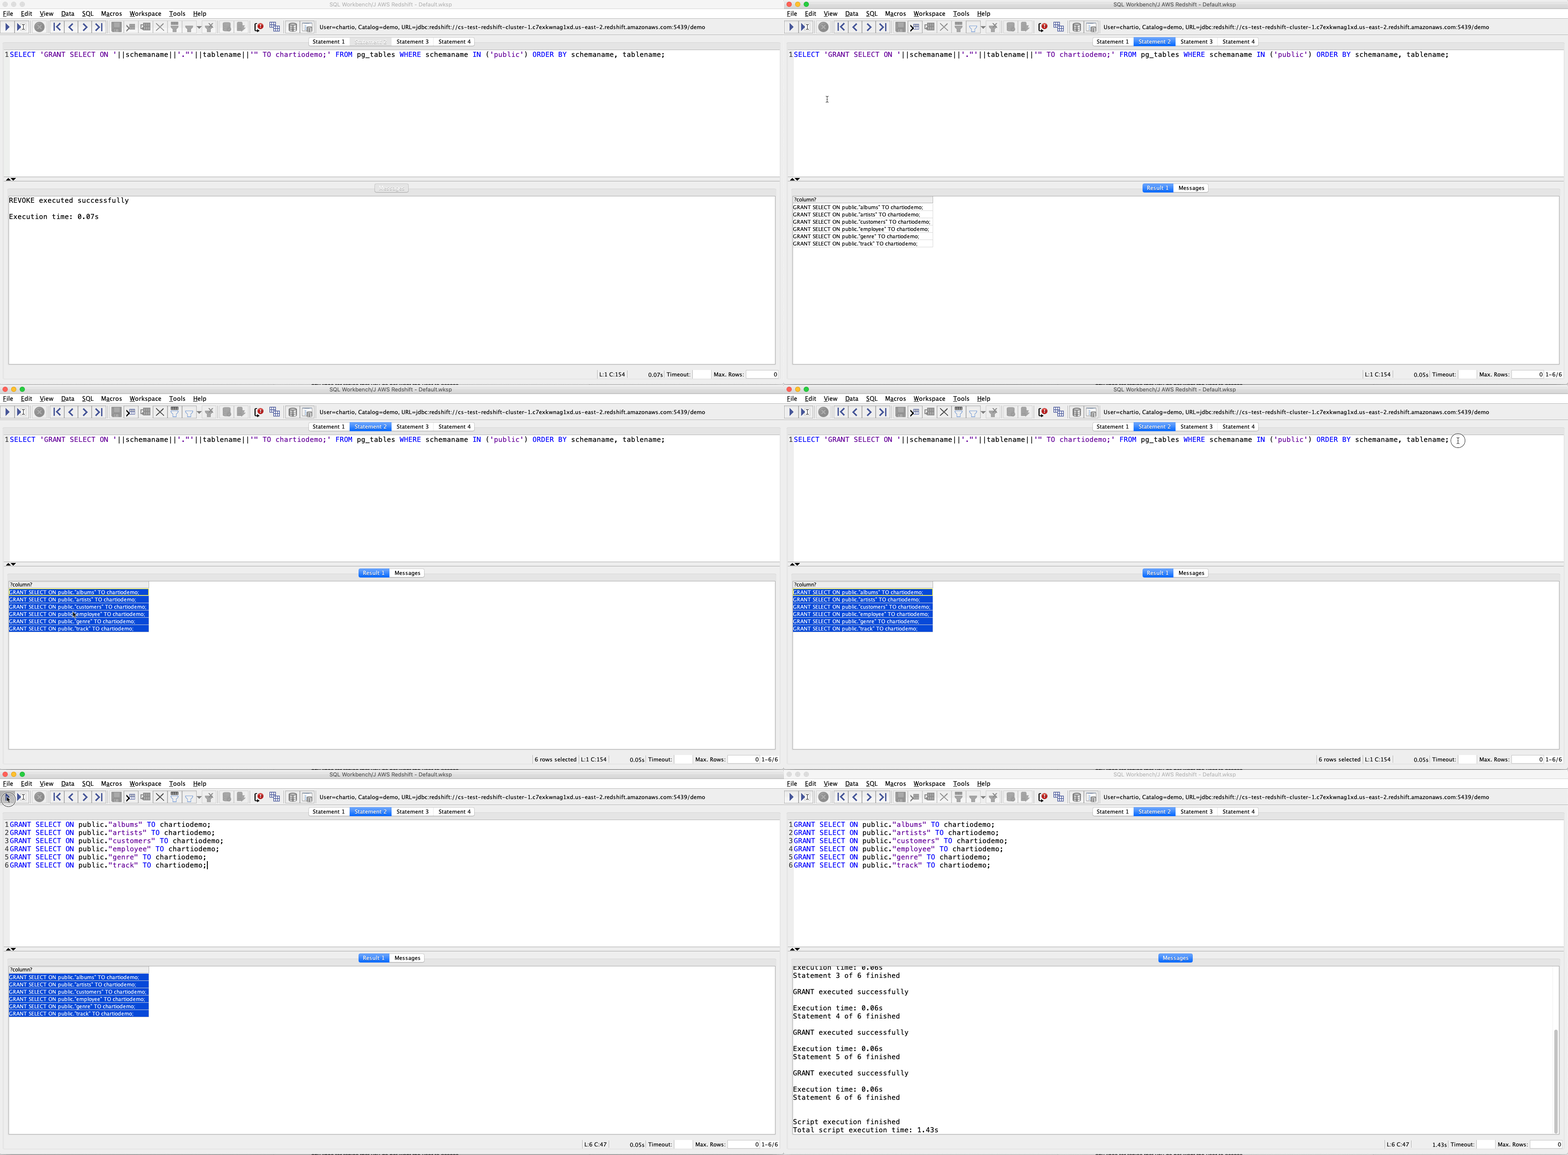
GRANT SELECT ONeach table in a schema. You’ll then need to exclude any grant statements for tables that you don’t want the user to access.NOTE: The AWS Redshift query editor will not run multi-statement queries; it’s recommended you use SQL Workbench to connect to Redshift and run multiple queries at one time.
SELECT 'GRANT SELECT ON '||schemaname||'."'||tablename||'" TO <username>;' FROM pg_tables WHERE schemaname IN ('<schema>') ORDER BY schemaname, tablename;Copy the output of this command and paste it into SQL workbench, but make sure to remove any lines for tables that you do not want the user to access.

3. Connect Amazon Redshift to Chartio
You’ll need to provide the following information in Chartio’s Amazon Redshift connection form to connect your Amazon Redshift data source to Chartio:
-
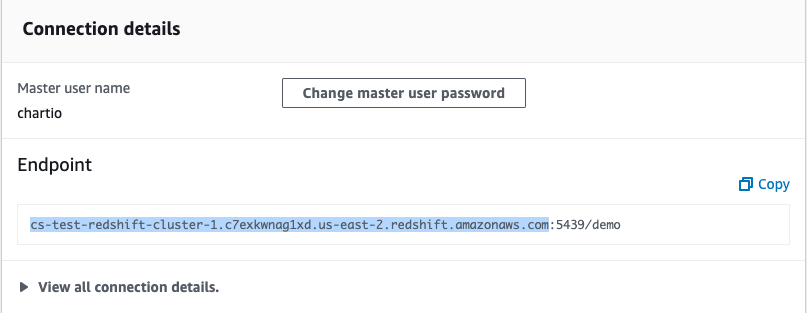
Endpoint: The endpoint of your Redshift cluster database
- Go to the Properties tab of your Redshift Cluster Details page.
-
Under the Connection details section, copy the Endpoint up to but not including the colon (
:).
-
Database Port: default port number for Redshift is
5439From your Redshift Cluster Details page, you can find the port number under the Database configurations section of the Properties tab.
- Username: username of the Redshift read-only user you created previously
- User Password: password of the Redshift read-only user you created
-
Database Name: name of your Redshift database
You can also find your Database Name under the Database configurations section of the Properties tab.
- Schema: optional; leave this field blank if you want to add all schemas to Chartio
After filling in the required form fields, click Connect. Once your schema(s) are pulled in, you can explore your Redshift data in Chartio!
Query comment
To provide more context to where queries to your data source are coming from, Chartio includes a query comment to any queries we send; it looks similar to the following:
{
	"reason":"chart_editor",
	"user_email":"support@chartio.com",
	"datasource_id":123456,
	"dashboard_slug":"my-dashboard",
	"chart_id":1234567,
	"datasource_alias":"my data source",
	"organization_id":12345,
	"dataset_id":1231231,
	"is_manual":false,
	"dataset_name":"Dataset 1",
	"dashboard_id":456456
}
Redshift expiring SSL certificate
Chartio does not check the validity (signing) of their SSL certificate; we only check that you have one for encryption purposes. This shouldn’t affect the Chartio connection, but if you do run into issues with the connection, please let us know and we can investigate further.