Connect to CSV Uploads
A comma-separated values (CSV) file stores tabular data in plain text, where each line of the file is a data record separated by commas. CSV files can be easily uploaded to Chartio, queried, and visualized like any other data source. Uploading multiple CSVs together allows you to use each as a table within the same database. CSVs uploaded to Chartio will be queried in PostgreSQL syntax.
Check out our step-by-step video showing how to connect a CSV file to Chartio:
Preparing your CSV for upload
- File uploads are limited to 100MB each. Larger files can be separated into multiple files and appended.
- Remove extra headers and footers. Your CSV should be in raw table format, with all data arranged in columns and one header row, as shown in our example below.
- The header row should contain no special characters – only numbers, letters, or underscores.
Example Table
| Date | City | Temperature in Celsius |
|---|---|---|
| 9/20/2017 | San Francisco | 19 |
| 9/20/2017 | Austin | 34 |
| 9/21/2017 | San Francisco | 18 |
| 9/21/2017 | Austin | 33 |
When opened in a text editor, the file should be in this format:
Date, City, Temperature in Celsius
9/20/2017, San Francisco, 19
9/21/2017, Austin, 34
9/21/2017, San Francisco, 18
9/21/2017, Austin, 33
Uploading and processing your files
- In the top navigation menu, select Data.
- At the top of your data sources list, click + Add Data Source.
- From the Data Sources list, choose CSV Upload.
-
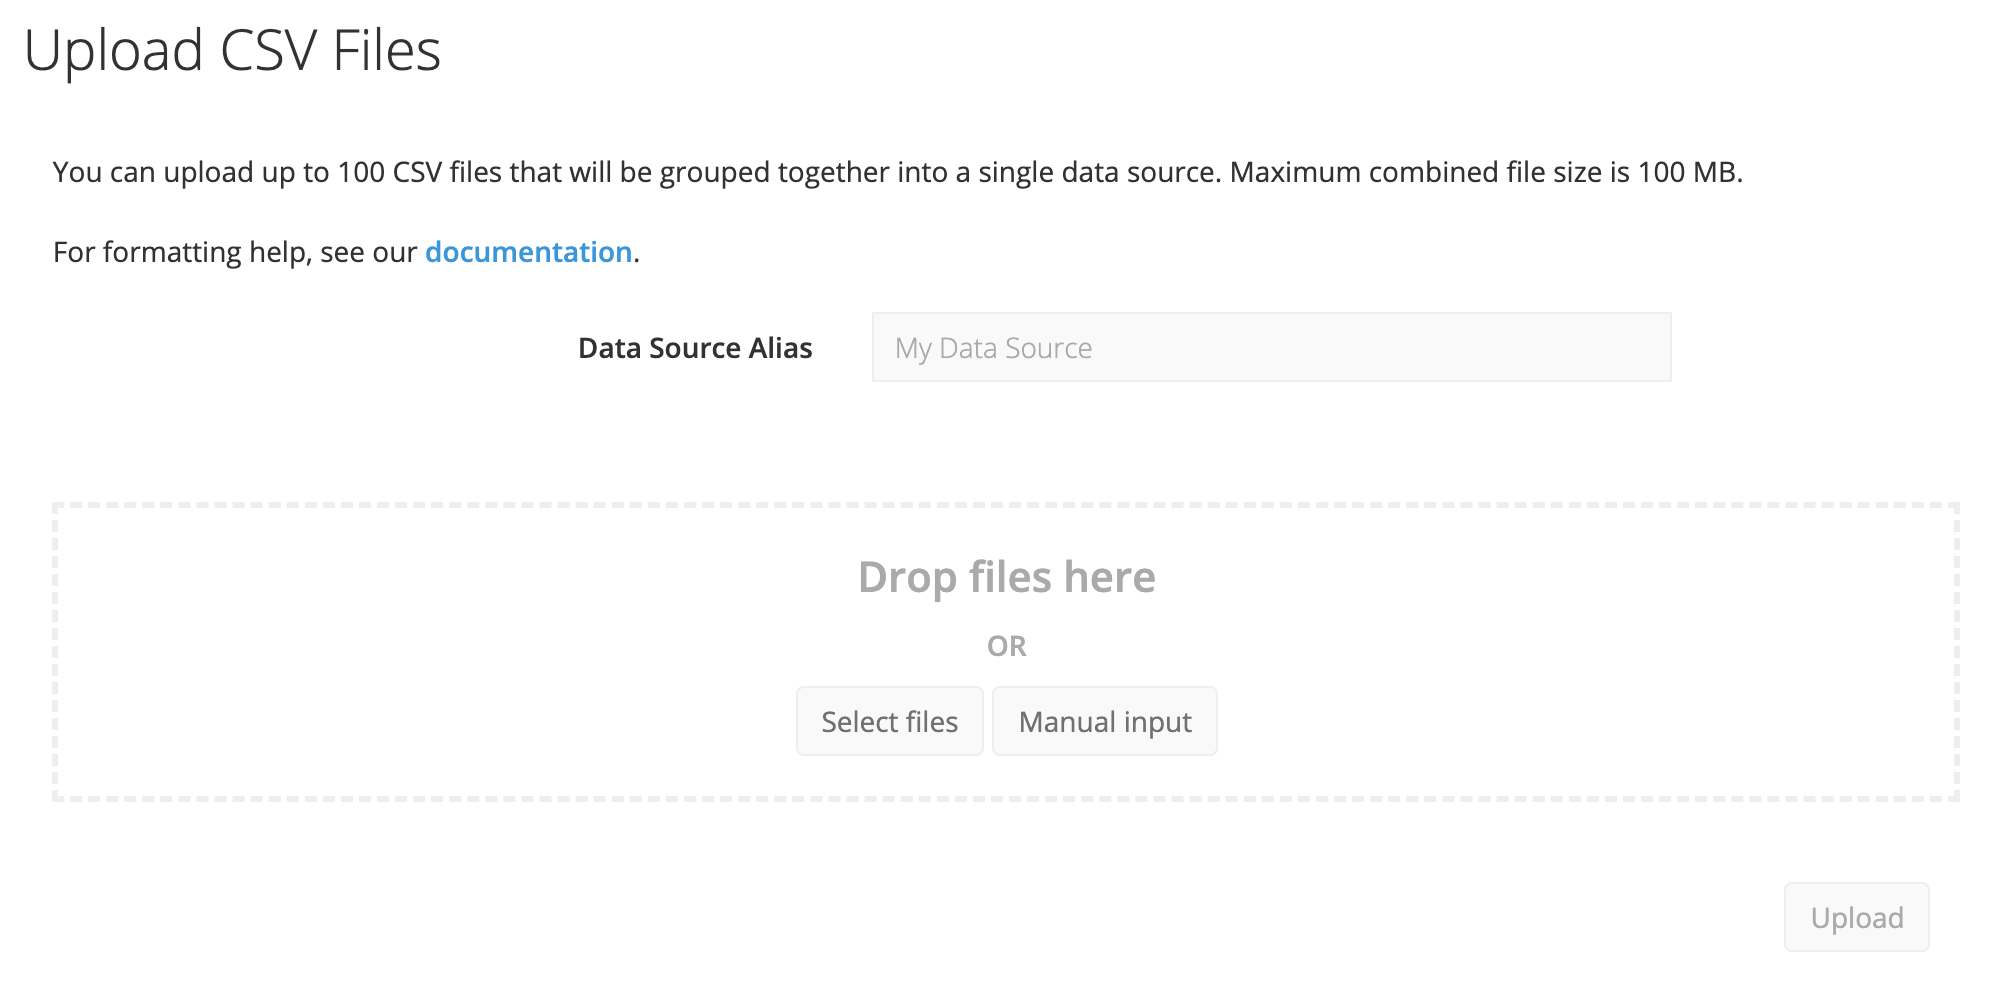
Click Select files and select one or more (up to 100) CSV files then click Open. Alternatively, you could drag-and-drop the files to the uploader or manually input the data.

-
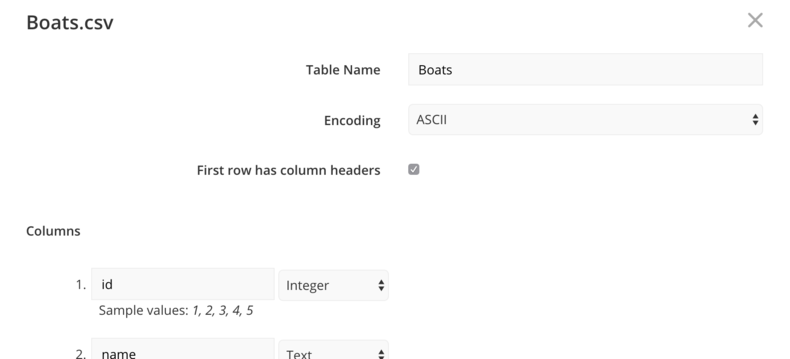
Each file will become a separate table in the CSV data source. Feel free to edit the Table Name. You can also deselect First row has column headers, if applicable, and manually enter your desired header names. Be sure to review the data types Chartio has auto-detected for each column and change them, if necessary.

Chartio tries to guess the date format of your datetime columns, but it’s not always correct. Verify the date format is correct and edit if necessary. Check out our date formatting reference table below if you need more help.

- Click Upload when you’re ready to create the data source.
View the Schema Editor to rename the data source, change the names of individual tables and columns, and create foreign keys between tables.
Adding CSV data to an existing CSV data source
Whenever you make changes to your CSV files, you need to manually upload those modified CSV files to Chartio–unlike Google Sheets, which automatically update in Chartio whenever you change them.
-
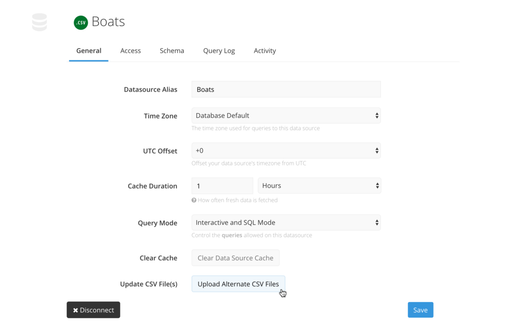
From your data source settings, click Upload Alternate CSV files, located in the General tab.

-
Select whether your new file will append or replace existing data, or create a new table in the CSV data source. You can update the data in an existing CSV in the following ways:
Adding a new CSV table
If you choose to add a new table, you’ll first need to provide the new table name. After that, the steps are similar to Steps 4 - 6 of Uploading and processing your files.
Appending or replacing an existing CSV table
-
If you choose Append or Replace, a dropdown will appear, prompting you to select the table you’d like to update.

- Provide the new file or data to the file uploader.
- Confirm the Encoding type is correct and, if applicable, deselect First row has column headers.
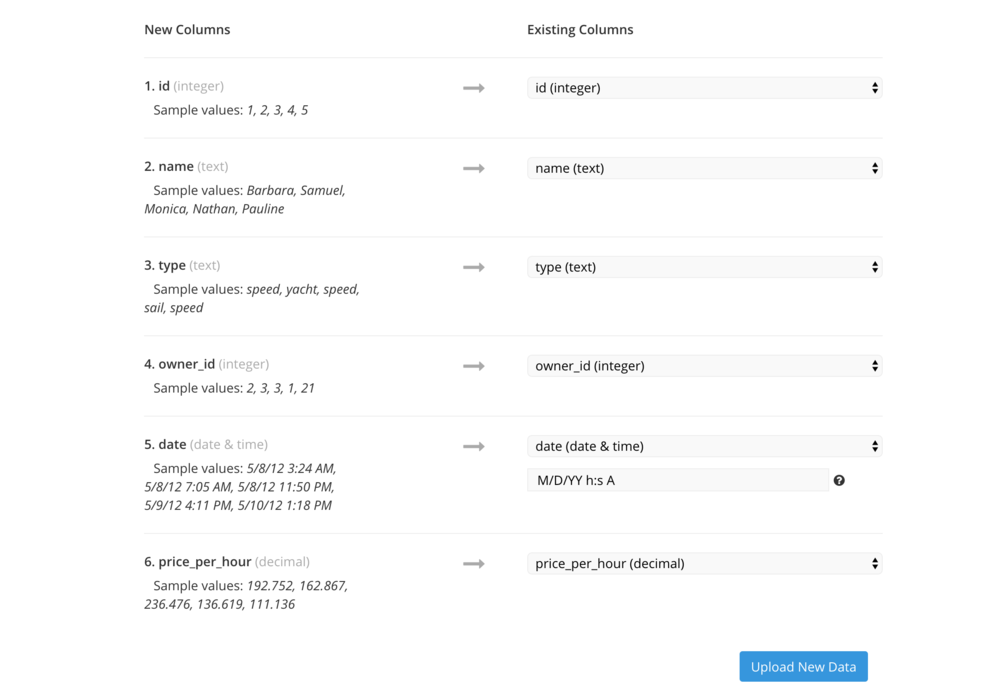
For each new column, you can specify how you want to add it in the table:
-
If you want to map a new column to an existing column, select the column name from the existing columns.
-
If you don’t want to add one of the new columns to the table, select Not used for its mapping.
-
If you want to add one of the new columns but it doesn’t map to an existing column, you can select New column for its mapping and provide the corresponding data type and column name.
Chartio will convert data types to match an existing column’s data type whenever possible.
If you’re replacing the CSV, just make sure all the columns in the existing CSV upload are found in the new CSV. If any columns aren’t mapped when replacing a table, their rows will be wiped during the upload. -
-
When you’re satisfied with the settings and mappings, click Upload New Data.

Date formatting reference
| Token | Example output | |
|---|---|---|
| Year | YYYY | 2000 |
| YY | 00 | |
| Month | MMMM | January..December |
| MMM | Jan..Dec | |
| M | 1..12 or 01..12 | |
| ISO Week | W | 1..53 |
| WW | 01..53 | |
| Day of Month | D | 1..31 or 01..31 |
| Day of Year | DDD | 1..365 or 001..365 |
| Hour (24) | H | 1..24 or 01..24 |
| Hour (12) | h | 1..12 or 01..12 |
| AM / PM | A | AM, PM or am, pm |
| Minute | m | 1..59 or 01..59 |
| Second | s | 1..59 or 01..59 |
| Sub-second | S | 1 or 01 or 001 |
| Timezone | ZZ | -07:00, -06:00 ... +06:00, +07:00 |
| Z | -0700, -0600 ... +0600, +0700 | |
| Unix Timestamp | X | 1381685817 |
Date formatting tips
- Dates can include special characters above by using brackets. For example, Y2015-W01 has the following format:
[Y]YYYY-[W]WW - For 6-digit milliseconds, use
SSS[000]