Connect to Amazon RDS
Check out our step-by-step video showing how to connect Amazon RDS to Chartio:
1. Allow Chartio’s IP address
Follow the instructions in the Amazon RDS section of our documentation for how to allow Chartio’s IP address.
2. Endpoint and port number
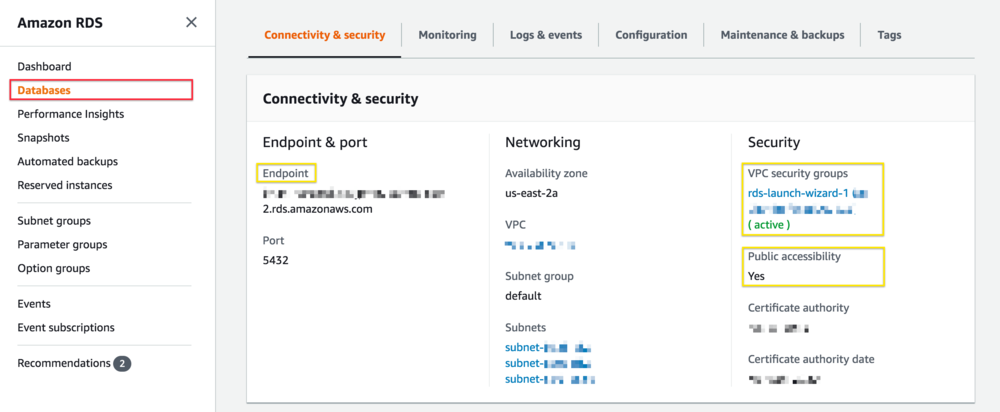
From your database instance’s summary page, copy the RDS endpoint and port number from the Connectivity & security tab. You’ll need this information to complete Chartio’s Amazon RDS connection form.

3. Create a read-only user
Adding Chartio’s external IP to your Security Group allows our server to connect to your RDS instance; however, you still need to provide read-only credentials for authentication. The steps for creating this read-only user depends on your database type. In our video example above, we create a read-only user for a MySQL database.
4. Connect Amazon RDS to Chartio
You’re nearly done! Now that you have all the info, provide the required information to the Amazon RDS connection form in Chartio.
Paste the endpoint and port number you copied previously and supply the credentials for your read-only user.
As you complete each field, Chartio verifies the information you’ve provided with your server. If there are any problems, Chartio displays an error to help you troubleshoot.
After you’ve provided the required fields, click Connect.
Now you can start exploring the data of your RDS instance in Chartio!