Connect to Google BigQuery
Check out our step-by-step video showing how to connect BigQuery to Chartio:
To connect your BigQuery account to Chartio, you’ll need to set up a Service Account and upload the generated key to Chartio.
1. Create a Service Account
You can choose to set either project-level permissions or dataset-level permissions for your service account, so follow the respective instructions to set the appropriate roles for your service account.
Project-level permissions
- Log in to Google Cloud Platform and navigate to the project you want to use in Chartio.
-
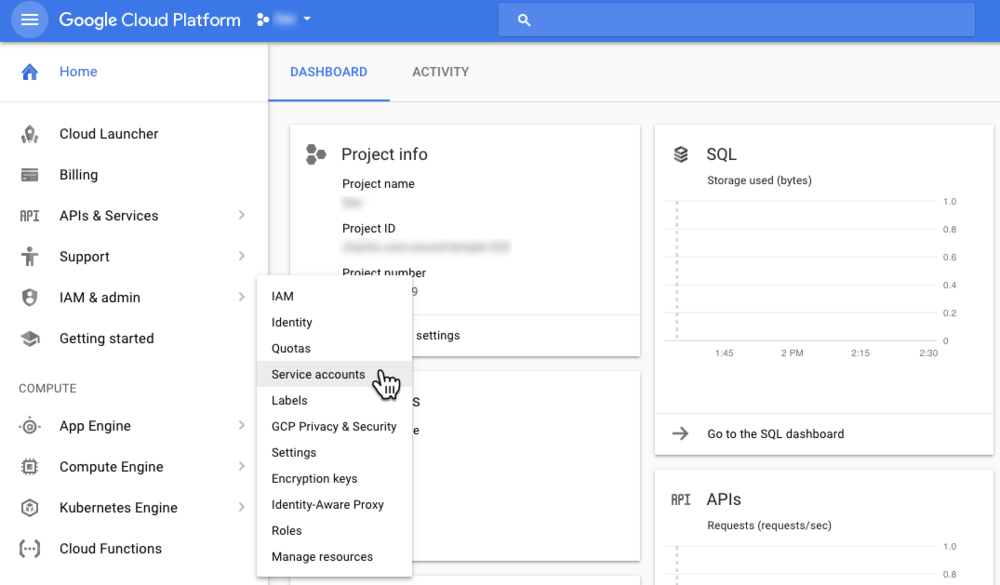
In the sidebar, select IAM & admin and choose Service accounts.
-
Click Create Service Account.
-
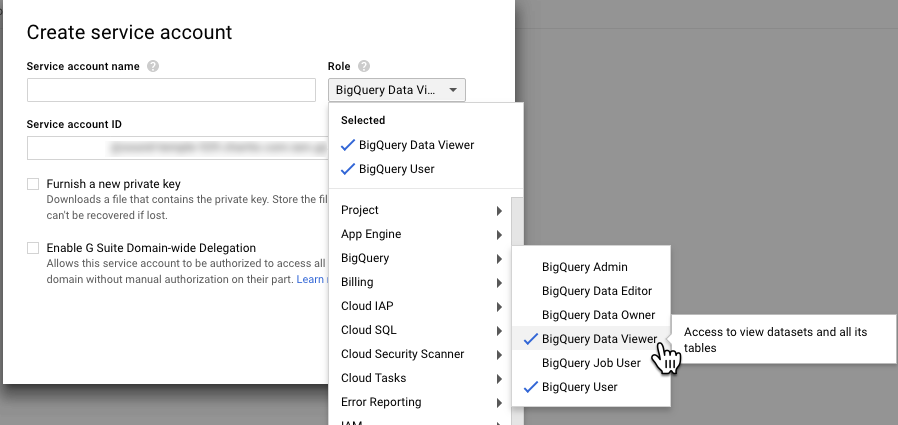
Enter a service account name —- you may want to name it “Chartio” so you can remember its purpose later.
Under Role, select BigQuery Data Viewer and BigQuery User. Ensure both roles are selected; if either are missing, Chartio will be unable to connect to your BigQuery data. Once added, click Continue.
Note: It is possible to use only the BigQuery User role but that service account would need to be added to each dataset individually.
- Click + CREATE KEY, select JSON for the Key type, then click Create.
-
Your key is generated and downloaded to your machine. Save the JSON file to a secure location, or delete it after uploading the key to Chartio.
If you have multiple BigQuery projects you’d like to associate with a single service account, follow our instructions below for accessing multiple projects.
2. Connect Google BigQuery to Chartio
1. Upload key to Chartio
In Chartio, select Data > Add Data Source > Google BigQuery and upload the JSON file you downloaded in the previous step. Note: It can take a few minutes for Google to accept the JSON key. If you get an error uploading the JSON file to Chartio, wait a few minutes and try again.

2. Finish connecting
Provide an Alias for your data source, verify the Project ID, and specify the Maximum Bytes Billed, which limits queries over the specified size for billing purposes.
Dataset-level permissions
Rather than granting project-level permissions, you can alternatively grant dataset-level permissions. We highly recommend doing this if your project hits our maximum table/column limits.
1. Create a custom role
-
Log in to Google Cloud Platform and navigate to the project you want to use in Chartio.
-
In the sidebar, select IAM & admin and choose Roles.
-
From the top of the screen, click Create Role.
-
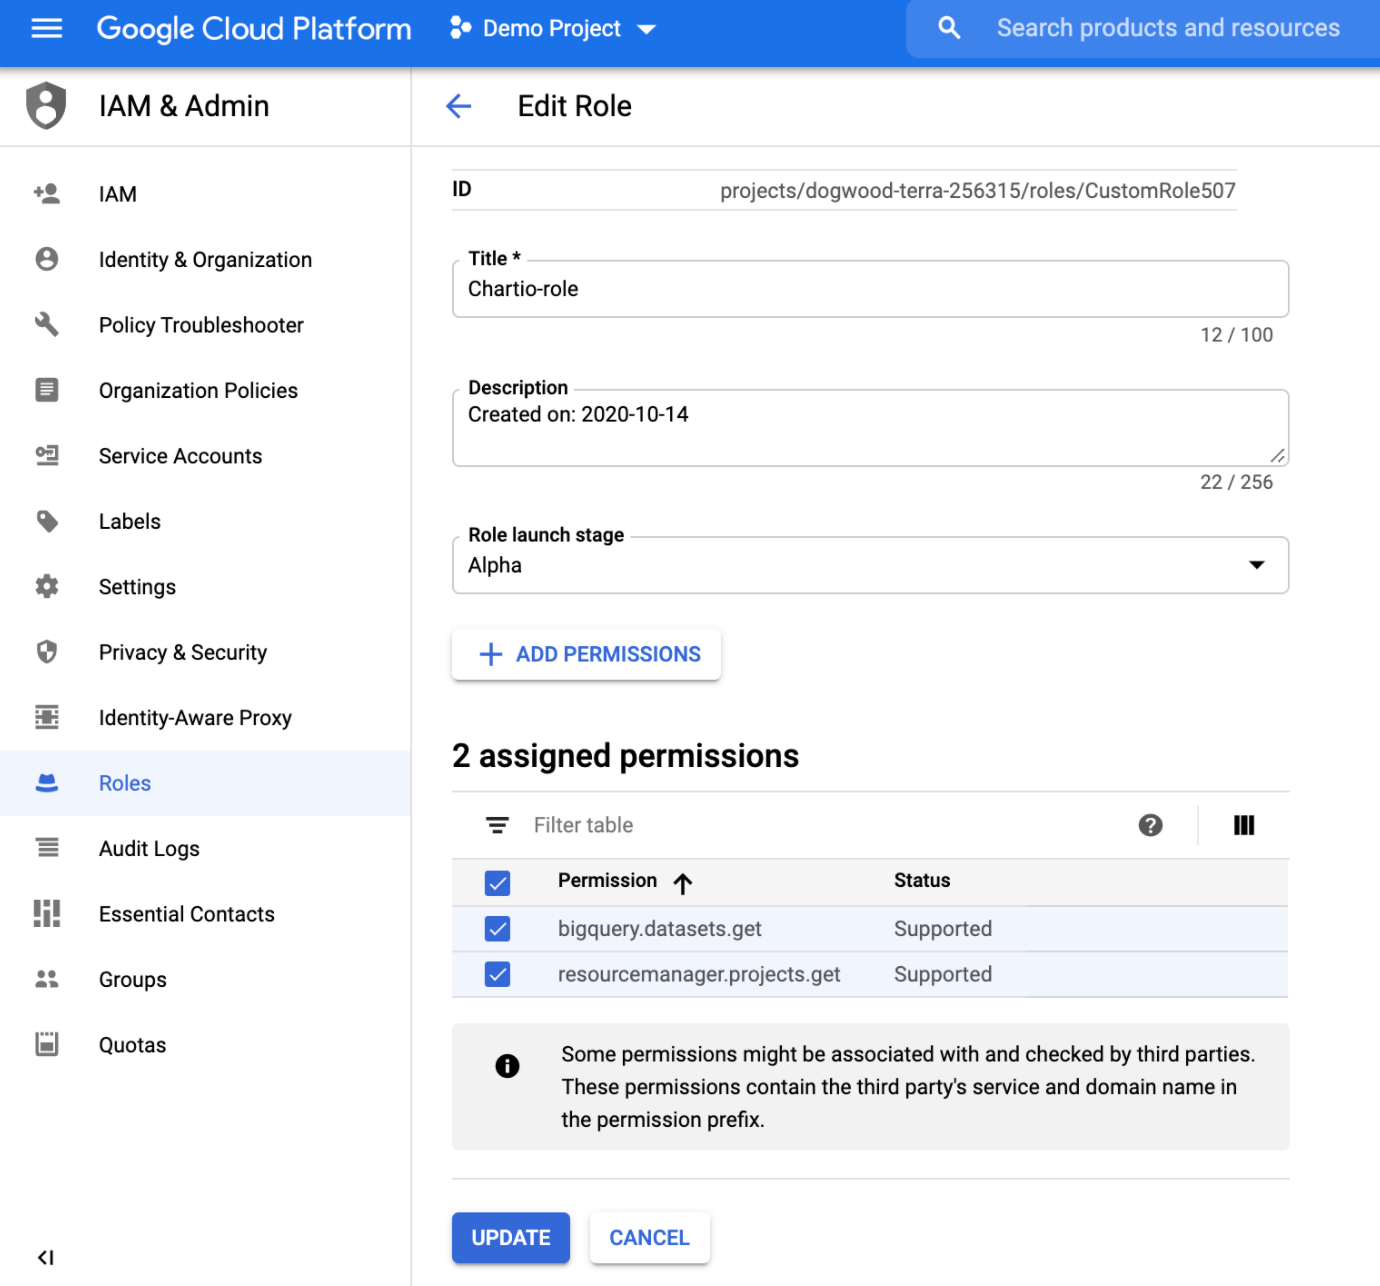
Provide a name in the Title field (e.g.,
chartio-role) and an optional Description. -
Click Add Permissions and add the following permissions to the role:
- bigquery.jobs.create
- resource manager.projects.get
-
Click Create to create the custom role.
2. Assign the role to a service account
Assign your newly created custom role to a new service account or to an existing one.
Create a new service account
-
In the GCP sidebar, select IAM & admin and choose Service accounts.

-
Click Create Service Account.
-
Enter a service account name—you may want to name it “Chartio” so you can remember its purpose later—then click Create.
-
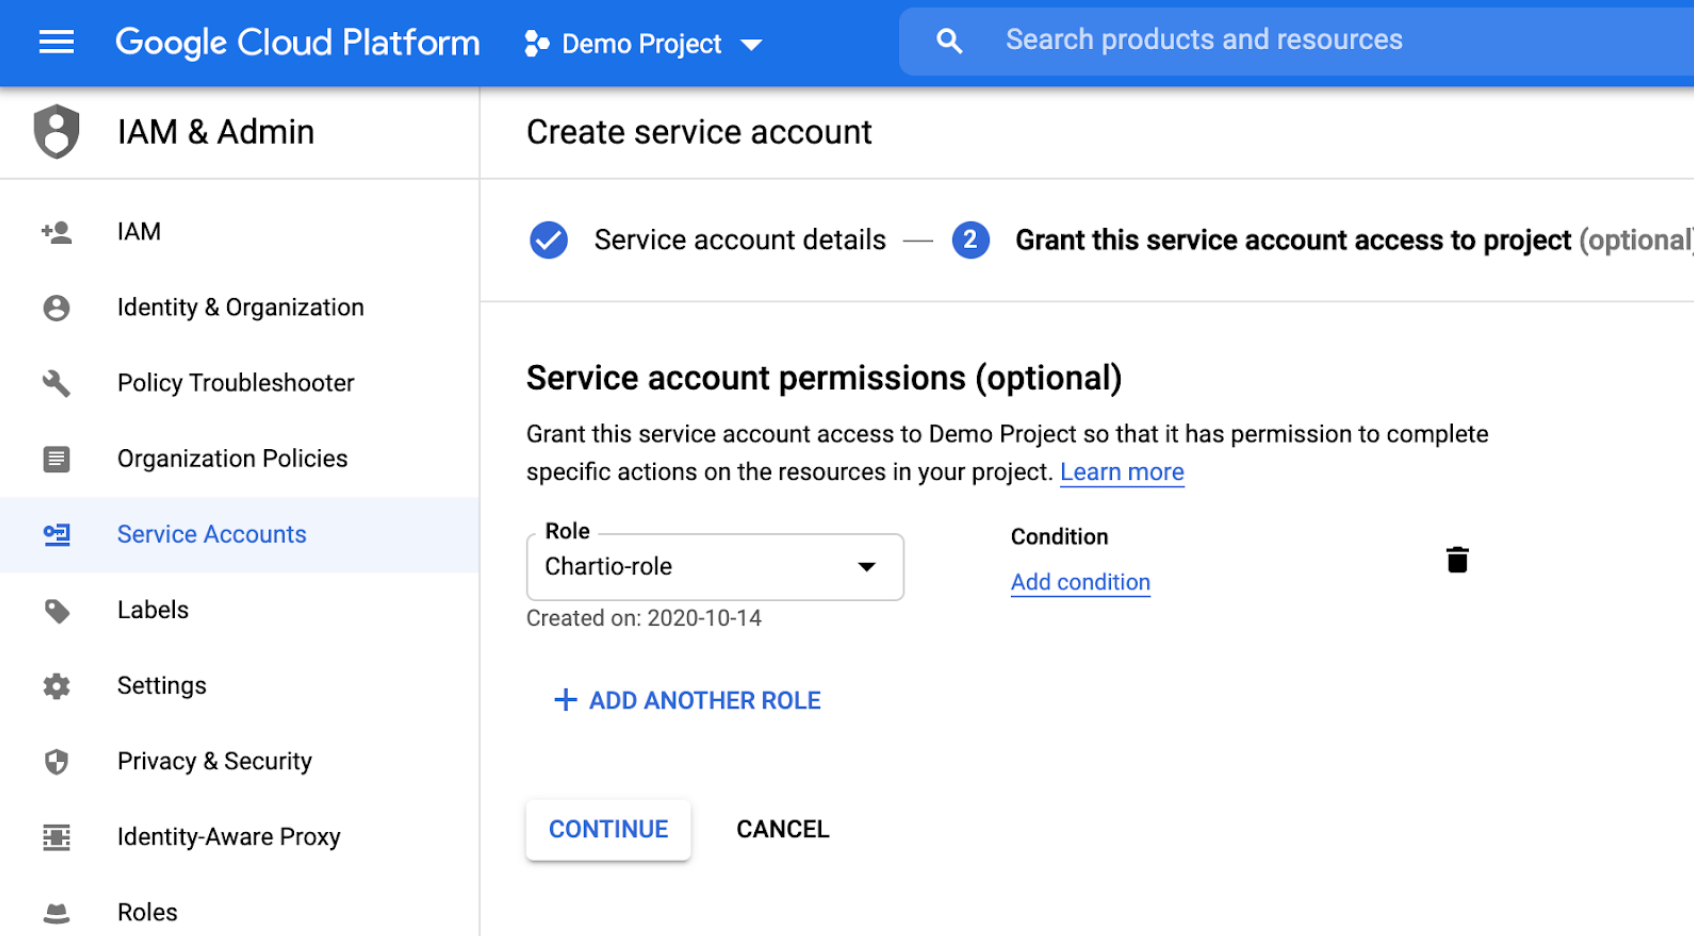
For the Role, select the custom role you created previously then click Continue.
-
Click Done.
-
Click the name of your newly created service account then click Add Key > Create new key, select JSON for the Key type, then click Create.
-
Your key is generated and downloaded to your machine. Save the JSON file to a secure location, or delete it after uploading the key to Chartio.
-
Copy the Email name associated with the newly created service account.
Assign to an existing service account
Rather than creating a new service account, you can add the custom role to an existing service account. If you’ve already created a new service account, skip to Step 3.
-
From the GCP sidebar, click IAM & Admin > IAM.
-
Select the service account you’d like to use for restricting dataset access and click the Pencil icon to edit it.
-
Assign the custom role you created then click Save.

3. Restricting datasets
Navigate back to your BigQuery instance (make sure you’re still in the same project) and follow these steps:
-
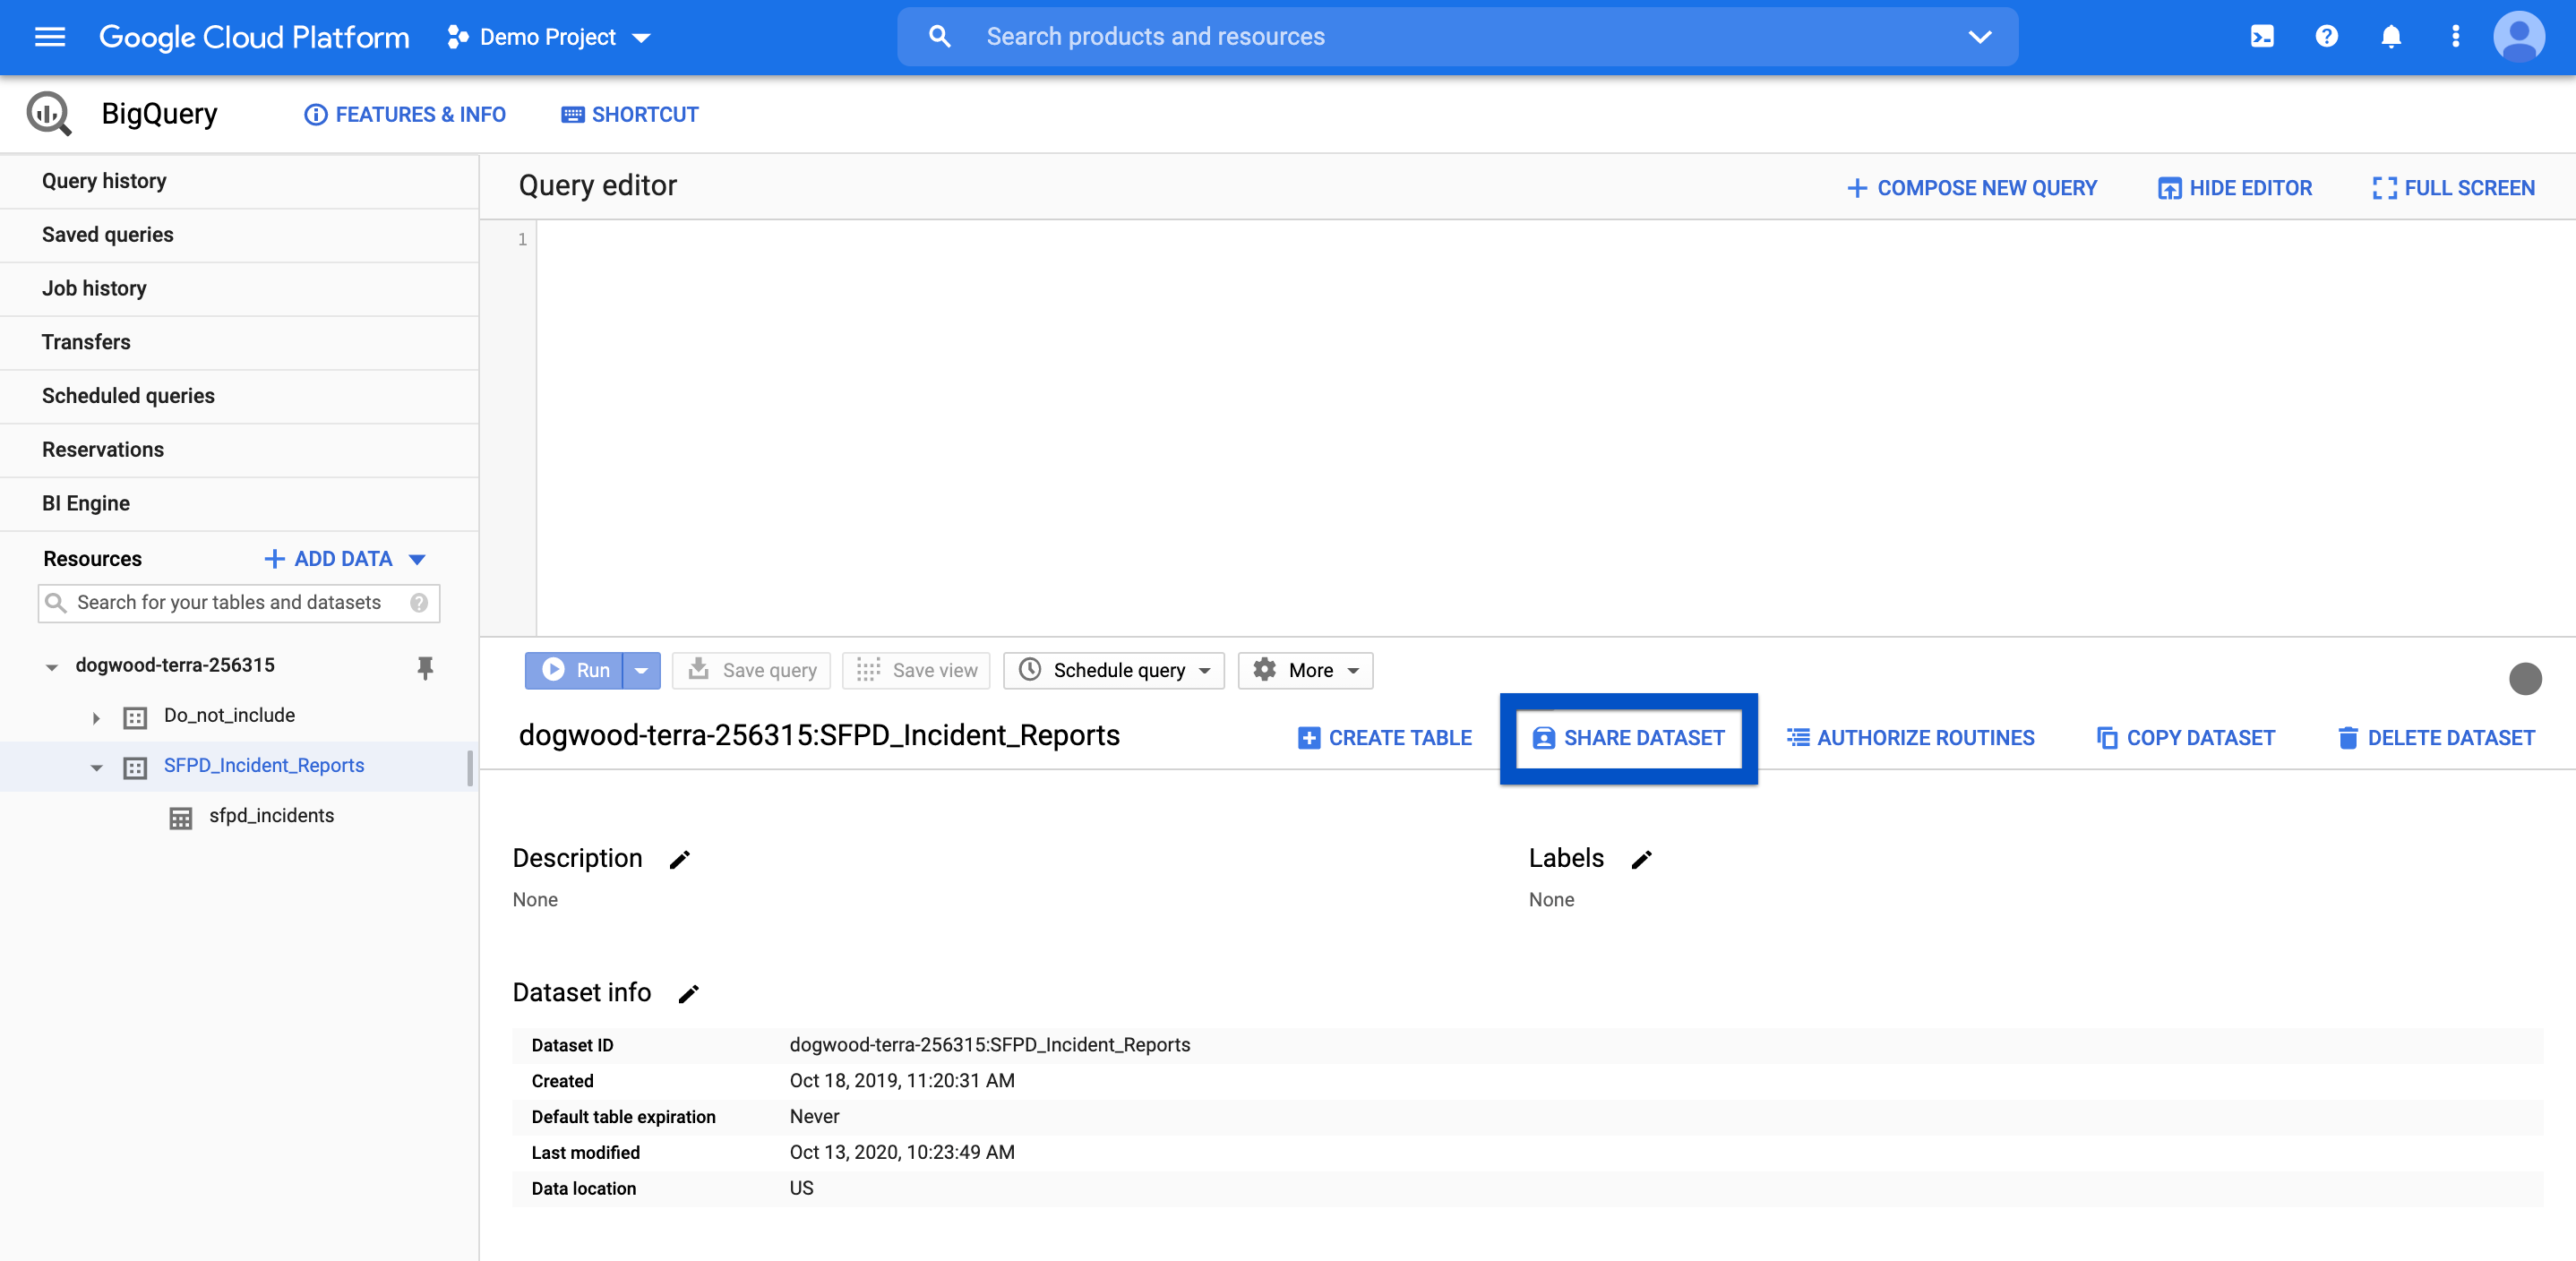
Select your dataset then click Share Dataset to continue.
-
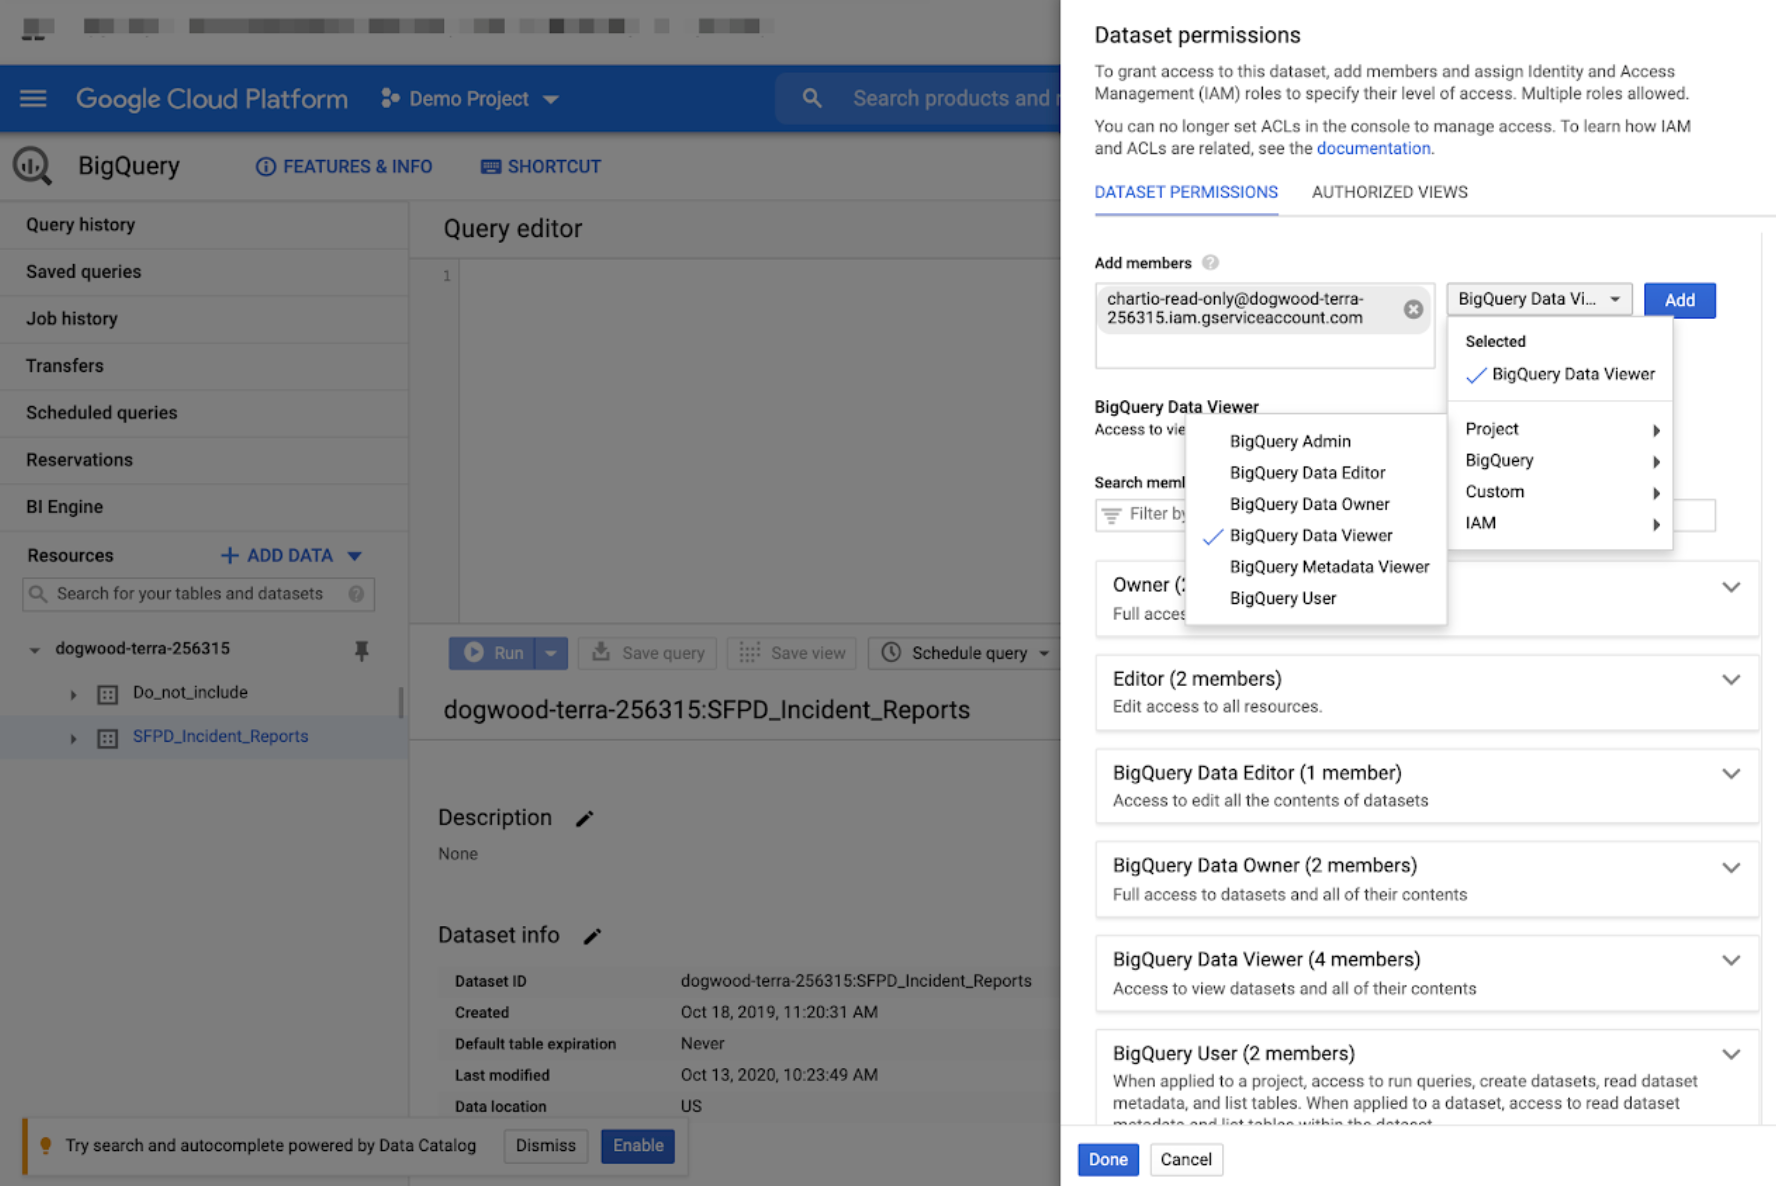
In the “Add Members” field, paste in the Service Account email address that you copied earlier (see Step 7 of assigning your custom role to a new service account).
-
From the “Select a role” dropdown, select BigQuery Data Viewer.
-
Click Add then click Done.
Now that your Service Account is created, follow the remaining instructions for connecting your BigQuery database to Chartio.
Access multiple projects
To access additional BigQuery projects with a single Service Account, you’ll need to add the client ID to the additional projects from the Google Cloud Platform console.
- From Google Cloud Platform, select IAM & admin > IAM from the sidebar.
-
Find the service account and copy the member name.

- Switch to another project you want to connect to Chartio, and click Add at the top of the page.
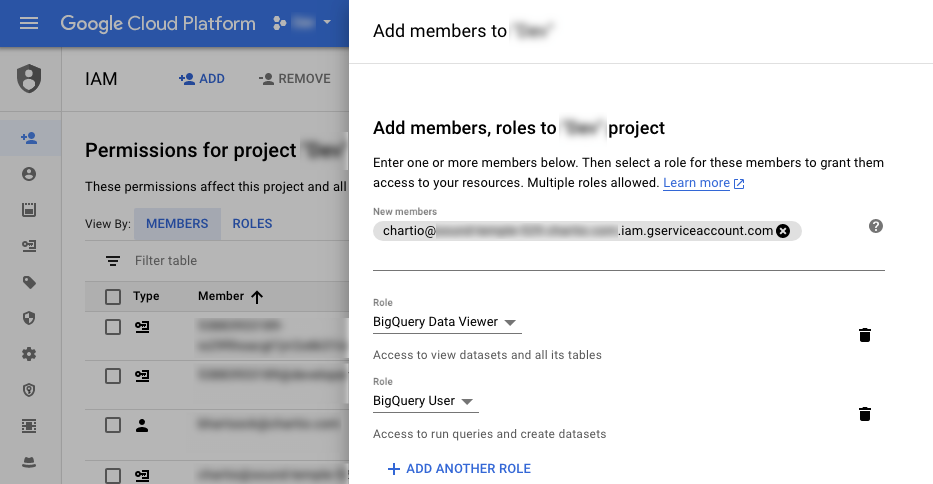
- In the Members field, paste the member name you copied earlier.
-
Under Role, select BigQuery User and BigQuery Data Viewer.
- Once this is finished, you can use the same JSON file you downloaded earlier to connect your second BigQuery project to Chartio.
Google BigQuery SQL Syntax
Google BigQuery uses its own proprietary SQL, so you need to use that syntax when creating queries in SQL Mode. If you need help, you can refer to Google BigQuery’s Standard SQL Query Syntax documentation.
Google Sheets via BigQuery
If you’ve added Google Sheets tables to your BigQuery project, you can query them in Chartio from your BigQuery connection after a few settings updates. Your BigQuery account must use a service account connection to enable this feature.
Enable Google Drive API in the project
- Log in to your Google Cloud Console.
- Select your project from the top dropdown.
- From the left navigation, choose APIs & Services > Dashboard.
- At the top of the page, click Enable APIs and Services.
- Use the search bar to search for Google Drive API. Select it, and click Enable.
Add service account client ID to the Google Sheet
- From your Google Cloud Console, select IAM & admin > Service accounts from the left sidebar.
- Copy the value in the Service account ID column. If you don’t have a service account yet, follow the instructions above for creating a BigQuery service account.
- Open your Google Sheet and click on the Share button.
- Click Advanced at the bottom of the pop-up. In the Invite people text input, enter the Service account ID value you copied earlier.
BigQuery job labels
To provide more context to where queries to your data source are coming from, Chartio includes job labels to any queries we send. Unfortunately, you can’t view these labels in the BQ console, but you can use the command line tool to see them. Check out the BQ documentation for more info.
Note: We previously used query comments but found BigQuery’s job labels to be more cache-friendly and less costly for our BigQuery customers.
The job labels we send look similar to the following:
{
	"reason":"chart_editor",
	"user_email":"support@chartio.com",
	"datasource_id":123456,
	"dashboard_slug":"my-dashboard",
	"chart_id":1234567,
	"datasource_alias":"my data source",
	"organization_id":12345,
	"dataset_id":1231231,
	"is_manual":false,
	"dataset_name":"Dataset 1",
	"dashboard_id":456456
}
