Use 12-hour format with AM and PM labels
To bucket data by hour of the day and to display it in a 12-hour format, set the columns to 12-hour clock, with AM and PM labels.
In the Visual SQL interface
-
Add the datetime column to your query and select Hour of Day in the column’s Aggregation menu in the Result Table.
-
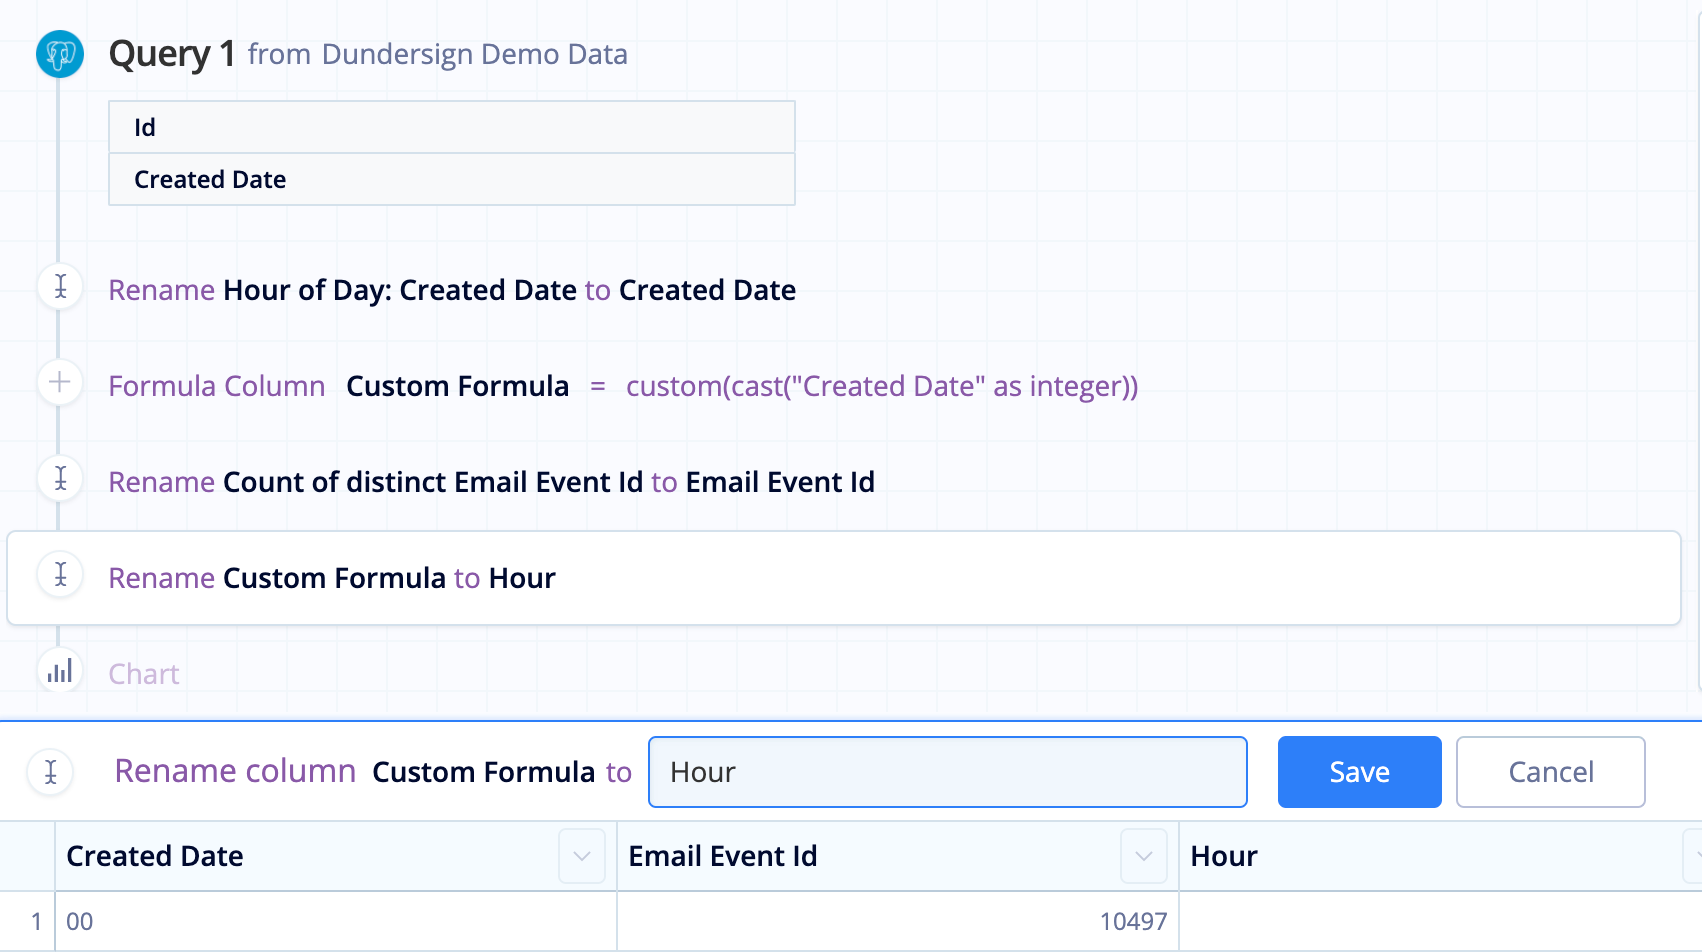
Add a Formula Column Action in the Pipeline, select Custom as the formula type and use the following formula to cast the datetime column as an integer (replace
Created Datewith the name of your column).cast("Created Date" as integer) -
For clarity, we renamed our newly added Custom Formula column to “Hour” using a Rename Column Action; however, renaming the column is optional.
-
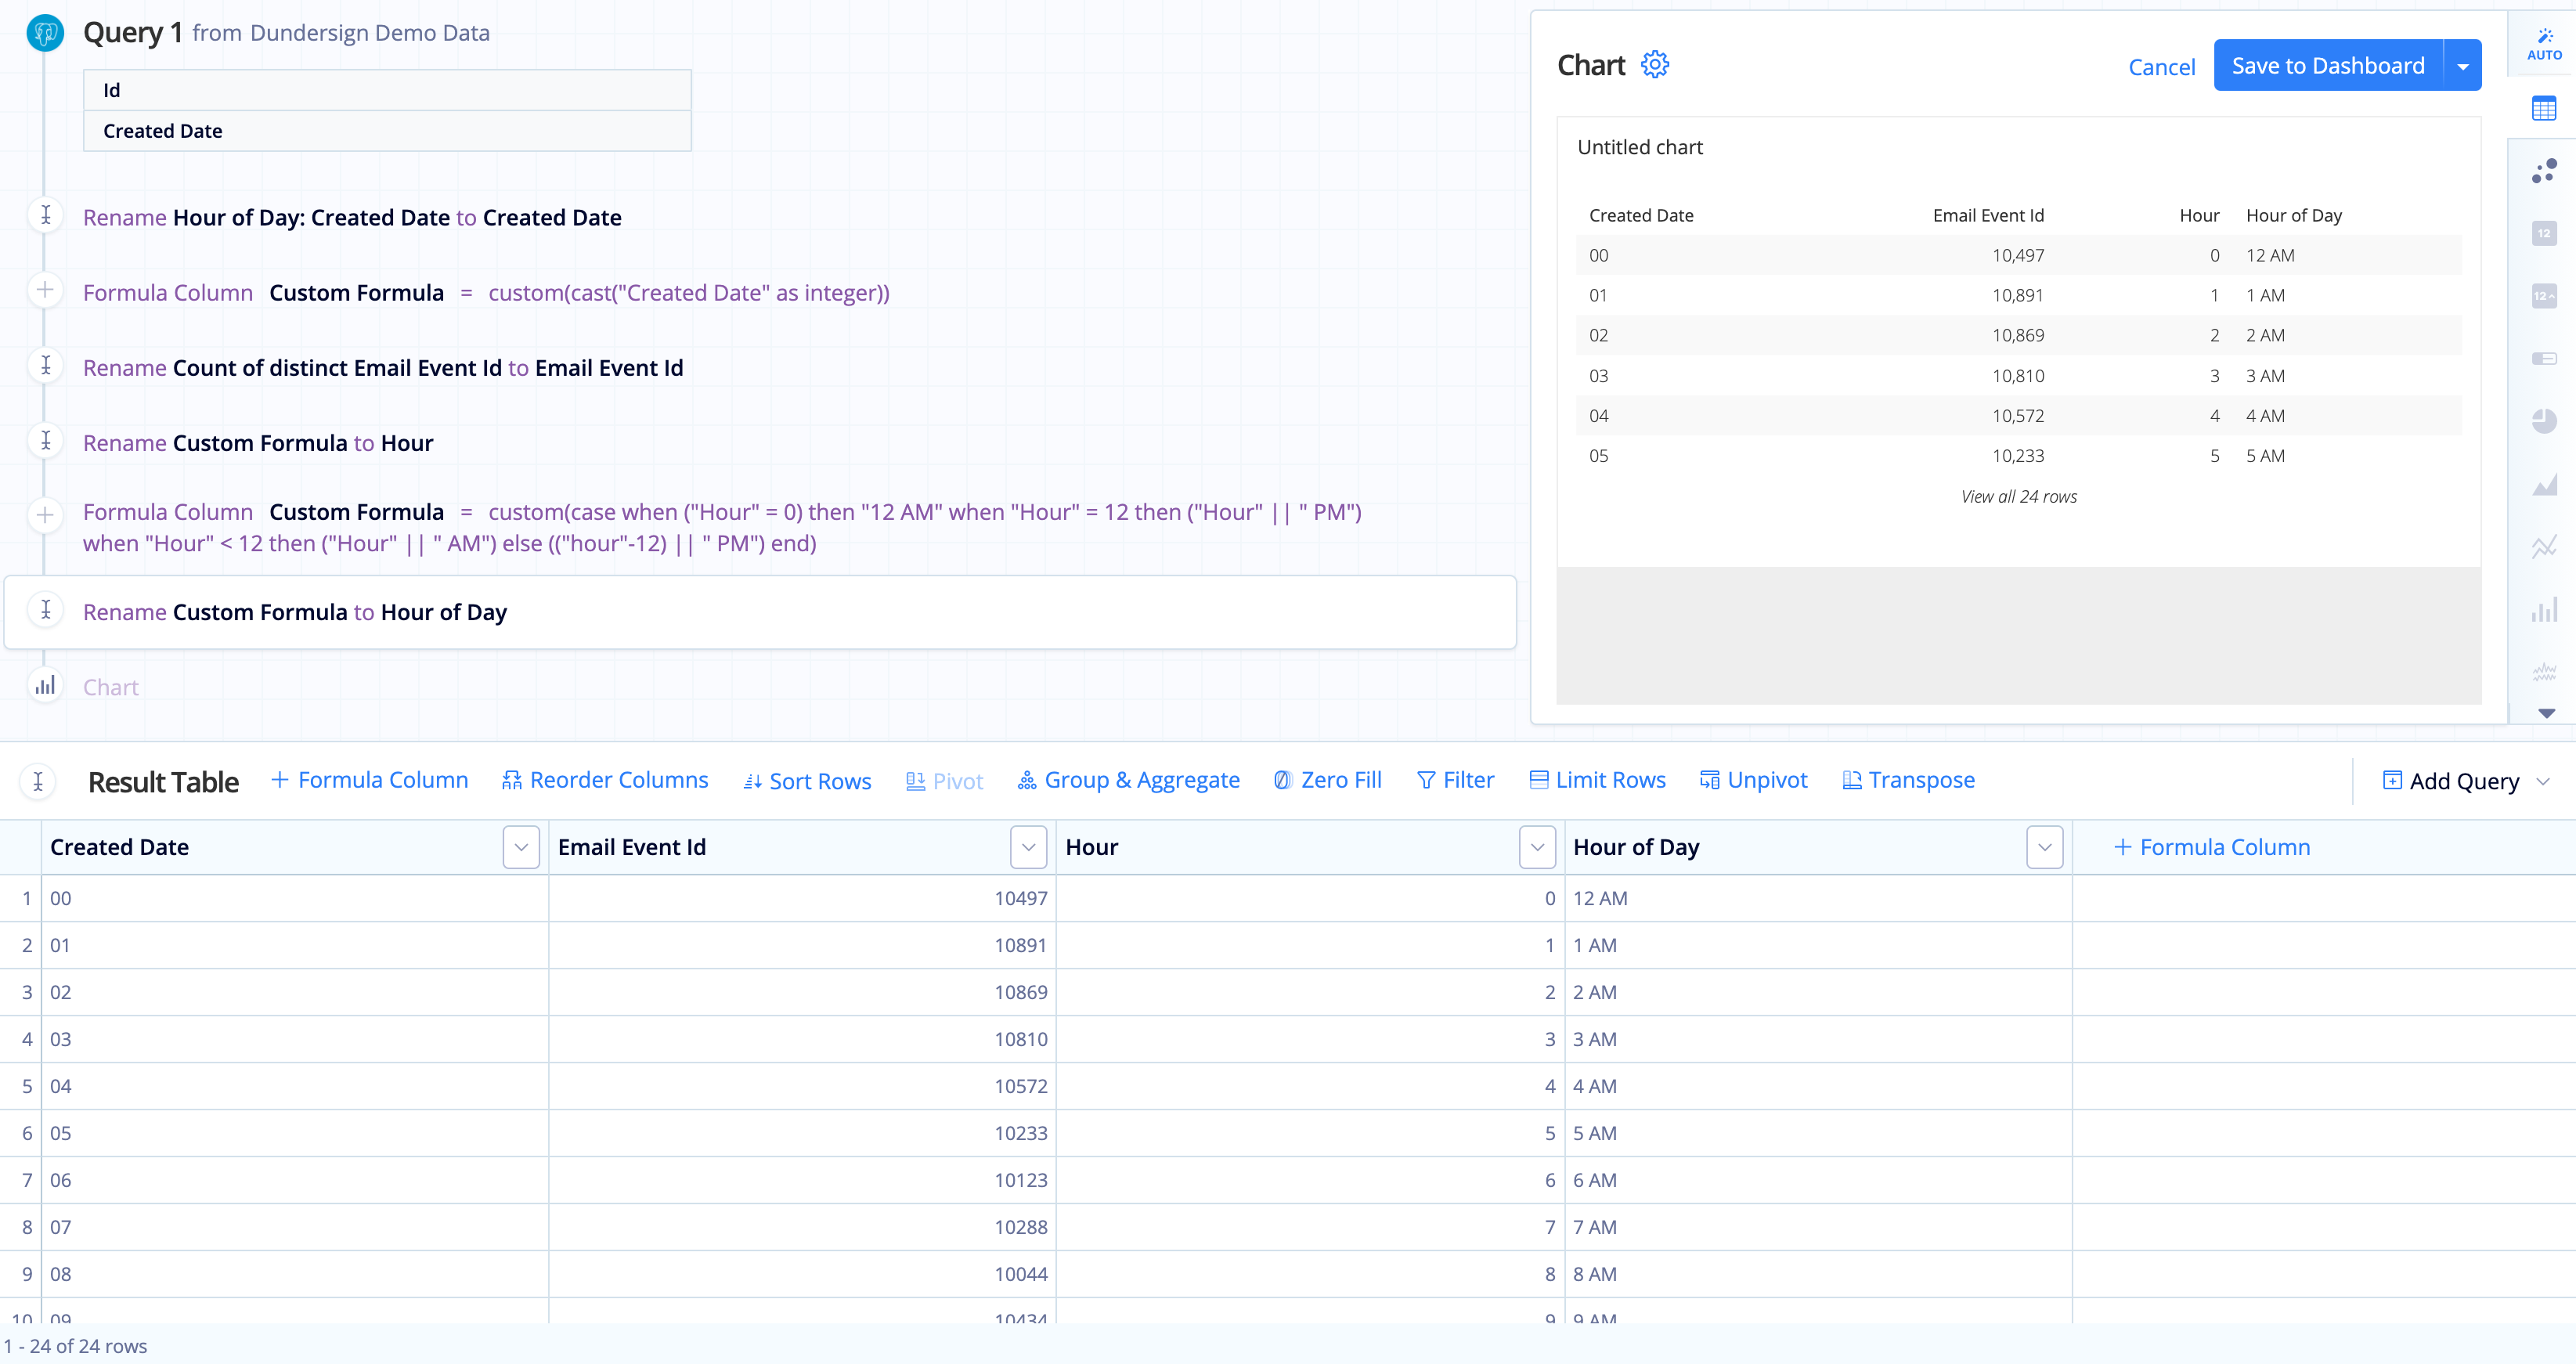
Add another Formula Column, again selecting the Custom formula type, and use the following CASE statement to change the Hour column to a 12-hour format with AM and PM labels:
case when ("Hour" = 0) then "12 AM" when "Hour" = 12 then ("Hour" || " PM") when "Hour" < 12 then ("Hour" || " AM") else (("hour"-12) || " PM") end -
We rename the new Custom Formula column to “Hour of Day” for clarity.
-
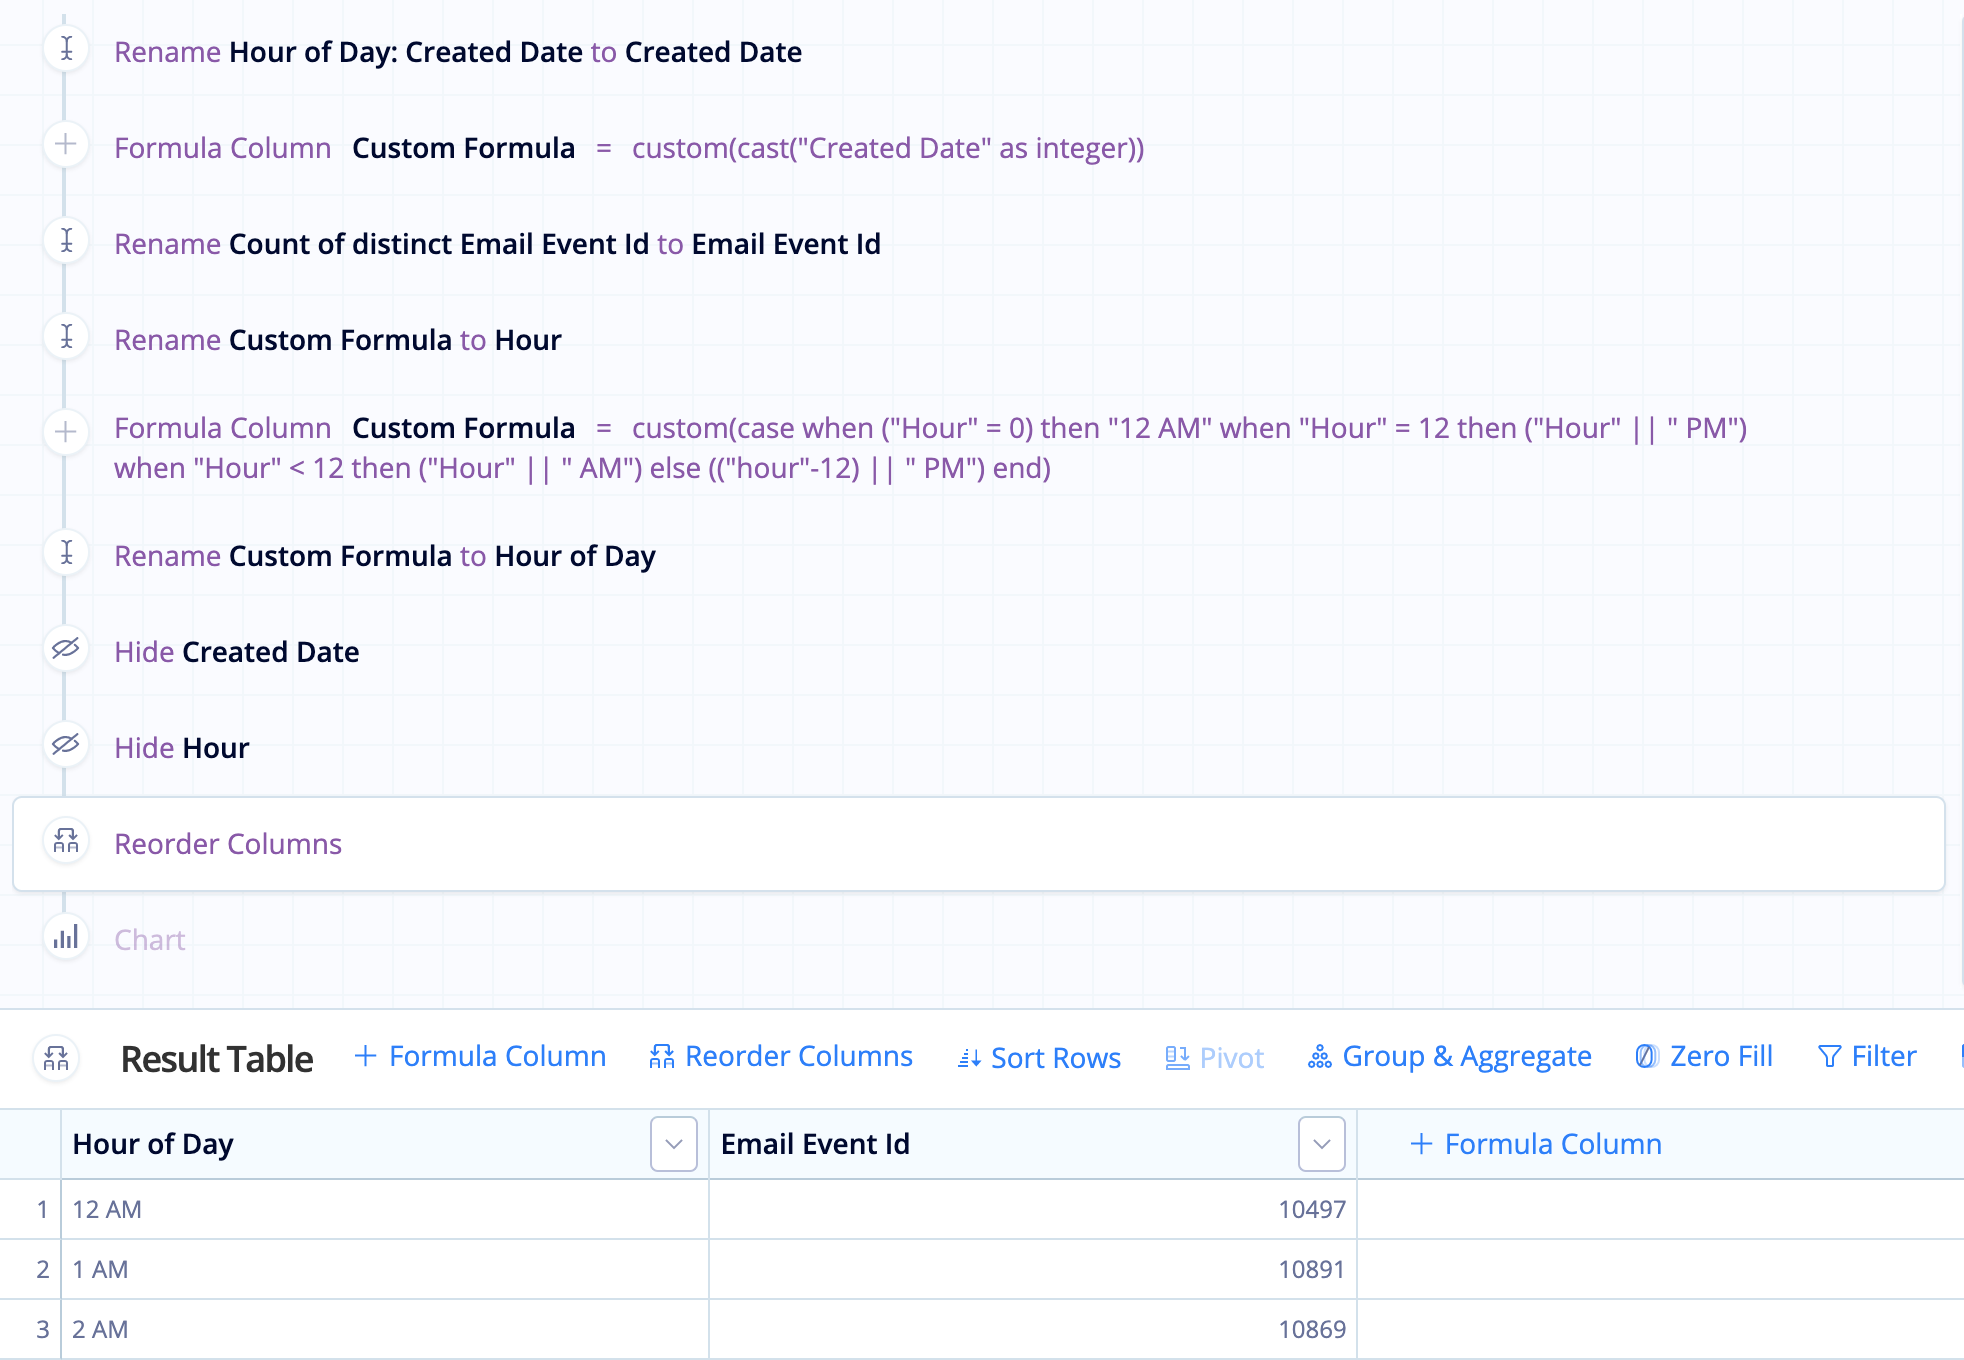
Hide the original datetime column and the “Hour” column from Step 2 then Reorder the “Hour of Day” column to the front (i.e., leftmost column in the Result Table).
-
Choose the chart type to best represent your data and style it as you see fit!
In the Data Explorer interface
-
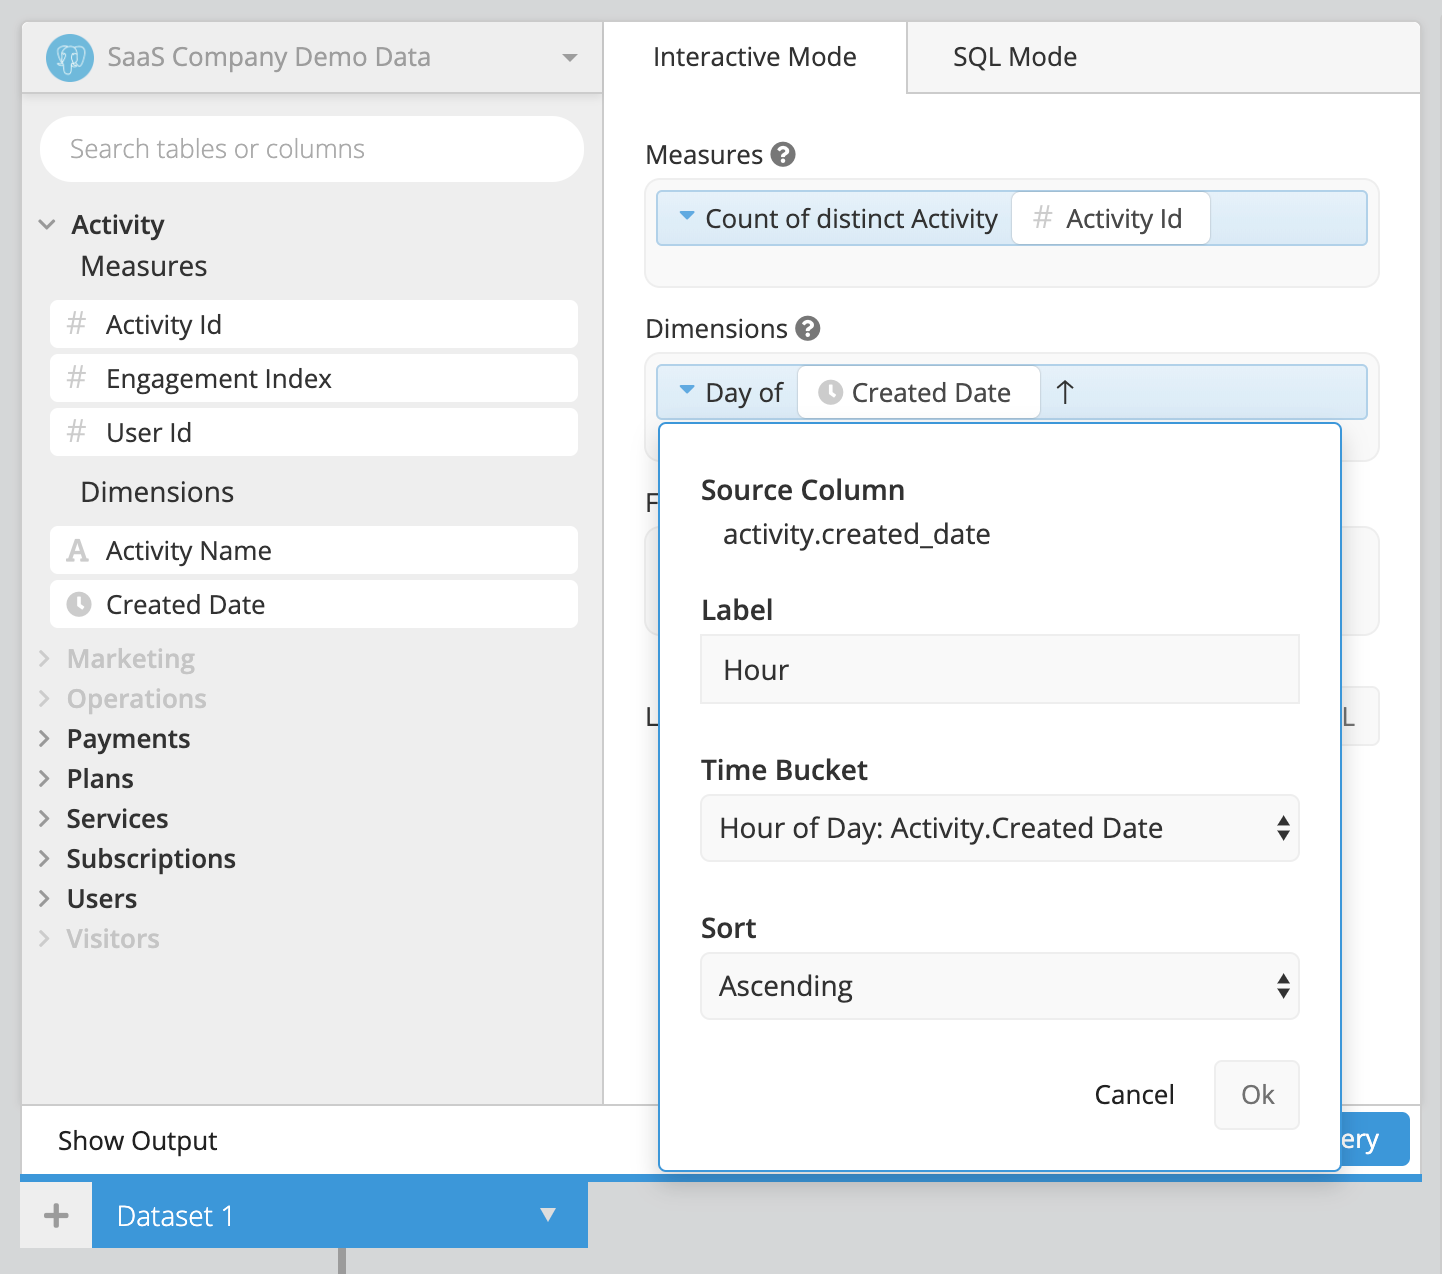
Drag a datetime column into the Dimensions field. Select Hour of Day in the Time Bucket dropdown menu and change the Label to Hour for clarity.
-
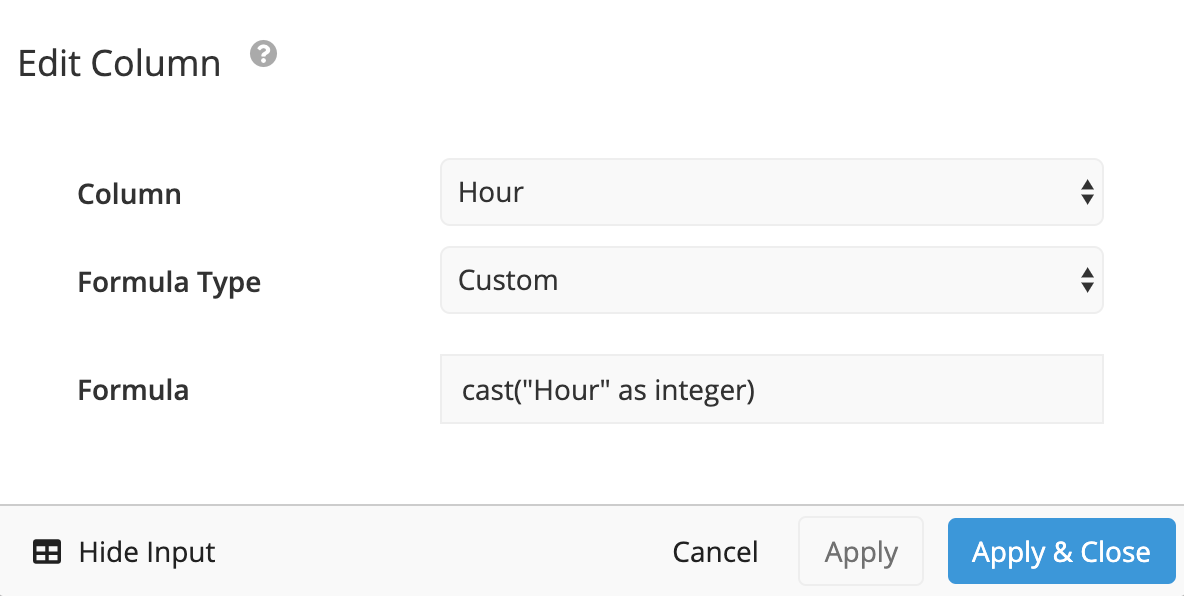
Add an Edit Column step in the Pipeline, select Custom as the formula type, and cast the datetime column as an integer.
Click Apply & Close to save the step settings.
-
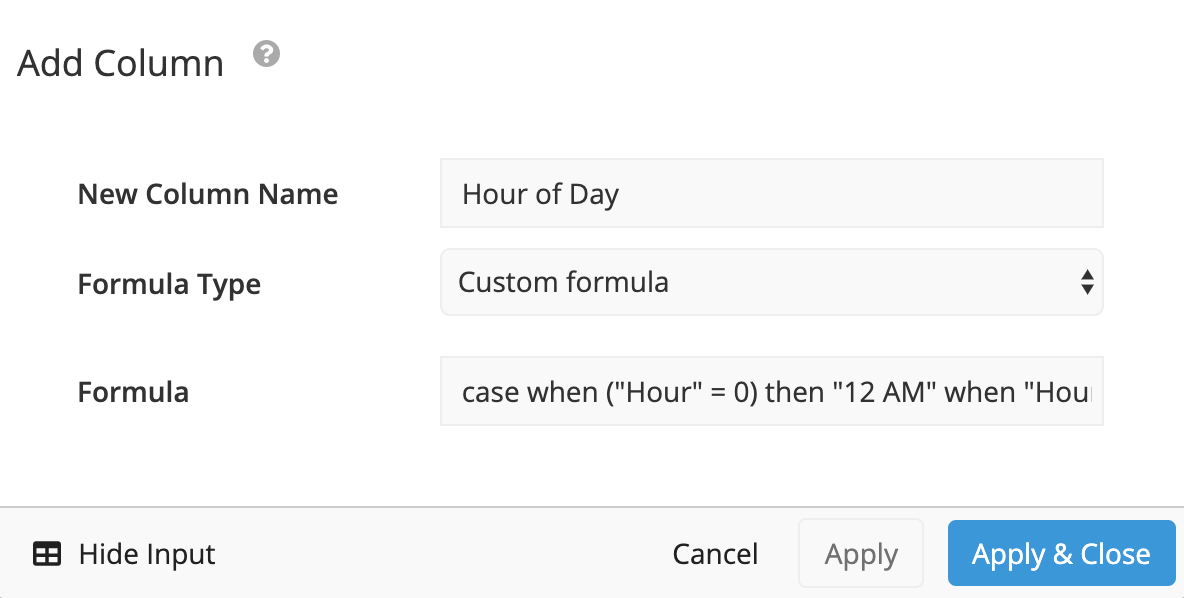
Use an Add Column step in the Pipeline to add a new column. Select Custom formula as the formula type and use the following CASE statement to change the Hour column to a 12-hour format with AM and PM labels:
case when ("Hour" = 0) then "12 AM" when "Hour" = 12 then ("Hour" || " PM")
when "Hour" < 12 then ("Hour" || " AM") else (("hour"-12) || " PM") end
Click Apply & Close to save the step settings.
-
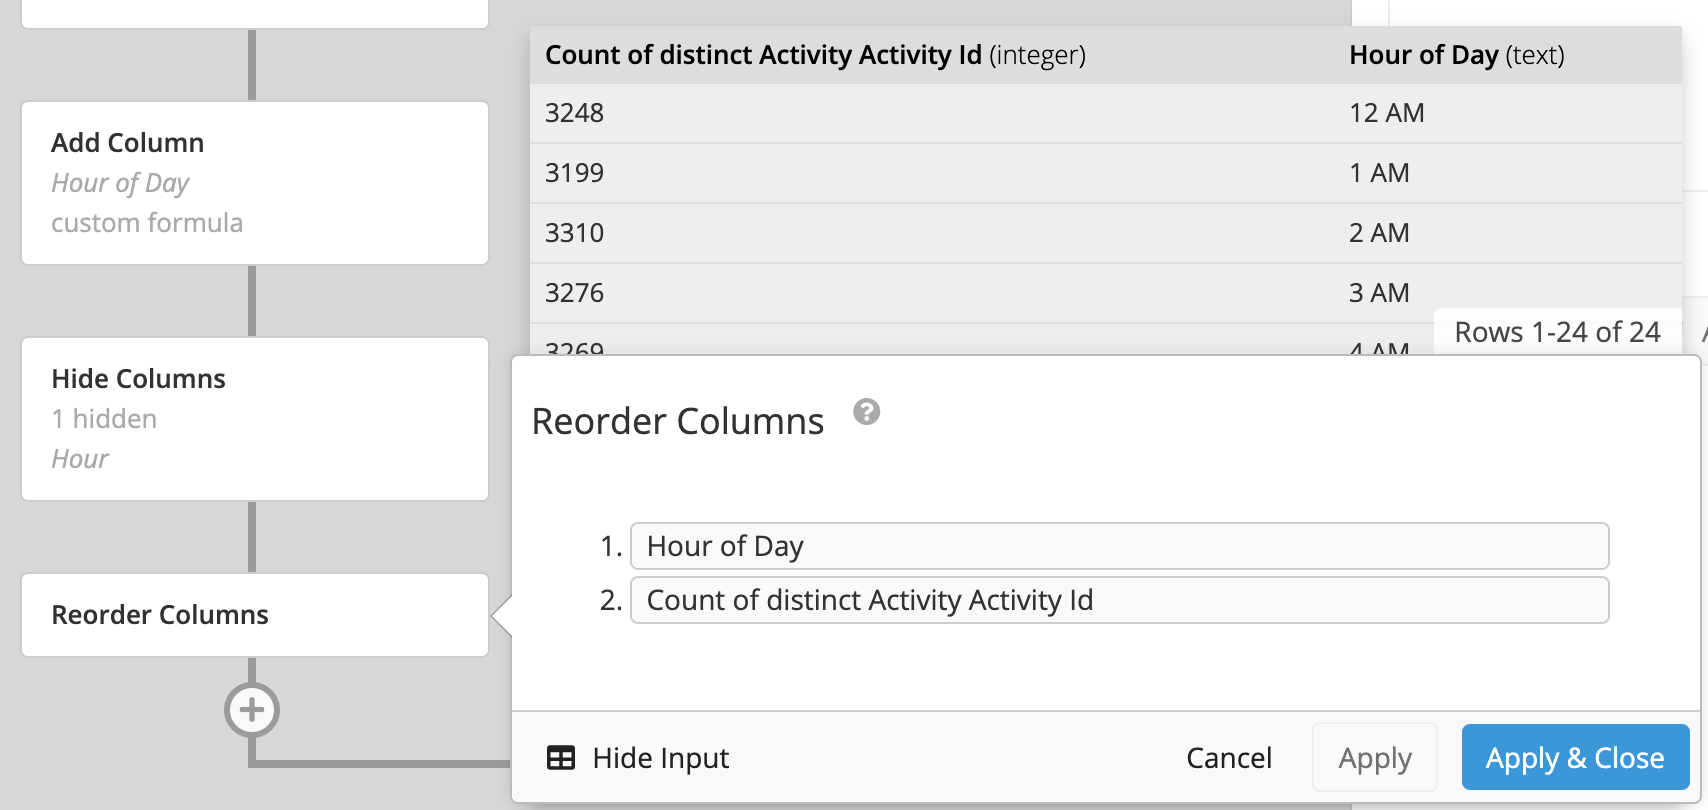
Add a Hide Columns step to hide the unnecessary column from Step 1 and use a Reorder Columns step to move the Hour of Day column to the far-left of the table.
-
Choose the chart type to best represent your data and style it as you see fit!
